1. Introduction: Illuminating the World of 12V RGB Controllers
Lighting has evolved from a purely functional necessity to a powerful medium for personal expression and environmental design. At the heart of this colorful revolution in everything from custom PC builds to architectural accents and automotive underglow lies a critical, yet often overlooked, component: the rgb controller 12v. This device is the maestro of the lighting orchestra, transforming simple electrical current into a dynamic symphony of color. It empowers users to move beyond static white light, offering control over hue, saturation, brightness, and even dynamic effects. Understanding the role and capabilities of the 12V RGB controller is the first step in unlocking the full potential of LED lighting technology, allowing for the creation of immersive atmospheres, enhanced visual appeal, and intelligent lighting solutions that respond to your commands.
2. What is a 12V RGB Controller? Defining the Core Component
A 12V RGB controller is an electronic device designed to manage and manipulate the output of 12-volt RGB (Red, Green, Blue) LED lighting strips or fixtures. Functioning as the central command unit, its primary role is to regulate the power and signal sent to the individual color channels (red, green, and blue) within an LED strip. By independently adjusting the intensity of each of these three primary colors, the controller can produce a vast spectrum of mixed colors. Unlike a simple on/off switch, a true rgb controller 12v provides user interface—whether physical buttons, a remote control, a smartphone app, or software—to select specific colors, create fading or strobing patterns, and set the overall brightness. It acts as the essential bridge between a user’s creative intent and the physical manifestation of light, making it the indispensable brain of any sophisticated 12V RGB lighting system.
3. How 12V RGB Controllers Work: The Science of Color Mixing and Control
The operation of a 12V RGB controller is a practical application of additive color theory, the same principle used in televisions and computer monitors. A standard 12V RGB LED strip is composed of individual LEDs grouped into clusters, with each cluster containing a red, a green, and a blue LED diode. These three colors are the additive primaries; combining them at varying intensities can produce millions of perceived colors.
The controller’s internal circuitry receives a low-voltage command signal from the user interface (like a remote). It then uses solid-state components, typically MOSFETs, to act as high-speed electronic switches for each of the three color channels (R, G, and B). The controller rapidly pulses power to each channel using a technique called Pulse Width Modulation (PWM). By varying the width of the power pulse—the “duty cycle”—it controls the average current flowing to each LED color. A very short pulse results in a dim LED, while a long, nearly continuous pulse makes the LED shine brightly. Because this switching happens hundreds or thousands of times per second, the human eye perceives a steady, blended color. For example, to create the color yellow, the controller would send full power pulses to the red and green channels while keeping the blue channel completely off. The controller seamlessly blends these rapid pulses, allowing for smooth transitions, dynamic effects like color cycling, and precise color selection.
4. Key Types and Technologies: From Analog to Digital (RGB vs. RGBW, ARGB)
Not all RGB controllers are created equal, and the technology defines their capabilities and compatibility. The primary distinction lies in the control method: analog or digital.
4.1. Analog 12V RGB Controllers
This is the most common and traditional type for 12V systems. An analog controller, often referred to simply as a “12V RGB controller,” manages all LEDs on a strip in unison. It has four output wires: a common 12V positive wire and three negative wires for red, green, and blue. When you select a color, every single LED on the connected strip displays that exact same color and effect at the same time. These controllers are known for their simplicity, reliability, and ability to power very long runs of LED strips from a single output.
4.2. Digital 12V RGB Controllers (Often called ARGB or DRGB)
Digital controllers, frequently marketed as Addressable RGB (ARGB), represent a more advanced technology. While they still use a 12V power supply, they incorporate a data signal. In these systems, each individual LED or small group of LEDs has a tiny integrated chip (like a WS2812B). The controller sends a coded data sequence down a single data wire, telling each specific LED exactly what color to display and when. This allows for stunning effects where different parts of the same strip can display different colors simultaneously—creating chasing rainbows, marquee effects, and complex animations impossible with analog strips. It’s important to note that analog and digital controllers and strips are not interchangeable.
4.3. RGB vs. RGBW
Beyond the basic RGB setup, RGBW technology adds a dedicated white LED chip. A standard RGB controller cannot properly drive an RGBW strip, as it lacks a separate channel for pure white. Specialized RGBW controllers have four control channels (R, G, B, W). This allows for two major advantages: the creation of a brighter, cleaner, and more natural white light by using the dedicated white diode instead of mixing red, green, and blue, and the expansion of the color palette to include pastel and tinted shades by blending the white with the colored LEDs. Choosing between RGB and RGBW fundamentally dictates the type of controller you need.
5. Essential Components of a 12V RGB Lighting System
A functional and safe 12V RGB lighting system is more than just a strip and a controller. It is an ecosystem of interdependent parts, each playing a vital role.
- 12V DC Power Supply (Adapter/Driver): This is the system’s powerhouse, converting mains AC voltage (e.g., 120V/240V) to a stable, low-voltage 12V DC current. Its wattage and amperage rating must be sufficient to handle the total power draw of all connected LED strips, with a recommended 20% overhead for safety and longevity.
- RGB LED Strip Light: The light-emitting component itself. It is crucial to match the strip type (Analog 12V RGB, Digital 12V ARGB, or 12V RGBW) with the compatible controller. Strips are characterized by their LED density (LEDs per meter), color rendition (CRI), and waterproof rating (IP20, IP65, IP67, etc.).
- The rgb controller 12v: The command center, as previously defined. It must match the strip’s technology (analog/digital) and channel count (3-channel for RGB, 4-channel for RGBW).
- User Interface: The method for sending commands to the controller. This can be an infrared or RF remote control, a wired control panel, a Bluetooth-connected smartphone app, or Wi-Fi integration for voice control via Alexa/Google Assistant and automation within smart home ecosystems.
- Wiring and Connectors: Proper-gauge wire is essential to minimize voltage drop over distance, especially for long runs. Connectors (like JST-SM or custom plugs) and solder are used to create secure, reliable electrical connections between all components.
- Optional Accessories: These include signal amplifiers to extend control distance for analog strips, RF/Wi-Fi gateways to bridge different communication protocols, and diffuser channels to house the strip for a more professional, glare-free light output.
6. How to Choose the Right 12V RGB Controller for Your Project
Selecting the optimal controller is critical for system performance and achieving your desired outcome. Follow this decision framework to narrow your choices.
6.1. Determine Your LED Strip Type and Technology
This is the non-negotiable first step. Identify whether you have a standard analog 12V RGB/RGBW strip or a digital addressable (ARGB) 12V strip. Check the product specifications or count the connection points: analog strips typically have 4 pins (12V, R, G, B) or 5 pins (for RGBW), while digital strips have 3 pins (12V, Data, Ground). Using the wrong controller type will result, at best, in no function and, at worst, in damaged components.
6.2. Assess Your Control and Feature Requirements
Consider how you want to interact with your lighting. Do you need simple manual control with a basic remote, or do you desire advanced integration? Basic IR remotes are inexpensive but require line-of-sight. RF remotes offer longer range and don’t need direct visibility. For the most flexibility, choose a controller with Bluetooth or Wi-Fi app control, which provides access to millions of colors, intricate effect programming, timers, schedules, and often music synchronization features. If smart home voice control is a priority, ensure the controller explicitly supports Alexa, Google Assistant, or Apple HomeKit.
6.3. Calculate Power Handling Capacity
Every controller has a maximum power rating, measured in watts (W) or amperage (A) per channel and in total. You must calculate the total power draw of all LED strips you intend to connect to the controller. For example, a 5-meter strip drawing 14W per meter requires 70W total. Choose a controller rated for at least 84W (adding a 20% safety margin). Exceeding the controller’s rating can cause overheating, failure, and a fire hazard. For large installations, you may need a high-power controller or use a separate controller for each zone.
6.4. Consider the Installation Environment and Form Factor
Will the controller be hidden in a PC case, mounted in a vehicle, or placed in a home entertainment cabinet? Size and shape matter. Some controllers are compact PCB boards, while others are housed in plastic or metal enclosures. For outdoor or damp locations, ensure the controller has an appropriate ingress protection (IP) rating or can be installed in a sealed enclosure. Also, consider the physical connection types—screw terminals are great for permanent installations with raw wire, while pre-installed plugs offer convenience.
6.5. Plan for Expandability and Future-Proofing
Think beyond your immediate needs. If you might add more lighting zones later, select a controller that can handle multiple independent channels or one that can be easily synced with additional controllers. Controllers that use open or widely adopted protocols (like DMX or standard Wi-Fi) offer more flexibility for future expansion than proprietary, closed systems. Investing in a slightly more capable controller at the outset can save cost and hassle down the line.
7. Step-by-Step Guide: Installing and Configuring Your 12V RGB Controller
With the right controller selected, the next step is a successful installation. A methodical approach ensures safety, reliability, and optimal performance for your lighting project.
7.1. Safety First and Preparation
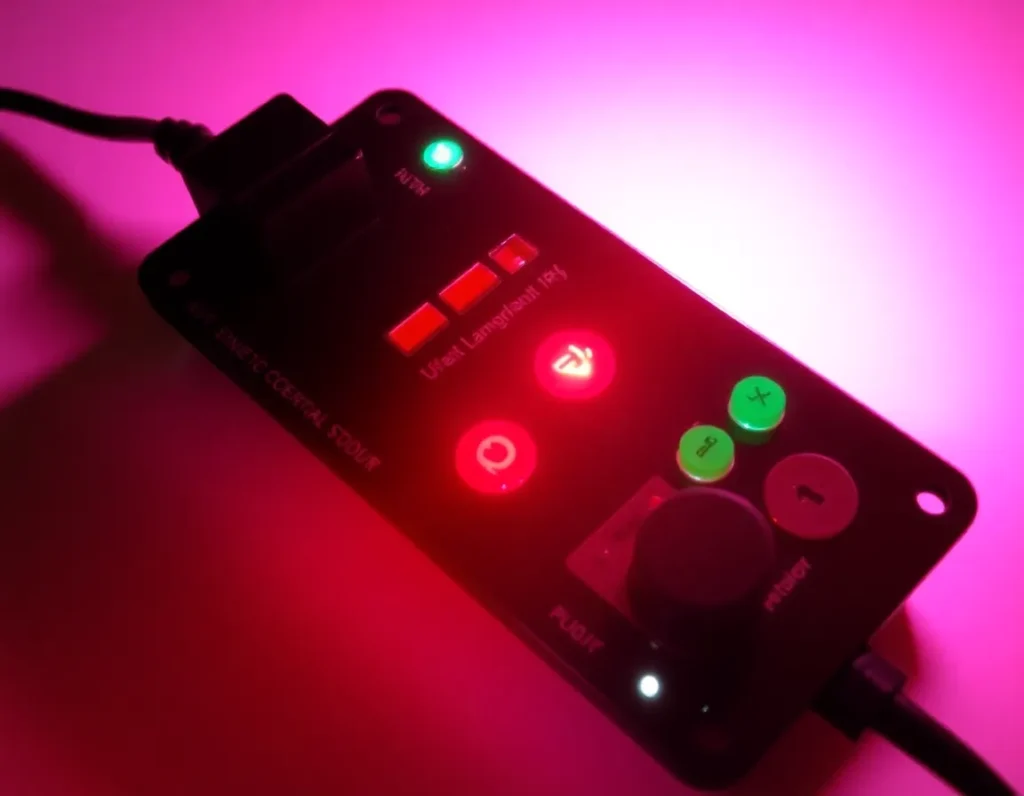
Before handling any components, disconnect all power sources. Gather your tools: wire strippers, screwdrivers, electrical tape or heat-shrink tubing, and possibly a multimeter. Lay out all parts—the rgb controller 12v, LED strips, power supply, and any extension cables. Review the controller’s manual to understand its specific wiring diagram and terminal labels (e.g., +12V, GND, R, G, B, and sometimes W).
7.2. Connecting Power and LEDs
Begin by connecting the power supply to the controller. The power supply’s positive (+12V or V+) output wire connects to the controller’s +12V or V+ terminal. The power supply’s negative (GND or COM) wire connects to the controller’s GND terminal. Next, connect the RGB LED strip. The strip will have four wires: a common +12V (often red) and individual wires for red (R), green (G), and blue (B). Match these precisely to the corresponding terminals on the controller. For RGBW strips, connect the white (W) wire to its dedicated terminal. Ensure all connections are tight and that no stray wire strands could cause a short circuit.
7.3. Mounting and Securing Components
Mount the controller in its intended location using screws or adhesive, ensuring it is away from sources of heat, moisture, or direct vibration. The power supply should be placed in a well-ventilated area. Use cable ties or conduits to manage wires neatly, preventing strain on the connections and reducing electromagnetic interference.
7.4. Initial Power-On and Basic Testing
Reconnect the power supply to mains electricity. Turn on the controller using its physical button or switch. Most controllers will have a default color or cycle mode. Use the basic controls to test each primary color (red, green, blue) individually to verify correct wiring. If a color doesn’t light or the wrong color illuminates, power off immediately and re-check the corresponding wire connection.
7.5. Configuration and Synchronization
This stage depends on your controller type. For a simple IR remote unit, use the remote to cycle through colors, modes (flash, fade, smooth), and speed settings. For a Wi-Fi or Bluetooth controller, download the companion app. Follow the in-app instructions to connect the controller to your home network or directly to your phone. This typically involves putting the controller in pairing mode. Once connected, you can create custom color palettes, set schedules, and group multiple controllers into zones. For advanced systems like DMX, you may need dedicated software to program scenes and assign channel addresses to each controller on the data line.
8. Creative Applications and Use Cases for 12V RGB Lighting
The versatility of 12V RGB systems makes them a favorite for hobbyists, designers, and homeowners alike. Their robust voltage and wide availability of components unlock a spectrum of creative possibilities.
8.1. Architectural and Interior Accent Lighting
Installing RGB LED strips along coves, under cabinets, or behind headboards transforms a room’s ambiance. A 12V system is ideal here due to its safety for in-home use and ability to run longer strip lengths. Create a calming blue hue for a home theater, a vibrant red for a party, or a warm white for everyday kitchen task lighting—all controlled from a smartphone.
8.2. Custom PC and Gaming Setups
While addressable (5V ARGB) strips are popular inside PC cases, 12V RGB remains a staple for external desk lighting, monitor backlighting (bias lighting), and illuminating gaming shelves. The higher voltage allows for longer, single-run strips to outline a desk or room perimeter without voltage drop issues, syncing with music or game events via software integration.
8.3. Automotive and Marine Customization
Vehicles and boats have 12V electrical systems, making a rgb controller 12v a natural fit. Install strips under car dashboards, in footwells, or along boat gunwales. Controllers designed for automotive use often include features like ignition-sensing auto-on/off and compatibility with CAN bus systems to avoid interference with vehicle electronics.
8.4. Retail Displays and Signage
Businesses use 12V RGB lighting to highlight products, create eye-catching window displays, or build illuminated signage. The ability to change colors seasonally or for specific promotions adds dynamic appeal. The reliability and low heat output of LED strips make them safe for prolonged use near merchandise.
8.5. Landscaping and Outdoor Entertainment
With waterproof (IP67/IP68) strips and sealed controllers, 12V RGB lighting can bring life to gardens, patios, and pools. Line walkways, uplight trees, or illuminate a pergola. Scheduling functions allow the lights to turn on at dusk and off at dawn, enhancing security and aesthetics automatically.
8.6. Themed Events and Stage Design
For DIY stage backdrops, wedding decor, or holiday displays, 12V RGB offers a portable and customizable solution. Battery packs can power the system for remote locations. Using a DMX controller allows for professional-grade, synchronized light shows that can be programmed to match music cues.
9. Troubleshooting Common 12V RGB Controller Issues
Even well-planned installations can encounter problems. Here’s a systematic guide to diagnosing and fixing the most frequent issues.
9.1. No Lights Power On
If nothing illuminates, start at the power source. Verify the power supply is plugged in and receiving mains power. Use a multimeter to check its output; it should read a steady 12V DC. If the power supply is good, check all connections between the supply, controller, and LED strip for looseness or incorrect polarity. Ensure the controller itself is switched on or not in a standby mode.
9.2. Partial Lighting or Incorrect Colors
When only some colors work (e.g., red and blue but no green), the issue is almost always in the wiring between the controller and the strip. The wire for the non-functioning color may be loose, connected to the wrong terminal, or broken. Re-seat the connection. If one section of a long strip shows wrong colors, you may be experiencing voltage drop—consider injecting power at both ends of the strip or using a higher-gauge power wire.
9.3. Flickering or Erratic Behavior
Flickering often points to a poor power connection or an underpowered supply. Calculate the total wattage of your LED strip and ensure your power supply exceeds that by at least 20%. Check for loose screws in terminal blocks. If using a wireless controller, interference from other 2.4GHz devices (like Wi-Fi routers) can cause erratic signals; try changing the controller’s channel or moving it closer.
9.4. Remote or App Control Not Working
For IR remotes, check the battery and ensure you have a direct line of sight to the controller’s sensor. Remove any obstructions. For Wi-Fi/Bluetooth controllers, ensure your smartphone is on the correct network. Try resetting the controller to factory settings and re-pairing it. Firmware updates for the controller, available via its app, can also resolve connectivity bugs.
9.5. Overheating Controller or Power Supply
Overheating indicates overloading or insufficient ventilation. Confirm the total load on the controller does not exceed its rated amperage per channel. The power supply should also not be covered or placed in an enclosed space. If the load is within specifications but overheating persists, the component may be faulty and should be replaced.
10. The Future of 12V RGB Control Technology
The landscape of RGB lighting control is evolving rapidly, driven by integration, intelligence, and improved user experience. The 12V platform is poised to adapt and thrive within these trends.
Seamless integration with broader smart home ecosystems is a key direction. Future 12V controllers will move beyond proprietary apps to become native citizens in platforms like Matter, Apple HomeKit, Google Home, and Amazon Alexa. This will allow for complex, cross-device automations—imagine your RGB room lights shifting to a “movie mode” (dim blue) when your smart TV turns on, all without custom programming.
Enhanced intelligence through onboard sensors is another frontier. Controllers may include ambient light sensors to automatically adjust brightness based on room conditions, or microphones for sound reactivity without needing a separate app connection. Machine learning algorithms could enable lights to learn and replicate your daily patterns and color preferences autonomously.
While addressable LEDs dominate for pixel-level effects, expect hybrid controllers that can manage both 12V analog RGB strips and 5V digital ARGB strips from a single unit, offering unparalleled flexibility for complex installations. Furthermore, wireless technologies will improve, with Bluetooth Mesh allowing for the creation of vast, reliable networks of controllers and lights without a central hub, perfect for large-scale commercial or residential projects.
Finally, sustainability will drive innovation. Expect more efficient power circuitry that minimizes energy loss as heat, and controllers designed to work optimally with next-generation, higher-lumen-per-watt LED chips. The future rgb controller 12v will not just be a switch for colors, but an intelligent, efficient, and fully integrated node in our connected environments.
11. Summary of Key Points
A 12V RGB controller is the essential command center for a vast array of lighting projects, translating user input into precise color outputs by regulating power to red, green, and blue channels. Its operation hinges on pulse-width modulation (PWM) to mix these primary colors, creating millions of shades. The technology spectrum ranges from simple analog controllers to sophisticated digital and addressable systems, with key distinctions between standard RGB, RGBW (with dedicated white), and the 5V ARGB alternative.
Building a system requires more than just the controller; it involves a compatible 12V power supply, LED strips, proper wiring, and often a user interface like a remote or smartphone app. Selecting the right controller demands careful consideration of compatibility, control method, channel count, power rating, physical form factor, and future expansion needs.
Successful installation follows a safety-first approach of correct wiring, secure mounting, and systematic testing. The creative applications are boundless, from home interior accent lighting and automotive customization to commercial displays and outdoor landscapes. When issues arise—such as no power, incorrect colors, or flickering—a logical troubleshooting process focusing on power, connections, and load capacity will typically identify the solution.
Looking ahead, the future of 12V RGB control is one of deeper smart home integration, increased intelligence via sensors, hybrid functionality, and a continued focus on energy efficiency and user-centric design.
12. Frequently Asked Questions (FAQ)
12.1. Can I use a 12V RGB controller with a 24V LED strip?
No, you cannot. The controller and the LED strip must operate at the same voltage. Applying 12V to a 24V strip will result in dim or no light, while applying 24V to a 12V controller will almost certainly destroy it. Always match the voltage ratings of all components in your system.
12.2. How many LED strips can I run from one 12V RGB controller?
The number is limited by the controller’s power rating (in Amps or Watts), not the number of physical ports. You must calculate the total current draw of all connected LED strips (Amps per meter x total meters) and ensure it is less than the controller’s per-channel and total output rating. Strips can often be connected in parallel, but for long runs, power injection is required to prevent voltage drop.
12.3. What is the difference between an RGB controller and an RGBW controller?
An RGB controller has three channels (Red, Green, Blue). An RGBW controller has a fourth, independent channel for a dedicated White LED chip. This allows for purer, brighter whites and more accurate pastel colors than mixing white from RGB. You cannot control an RGBW strip properly with a standard RGB controller, as the white channel will be unusable.
12.4. My remote control suddenly stopped working. What should I do?
First, replace the remote’s batteries. Ensure you are within range and have a clear line of sight to the controller’s IR receiver. Check if the controller itself is in a mode that ignores the remote (some have a “master/slave” setting). As a last resort, try resetting the controller to factory settings, as detailed in its manual.
12.5. Can I cut my RGB LED strip, and will it still work with the controller?
Yes, most RGB LED strips have designated cut lines, usually marked with a scissor icon. You can cut the strip at these points. After cutting, you will need to reconnect the strip to the controller’s wires, often using solder or clip-on connectors. The remaining part of the strip, when properly powered, will function normally.
12.6. Is it safe to install 12V RGB lighting outdoors?
Yes, provided you use components rated for outdoor use. This includes waterproof (IP65, IP67, or IP68) LED strips and a controller housed in a properly sealed, waterproof enclosure. All connections must also be waterproofed using silicone sealant or waterproof connectors. Always use a GFCI-protected outlet for the power supply.
12.7. Why are my lights showing a different color than what I selected in the app?
This is usually a wiring error. The most common mistake is swapping the red and green wires between the controller and the LED strip. For example, if you select pure green in the app but the strip lights up red, those two wires are reversed. Power down and correct the wiring according to the labels.