
대부분의 자동차용 바이 LED 프로젝터 구매 가이드는 형용사가 붙은 사양표처럼 읽힙니다. 루멘을 나열하고, 색온도를 언급하고, 그걸로 끝입니다. 그들이 건너뛰는 것은 설치 6개월 후에 실제로 만족할지, 아니면 포럼에 돌아와 빔 패턴 문제, 하우징 내 습기, 또는 작동이 멈춘 셔터 문제를 해결하려고 할지를 결정하는 모든 것입니다. 이 가이드는 다릅니다. 우리는 중요한 모든 결정 포인트를 살펴보고, 기술을 나란히 비교하고, 설치업체와 정비소 주인들이 매주 고치고 있는 비용이 많이 드는 실수를 피하도록 도와드리겠습니다.
GTR은 수년간 자동차용 바이 LED 프로젝터 헤드라이트를 엔지니어링하며 여러 대륙의 유통업체, 설치업체, OEM 파트너에게 서비스를 제공해 왔습니다. 이 가이드의 통찰력은 수천 건의 설치, 수백 건의 측광 테스트, 그리고 직접 제품을 제조할 때만 얻을 수 있는 값진 경험에서 비롯됩니다.
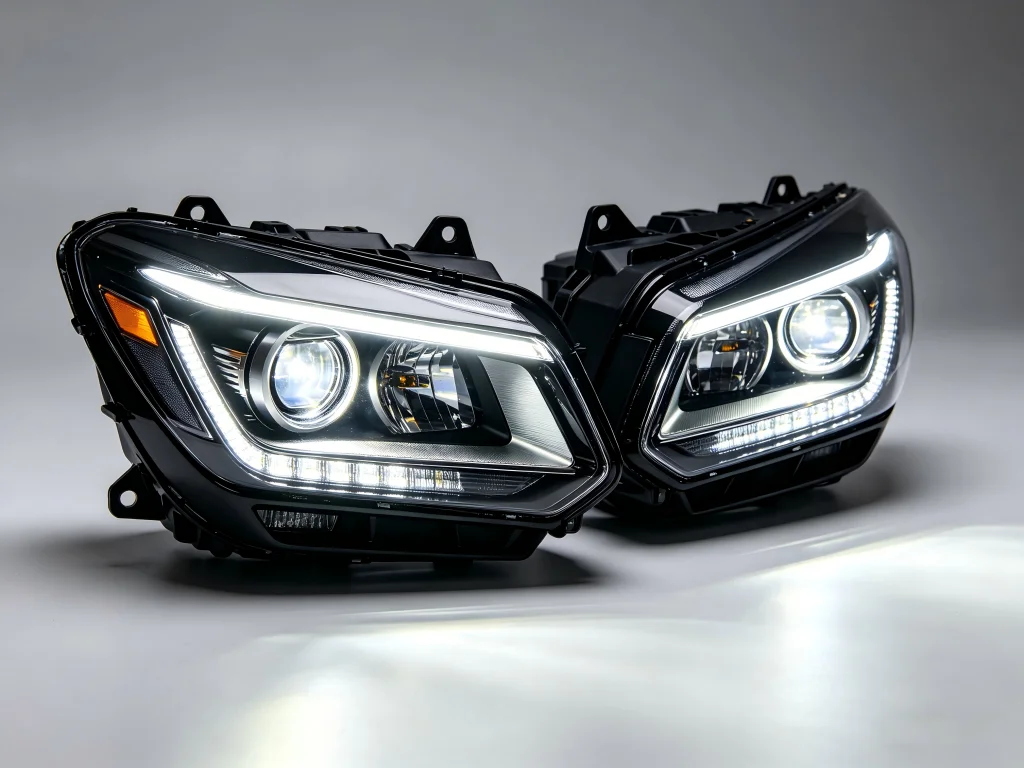
1. 기술 환경: 시장에 실제로 무엇이 있는가
자동차용 바이 LED 프로젝터는 단일 제품 범주가 아니라 핵심 엔지니어링 원리를 공유하지만 성능, 제조 품질, 가격에서 크게 차이가 나는 광학 시스템의 집합입니다. 구매 전에 환경을 이해하는 것이 실망을 피하는 가장 효과적인 방법입니다.
1.1. 바이 LED 프로젝터 vs. 할로겐 리플렉터: 기본 비교
Halogen reflectors are the basic starting point for most vehicles on the road. They work by placing a halogen bulb at the focal point of a mirrored bowl, reflecting light forward in a broad pattern. There are no lenses, no shutters, and little beam control other than the shape of the reflector itself.
Bi-LED projectors replace this entire system. Light from a high-output LED chip passes through a precision reflector bowl, then through a mechanical shutter that forms the cutoff, and then through a convex glass lens that focuses the beam onto the road. Each element in the chain has a role, and a weakness in any one of them degrades the final output.
Here is a comparison of the two systems on metrics that actually affect the driving experience:
| Performance Metrics | Halogen Reflector | Bi-LED Projector |
|---|---|---|
| Low Beam Lux @ 25 ft | 250–700 lux (depending on bulb age) | 1,500–3,200+ lux |
| Low Beam Throw Distance | 120–180 ft | 200–350 ft |
| Beam Cutoff Quality | Soft and diffuse — no distinct cutoff | Razor-sharp horizontal line |
| Glare to oncoming vehicles | Significant light scatter above cutoff | Minimum — light stops at cutoff |
| 색온도 | 2,800–3,200K (warm yellow) | 5,500–6,500K (daylight white) |
| Power consumption | 55–65W per bulb | 35–70W per projector (both beams) |
| Bulb/unit lifespan | 500–1,000 hours | 30,000 hours or more |
| High/low beam integration | Separate bulbs or dual filament | Single unit, shutter controlled |
Source: GTR internal test data and industry benchmarks. Lux values measured at hotspot center, 25 feet distance, with calibrated instruments. Actual performance may vary by specific product model.
1.2. Bi LED projector vs. HID (bi-xenon): the upgrade path debate
Before LED retrofit took over the conversation, HID (High-Intensity Discharge) projectors — commonly called “bi-xenon' — were the premium upgrade. They are still widely available and, for some applications, remain a viable choice. Understanding where each technology shines (and where it doesn't) will help you make a decision based on actual needs, not marketing hype.
HID projectors generate light by creating an electric arc through xenon gas, producing a plasma that emits intense light. This process requires a ballast to generate a high-voltage strike pulse and regulate current. It also typically requires a warm-up period of 5–15 seconds, and the bulb noticeably degrades over 2,000–3,000 hours, with color temperature shifting and output decreasing.
Bi-LED projectors generate light from solid-state emitters. No warm-up is needed: full brightness is immediate. No ballast is needed: only a compact driver circuit integrated into the projector housing. And the emitters degrade very gradually over tens of thousands of hours, without sudden burnout.
| 기능 | Bi-LED Projector | Bi-xenon HID projector |
|---|---|---|
| Start-up time | Immediate (0 seconds) | 5–15 seconds to full brightness |
| Bulb/unit lifespan | 30,000–50,000 hours | 2,000–3,000 hours (bulb); ballast may fail separately |
| External components | None (integrated driver) | External ballast, igniter, relay harness |
| Installation complexity | Moderate — projector + wiring | High — projector + ballast mounting + high-voltage wiring |
| Color shift over lifetime | Minimum (solid state) | Noticeable — bulbs become bluer over time |
| Cold weather performance | Excellent — no warm-up penalty | Slow warm-up, but normal operation once lit |
| Efficacy (lm/W) | High — typically 80–100 lm/W | Low — typically 60–75 lm/W (including ballast losses) |
In most passenger car applications, bi-LED projectors have become the default recommendation, and the gap is not close. The only scenario where HID might still be considered is budget-constrained, high-speed, long-distance highway applications where the installer has HID wiring experience. Even then, as quality bi-LED projectors become cheaper, the gap is narrowing.
1.3. Projector vs. Reflector (both LED): Why optics matter
“You would like to assume that an ”LED headlight” means a good headlight. It does not. There are LED reflector headlights on the market — some factory-installed, some aftermarket — that offer impressive lumen numbers on paper but mediocre actual beam patterns.
The difference lies in optical control. Reflectors rely on the shape of a mirrored bowl to direct light. They are essentially broad distribution devices. Projectors use a combination of a reflector bowl, a shutter, and a lens — three optical elements that can each be optimized independently. The result is more precise beam shaping: a clean cutoff, tight hotspot control, and uniform illumination across the width of the beam pattern.
In practical terms, if you are choosing between an LED reflector assembly and a bi-LED projector assembly from the same brand, choose the projector. The lux numbers in the hotspot will be higher, glare will be lower, and the beam will feel more “premium” in use. There is a reason virtually every luxury OEM — BMW, Mercedes, Audi, Lexus — uses projector optics in their flagship lighting systems.
2. How to read specifications without being fooled
2.1. 루멘 함정: 밝기 수치가 거짓말하는 이유
제조업체는 박스에 거대한 루멘 수치를 인쇄하는 것을 좋아합니다. 20,000 루멘! 30,000 루멘! 여기 불편한 진실이 있습니다: 원시 루멘은 광원에서의 총 광 출력을 측정하지, 도로 위의 빛을 측정하지 않습니다. 10,000 루멘 LED 칩을 가진 제대로 설계되지 않은 프로젝터는 3,000 루멘 이미터를 가진 정밀 엔지니어링된 유닛보다 차선에 더 적은 유용한 빛을 제공할 수 있습니다.
럭스는 운전에 중요한 측정값입니다. 럭스는 특정 거리에서 표면의 빛 강도를 측정합니다 — 즉, 실제로 보고 있는 곳의 도로가 얼마나 밝게 조명되는지입니다. GTR에서는 모든 프로젝터 변형을 표준 25피트 거리에서 테스트하고 핫스팟(컷오프 바로 아래 중심에 있는 빔의 가장 밝은 부분)에서 최대 럭스를 측정합니다. 25피트에서 2,000+ 럭스 판독값은 진지한 프로젝터의 표시입니다. 그 거리에서 1,000 럭스 미만의 판독값은 루멘 사양이 무엇을 주장하든 예산 광학을 나타냅니다.
일부 프로젝터가 높은 루멘을 생성하지만 낮은 럭스를 생성하는 이유는 무엇입니까? 광학이 비효율적이기 때문입니다. 빛이 하우징 내부에서 산란되고, 렌즈를 놓치거나, 제대로 가공되지 않은 리플렉터 표면에 흡수됩니다. 도로에 도달하지 못하는 광자에 비용을 지불하고 있는 것입니다.
2.2. 색온도: 6,000K vs. 5,500K 및 그 중요성
색온도는 켈빈 단위로 측정된 빛의 색조를 설명합니다. 할로겐은 2,800–3,200K에 있습니다 — 따뜻하고 노란색. 대부분의 애프터마켓 LED 프로젝터는 5,500–6,500K 범위에 있습니다 — 차가운 흰색에서 약간 파란색.
“더 파란색이 더 좋다”는 지속적인 신화가 있습니다. 그렇지 않습니다. 물리학은 다음과 같습니다: 더 짧은 파장(파란색 빛)은 물방울, 먼지 또는 안개에 부딪힐 때 더 많이 산란됩니다. 이는 비나 안개 속에서 6,500K 빔이 5,500K 빔보다 더 많은 역산란 — 공기 중 수분에서 반사되어 눈으로 들어오는 빛 —을 생성한다는 것을 의미합니다. 효과는 약한 비에서는 미묘하지만 짙은 안개나 강설에서는 눈에 띄게 됩니다.
모든 날씨 성능을 위해 5,500K가 실용적인 최적점입니다: 눈의 명시야(주간) 시야를 활성화하여 더 나은 세부 인식을 제공할 만큼 흰색이고, 과도한 산란 없이 수분을 통과할 만큼 따뜻합니다. GTR의 레이저 지원 프로젝터(G45 시리즈 포함)는 정확히 이 이유로 기본 색온도로 5,500K를 사용합니다. 맑은 조건에서 5,500K와 6,000K의 차이는 인간의 눈으로 거의 감지할 수 없습니다.
2.3. 와트수: 높을수록 항상 좋은 것은 아니다
35W에서 140W까지 정격 출력의 바이 LED 프로젝터를 보게 될 것입니다. 가장 높은 숫자를 선택하고 싶은 유혹이 있겠지만, 와트수만으로 밝기나 품질이 결정되지는 않습니다. 와트수는 열을 결정합니다.
LED는 가열되면 효율이 떨어집니다. 이를 열 드룹(thermal droop) 현상이라고 합니다. 방열 관리가 좋지 않은 100W 프로젝터는 LED 칩이 스스로 가열되기 때문에 60W의 잘 냉각된 제품보다 실제로 더 적은 유용한 빛을 생성할 수 있습니다. 초과 에너지는 열이 되어 이미터 수명을 단축시키고 결국 드라이버 전자 장치를 손상시킬 수 있습니다.
프로젝터 간의 와트수를 비교할 때 물어보세요: 열은 어디로 가는가? 품질 좋은 제품은 통합 핀 구조를 갖춘 항공우주 등급 알루미늄 바디(일반적으로 6063 합금)를 사용하며, 때로는 소형 냉각 팬으로 보완됩니다. 바디 자체가 방열판 역할을 합니다. 저가 제품은 열 질량이 적은 얇은 주조물을 사용하므로 더 뜨겁게 작동합니다.
3. 구성 체크리스트: 구매 전 확인해야 할 사항
모든 바이 LED 프로젝터가 동일한 표준으로 제작되는 것은 아닙니다. 시장 전반의 보증 반품 및 고장 제품을 처리한 후, 우리는 프로젝터가 오래 지속되는지 또는 1년 이내에 고장 나는지를 구분하는 구성 세부 사항을 식별했습니다:
3.1. 반사기 볼 재질: 금속 vs. 플라스틱
This was once the biggest quality differentiator in the industry. Early plastic reflector bowls could warp or deform under the sustained heat of HID bulbs. With LED light sources emitting less forward-radiated heat, the concern has diminished but not disappeared. High-power bi-LED projectors still generate significant heat at the LED junction, and some of that heat conducts to the reflector bowl.
Metal reflector bowls (aluminum or zinc alloy) offer three advantages: they do not deform, they act as an additional heatsink surface contributing to heat dissipation, and they can be machined to tighter tolerances for more precise beam shaping. Plastic bowls in modern projectors use heat-resistant polymers and are generally suitable for projectors under 50W. Above that, metal is strongly preferred.
GTR projectors use CNC-machined metal reflector bowls in all models, including entry-level ones. This is one of those invisible quality choices that customers cannot see but will certainly feel in the consistency of the beam pattern over years of use.
3.2. Lens Material: Glass vs. Plastic — A Settled Science
We touched on this in the first article, but it is worth repeating with more technical detail. The projector lens sits directly in the focused light path. Every lumen the LED produces passes through this single component. The material choice determines optical clarity, heat resistance, and long-term durability.
High-clarity optical glass (borosilicate or similar) offers 90–92% light transmission, zero risk of thermal deformation at automotive temperatures, and indefinite optical stability. The downsides are weight and cost.
Optical-grade polycarbonate offers 85–88% transmission, lower weight and cost, but has a significantly lower softening temperature. During sustained high-beam operation on hot summer nights, plastic lenses in high-output projectors can begin to deform subtly. The cutoff line becomes slightly fuzzy and gradually worsens over months.
Premium projectors use glass. Budget projectors use plastic. Mid-range projectors sometimes use glass-plastic hybrids or hard-coated plastic lenses. For a purchase expected to last the life of the vehicle, glass is the only material recommended for the primary projector lens.
3.3. Driver Electronics: Sealing, Potting, Protection
The LED driver is the brain of the projector. It regulates current to the LED chip, manages thermal protection, and handles the solenoid trigger for high/low switching. Driver failures typically occur due to moisture ingress, vibration loosening solder joints, or voltage spikes from the vehicle's electrical system overwhelming input protection.
Look for projectors with fully sealed, epoxy-potted driver circuits. The potting compound encapsulates the electronics, protecting them from moisture, vibration, and thermal cycling. An IP68 rating on the projector body means the entire unit (optics, driver, housing) is dust-tight and can withstand continuous immersion in water beyond one meter. This level of sealing is overkill for normal driving, but it means the projector will survive high-pressure washing, deep water crossings, and years of humidity cycling.
4. Size, Mounting, and Installation: Fitting the Projector to Your Vehicle
Bi-LED projector installation success depends more on mounting than any other single factor. A projector that is too deep for the housing, too wide for the reflector opening, or incompatible with the factory bulb mount will turn a weekend project into a frustrating ordeal.
Here is a practical size guide based on headlight housing dimensions:
| Housing Depth (Lens to Rear) | Recommended Projector Size | Typical Applications |
|---|---|---|
| ≥ 150mm | 3.0 inch | Large sedans, SUVs, trucks, most H4 headlights |
| 110–150mm | 2.5 inch | Compact cars, motorcycles, fog light conversions, narrow housings |
| ≤ 110mm | 1.8 inch or 2.0 inch | Motorcycle headlights, quad projector setups, special applications |
Measure twice, order once. The internal depth from the front lens to the rear bulb cover (with the cover installed) is a critical dimension. If your housing uses a rubber dust boot, measure with the boot compressed into its installed position. Add 5mm of clearance to the projector's specified depth to account for the rear lock nut and wiring bend radius.
4.1. Mounting Method: Threaded Shaft vs. Bracket
Threaded shaft mounting (sometimes called “universal mount') is the most common retrofit method for vehicles with standard bulb bases such as H4, H7, or 9005/9006. The projector has a threaded barrel that passes through the factory bulb opening. A lock nut secures it from the rear. This method is quick, non-destructive, and reversible. Both the GTR S35 and G45 series use threaded shaft mounting.
Bracket mounting is used for projector-specific housings or custom retrofits. The projector is bolted to a bracket inside the housing. This method allows for more precise alignment but requires fabrication or vehicle-specific adapter brackets. It is common in advanced custom retrofits where the installer wants full control over projector position and rotation alignment.
For most DIY installers, a threaded shaft projector that matches your vehicle's bulb base type (e.g., bi led projector h4 for H4-equipped vehicles) is the practical choice. It preserves the factory housing, requires no modification other than opening and resealing the lens, and can be completed in an afternoon.
5. Bi LED Projector Laser: Is It Worth the Premium?
Adding a laser element to a bi LED projector changes the performance equation in one specific area: high beam throw distance. The standard bi LED projector high beam is powerful and wide, but intensity diminishes with distance — the inverse square law applies. The laser spot complements the LED high beam, providing a highly focused beam that reaches far beyond the effective range of the LED beam.
In controlled testing, the GTR G45 laser-assisted projector delivers measurable lux figures beyond 300 meters where standard bi LED high beams have already diminished significantly. For drivers who regularly travel unlit rural highways at speed, this additional reach genuinely matters. For urban and suburban drivers who rarely use high beams, the laser adds cost without practical value.
The decision tree is simple:
- If you drive unlit highways or mountain roads at night more than twice a month → consider the bi LED projector laser variant.
- If 95% of your night driving is on roads with some ambient lighting → a standard bi LED projector is sufficient.
- If you frequently drive in fog, rain, or snow → skip the laser. The intense pencil beam backscatters off moisture and becomes a hindrance.
6. Common pitfalls: mistakes that send buyers back to the forums
6.1. Pitfall 1: buying the cheapest projector
We see this constantly. A customer buys a no-name bi LED projector for $35, installs it, and then discovers dark spots in the beam pattern, a fuzzy cutoff line, or the entire unit fails within three months. The money saved is offset by the cost of doing the job twice.
Low-cost projectors cut corners in three areas: reflector bowl precision (producing uneven beams), lens quality (producing soft cutoffs), and driver electronics (causing premature failure). Manufacturing economics make it impossible to produce a quality bi LED projector at a $35–50 retail price point. The materials alone — aluminum housing, glass lens, quality LED emitters, potted driver — exceed that price before considering labor, tooling, and quality control.
A reasonable entry price for an acceptable bi LED projector is $80–120. The sweet spot for consistent quality and strong performance is $120–200. Above $200, you are paying for laser assist, premium emitter bins, or vehicle-specific custom engineering.
6.2. Pitfall 2: ignoring reflector bowl material
We covered this in detail above, but in short: plastic bowls in high-output projectors are a long-term reliability risk. If you are spending over $100 on a projector, insist on a metal reflector bowl. It is one of the easiest quality checks you can perform before purchase.
6.3. Pitfall 3: skipping the alignment step
Even the best bi LED projector performs poorly if aimed incorrectly. Aim too high and you dazzle oncoming traffic. Aim too low and you reduce sight distance, making the upgrade seem underwhelming.
After installation, park the vehicle on a level surface facing a wall exactly 25 feet away. Measure the height from the ground to the center of the projector lens. The cutoff line on the wall should be 1–2 inches below that height. Most projectors have rotation adjustment — use it to ensure the cutoff is perfectly horizontal, with the stepped rise on the correct side (right for left-hand drive, left for right-hand drive) relative to traffic direction.
6.4. 함정 4: 습기 관리 잊기
헤드라이트 하우징은 통기성이 있습니다. 사용 중 가열되고 사용 후 냉각되면서 내부 공기가 팽창하고 수축하여 주변 습기를 빨아들입니다. 통풍구나 건조제가 없으면 그 습기가 렌즈 내부에 응결됩니다. 시간이 지나면 렌즈에 김이 서리고, 연결부가 부식되며, 결국 전자 장치가 고장 납니다.
개조 후 헤드라이트를 다시 밀봉할 때, 고어텍스 통기 패치(압력 평형을 허용하면서 액체 물은 차단) 또는 하우징 내부에 고정된 실리카겔 건조제 팩 여러 개를 포함하세요. 건조제 팩은 매년 교체하세요. 이 한 가지 단계로 보증 반품에서 볼 수 있는 설치 후 고장의 대부분을 방지할 수 있습니다.
7. 퍼널 하단에서 나오는 질문들
7.1. 제 차에는 어떤 GTR bi LED 프로젝터를 사야 하나요?
우리 제품 라인은 차량 모델이 아닌 성능 등급과 용도에 따라 구성됩니다 — 이는 의도적인 것으로, 장착 여부는 하우징 크기와 전구 베이스 유형에 의해 결정되기 때문입니다. 다음은 빠른 매칭 가이드입니다:
- GTR S35: 3.0인치 바이 LED 프로젝터, H4/H7/9005/9006 하우징용 나사산 샤프트 마운트. 다목적 작업용 제품입니다. 선명한 컷오프 라인, 넓은 빔, 금속 반사판, 유리 렌즈. 대부분의 승용차, SUV, 경트럭에 가장 적합한 선택입니다.
- GTR G45 레이저: 3.0인치 바이 LED 프로젝터 레이저, S35와 동일한 마운팅 시스템. 확장된 하이빔 도달 거리를 위한 레이저 스팟이 추가되었습니다. 조명이 없는 조건에서 하이빔을 정기적으로 사용하는 지방 및 고속도로 운전자에게 가장 적합한 선택입니다.
- GTR WS03: 2.0인치 바이 LED 안개등 프로젝터, 안개등 하우징용 컴팩트한 폼 팩터. 평평한 컷오프 라인, 넓은 확산, IP68 등급. 보조 안개등 또는 코너링 라이트 업그레이드에 가장 적합합니다.
- GTR ES6: 3.0인치 바이 LED 프로젝터, 이중 색온도 옵션(로우빔 6,000K / 하이빔 4,000K)으로 역산란 감소를 위해 더 따뜻한 하이빔 조명이 필요한 용도에 적합합니다.
어떤 제품이 맞는지 확실하지 않으신가요? 하우징 깊이와 전구 베이스 유형을 측정한 후 문의 양식을 통해 연락해 주세요 https://www.rhgtr.com. 저희 팀은 매일 차량에 프로젝터를 매칭하며 24시간 이내에 적합 여부를 확인해 드릴 수 있습니다.
7.2. GTR 프로젝터는 정말 플러그 앤 플레이인가요?
표준 H4, H7, 9005, 9006 또는 H11 전구 베이스가 장착된 차량의 경우, 전기적 측면은 플러그 앤 플레이입니다. 프로젝터의 입력 하네스는 공장 전구 소켓에 직접 연결됩니다. 하이빔 솔레노이드 트리거 와이어는 차량의 하이빔 회로에 연결되며, 일반적으로 5분 이내에 포지탭 또는 스페이드 커넥터로 연결할 수 있는 단일 와이어입니다.
Physical installation (opening the headlight, mounting the projector, resealing the lens) requires time and care, but the threaded shaft system means you don't have to permanently modify the housing. We provide detailed installation documentation with every product, and our support team is available to help if you have questions during installation.
7.3. What warranty and support does GTR offer?
All GTR projector lenses come with an 18-month direct replacement warranty. If a product fails within the warranty period, we'll send you a replacement without requiring you to return the defective product first. This policy is based on a manufacturing defect rate of less than 0.1%, achieved through an 8-step quality control process that tests beam pattern, shutter function, electrical consumption, and waterproof performance on every projector before it leaves the factory.
For bulk buyers such as distributors, installers, and OEM partners, we offer extended warranty terms and priority support. Discuss your requirements with our sales team through the contact channels. https://www.rhgtr.com.
8. Conclusion: Decision Framework
By now, you’ve absorbed a lot of information. Let’s distill it into a simple decision framework you can use right now:
- Measure your headlight housing depth and identify your bulb base type. This determines which projector sizes and mounting options are available to you.
- Decide between standard bi LED and bi LED laser based on your actual driving patterns. Be honest with yourself. Don’t pay for a laser you’ll use twice a year.
- Set a realistic budget. $120–200 gets you into quality territory. Below $80, you’re in the danger zone of inconsistent optics and questionable driver electronics.
- Check the construction details. Glass lens, metal reflector bowl, sealed driver — three boxes that should all be ticked.
- Choose a brand that stands behind the product. 보증 기간, 지원 대응 속도, 실제 평판은 사양표 숫자보다 더 중요합니다.
- 주의 깊게 설치하고, 제대로 정렬하고, 습기를 관리하세요. 세계 최고의 프로젝터라도 서두른 설치로 하우징에 김이 서리고 빔이 비뚤어지면 소용없습니다.
여기까지 읽으셨다면 이미 95%의 구매자보다 앞서 있습니다. 무엇을 측정해야 하는지, 어떤 사양을 무시해야 하는지, 실제 품질 차이가 어디에 있는지 알고 있습니다. 이제 차량과 주행 환경에 맞는 프로젝터를 선택하는 문제입니다.
GTR 전체 제품 라인업(프로젝터, 안개등, 완전한 헤드라이트 어셈블리)을 살펴보세요 — https://www.rhgtr.com. 에서 확인하세요. 선택 범위를 좁히는 데 도움이 필요하신가요? 당사의 엔지니어링 지원 팀이 매일 장착 관련 질문을 처리합니다. 문의하시면 어떤 차량을 운전하고 어디서 운전하는지 알려주시면, 상황에 맞는 프로젝터를 추천해 드립니다. 추가 판매 없이, 추측 없이, 앞길을 밝히는 올바른 조명만 제공합니다.
참고 문헌 및 추가 자료
1. SAE International. (2022). SAE J1383: 자동차 헤드램프 성능 요구 사항. https://www.sae.org/standards/content/j1383_202206/
2. Royalin-Lighting. (2025). 바이-LED 프로젝터 렌즈의 밝기를 올바르게 측정하는 방법? — 럭스 기반 측광 테스트 방법론 참고 자료.
3. Royalin-Lighting. (2025). 프리미엄 바이-LED 프로젝터가 여전히 유리 렌즈를 사용하는 이유는? — 자동차 열 부하 조건에서 유리 대 플라스틱 렌즈 재료의 기술적 비교.
4. Headlight Revolution. (2025). GTR Lighting Carbide 시리즈 LED 헤드라이트는 괜찮은가요? — 제3자 독립 리뷰 및 성능 평가.
5. Conpex Group. (2025). 일반 자동차 LED 헤드라이트 대 바이-LED 프로젝터 렌즈 헤드라이트: 어느 것이 더 좋고 어떻게 선택할까요? — Comparative analysis of LED reflector vs projector technology.