
Si has pasado más de 10 minutos investigando mejoras de faros, ya te has encontrado con afirmaciones contradictorias. Una marca dice que las bombillas LED son las más brillantes. Otra jura por HID. Una tercera insiste en que una proyector bi led reconversión completa es la única respuesta segura. La verdad depende completamente de lo que valores: lúmenes brutos en una hoja de especificaciones, o luz controlada y utilizable en la carretera real a 60 mph. Esta guía desglosa cada tecnología principal de iluminación lado a lado, revela las especificaciones ocultas que las marcas no quieren que compares, y te guía exactamente a través de qué sistema se adapta a tu presupuesto, vehículo y condiciones de conducción.
Based on our years of manufacturing experience at GTR Lighting and thousands of customer installations, we have tested every popular headlight configuration on the market. This is not theory. These are data points from real projector test walls, lux meter readings at varying distances, and long-term reliability tracking across diverse vehicle platforms.
1. The Key Question: Single Beam vs. Bi-Beam—What Are You Really Buying?
Before comparing technologies (LED bulb versus HID versus Bi-LED projector), you need to understand the fundamental distinction in function. This distinction alone determines whether your high beams work correctly or not.
A single-beam projector produces only one dedicated beam function, typically low beam. If the vehicle needs high beam capability, it relies on a separate high beam reflector, projector, or optical module mounted elsewhere within the headlight housing. This is the most common factory configuration: one projector for low beam, a reflector or second projector for high beam.
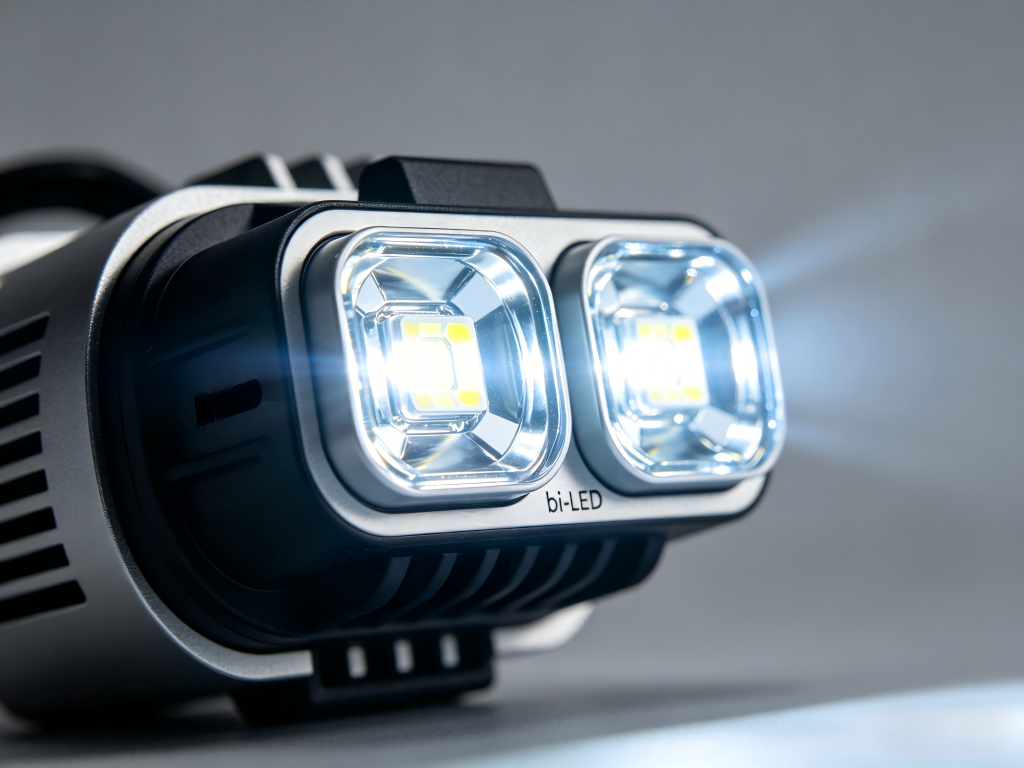
A proyector bi led uses a movable cutoff shield and solenoid actuator to provide both low beam and high beam from the same projector assembly. When the solenoid pulls the shield down, the full LED output floods the road with high beam intensity. When the shield returns to its default closed position, the sharp, controlled, anti-glare low beam cutoff remains. This dual-function design simplifies headlight architecture, reduces part count, and ensures perfect alignment between low and high beam patterns, as both originate from the same optical system.
If you are considering a bi led projector vs led setup where the “LED” option is simply a single-beam projector or a reflector housing with LED bulbs, the Bi-LED always wins in beam control and dual-function integration. The ability to seamlessly switch between modes without separate optics is a genuine advantage, particularly in compact headlight housings where space is limited.
2. Direct Comparison: Bi-LED Projector vs. LED Bulb in Reflector Housing vs. HID Projector
Each technology has legitimate use cases. The following comparison is based on our engineering laboratory tests and real-world road evaluations across dozens of vehicle platforms.
| Métrica | Proyector Bi-LED | LED Bulb (reflector housing) | Proyector HID |
|---|---|---|---|
| Glare control | Excellent — physical cutoff shield | From poor to fair — common geometry mismatch | Very good — cutting shield present |
| Low beam light width | Very wide, edge-to-edge coverage | Narrow to medium — often uneven | Wide, though sometimes uneven |
| High beam light distance | Excellent — concentrated focal point + wide fill | Poor — no secondary high-beam optics | Very good — heat delay present |
| Instant on / flash for advance | Yes — zero warm-up | Yes — zero warm-up | Partial — 3-7 second warm-up |
| Color temperature options | 5000K to 6500K (daylight to cool white) | 3000K a 8000K+ (amplia variación) | 4300K a 6000K (requiere cambio de bombilla) |
| Vida útil (horas) | 30,000–50,000+ | 15,000–30,000 (dependiente de la temperatura) | 2,000–8,000 (falla de bombilla y balasto) |
| Eficiencia energética | Muy alta (≈100–150 lm/W) | Alta (≈80–120 lm/W) | Moderada (≈70–100 lm/W) |
| Complejidad de instalación | Alta — requiere abrir la carcasa del faro | Baja — enchufar y usar | Alto: montaje de balasto + cableado + alineación de la bombilla |
| Costo (sistema completo) | Moderado a alto | Bajo a moderado | Moderado |
| Caso de uso ideal | Entusiastas que buscan el máximo rendimiento | Conductores conscientes del presupuesto con carcasas de reflector estándar | Retrofit heredados / plataformas anteriores a 2015 |
El veredicto para la mayoría de los conductores: Si conduces principalmente por calles de la ciudad bien iluminadas, las bombillas LED en carcasas de reflector pueden ser suficientes, pero debes entender que estás aceptando deslumbramiento para el tráfico que viene en sentido contrario y un rendimiento limitado de luces altas. Si conduces por carreteras rurales oscuras, autopistas o terreno montañoso, un proyector bi led retrofit proporciona el patrón de haz más amplio y controlado con una excelente iluminación a distancia. Los proyectores HID están cada vez más obsoletos para nuevas construcciones: su retardo de calentamiento y la vida útil más corta de la bombilla los hacen menos prácticos que las opciones LED modernas.
3. La óptica que importa: fundamentos del patrón de haz que todo comprador debe entender
Los materiales de marketing aman publicar números de lúmenes. A nuestro equipo de ingeniería le encanta ignorarlos. He aquí por qué: los lúmenes miden la salida total de luz del chip, pero los lux miden la intensidad enfocada de esa luz en la carretera a distancia. Un proyector podría emitir 10,000 lúmenes directamente en una esfera de prueba, pero si la óptica está mal diseñada, apenas 2,000 lux llegan a la superficie de la carretera a 100 pies. Esa es luz inútil: brillante en primer plano, inútil a distancia.
Al evaluar candidatos de lente de proyector bi-led ignora por completo la afirmación de lúmenes. En su lugar, examina fotos reales del patrón de haz o videos de pared de prueba. Un proyector de calidad muestra cuatro características críticas:
- Línea de corte nítida: La línea de corte de luz baja debe ser plana, intensamente nítida y libre de dispersión o franjas de color. Un pequeño “escalón” en el lado del pasajero (para países con conducción por la izquierda) es normal y ayuda a iluminar las señales de tráfico sin causar deslumbramiento.
- Ancho de haz muy amplio: El área iluminada debe extenderse de borde a borde a lo largo de la carretera, alcanzando hombros, aceras y esquinas de intersecciones. Un haz estrecho de “visión de túnel” reduce la conciencia periférica y contribuye a accidentes.
- Distribución suave y uniforme: No debe haber puntos oscuros, manchas o secciones “nadantes” donde la luz se intensifica y se desvanece. La distribución uniforme asegura una visibilidad consistente en todo el campo de visión.
- Punto caliente central bien definido: La porción más intensa del haz debe ubicarse precisamente en el centro de la línea de corte—ni demasiado alta (deslumbramiento) ni demasiado baja (distancia reducida). Un punto caliente fuerte proporciona alcance de largo alcance mientras que el haz más amplio cubre el primer plano.
Si un vendedor no puede proporcionar fotografías claras del patrón de haz tomadas bajo condiciones controladas, considere eso como una gran señal de alerta. Cualquier fabricante bi led de buena reputación mostrará con orgullo su rendimiento óptico.
4. El Tamaño Importa: Proyectores Bi-LED de 3.0 Pulgadas vs. 2.5 Pulgadas vs. 1.8 Pulgadas
proyectores bi led vienen en tres diámetros de lente comunes, cada uno adecuado para diferentes aplicaciones. Elegir el tamaño incorrecto conduce a problemas de ajuste, aberturas de espacio o degradación del patrón de haz.
- Proyectores de 3.0 pulgadas: Tamaño estándar para la mayoría de las carcasas de proyector de fábrica. Produce el patrón de haz más amplio con el punto caliente más pronunciado. Mejor para sedanes, SUV y camionetas con suficiente profundidad de carcasa. Requiere aproximadamente 4-5 pulgadas de espacio libre detrás de la lente, dependiendo de la profundidad del solenoide.
- Proyectores de 2.5 pulgadas: Compact variant for housings with limited space, including many Asian and European compact cars. Beam width slightly narrower than 3.0-inch units, but still significantly outperforms any reflector-based solution. Popular for retrofits in factory reflector bowls where a full-depth projector conversion is desired.
- 1.8-inch projectors: Ultra-compact “mini” projectors for fog light housings, motorcycle headlights, or retrofit projects with extreme space constraints. Beam width and intensity are reduced compared to larger units, but the controlled beam pattern remains far superior to scattered LED bulbs.
Before purchasing any candidatos de lente de proyector bi-led, measure the internal depth of your headlight housing from the mounting surface to the back of the lens. Also, measure the available space around the solenoid and wiring connectors. Three-dimensional printed templates or physical mockups can help validate fitment before opening a headlight assembly.
An improperly sized projector that crowds the housing walls can overheat due to restricted airflow, even if the thermal design is sound. Leave at least 1/2 inch of clearance around the entire projector body whenever possible.
5. Color Temperature: The 6000K Question
Color temperature measured in Kelvin (K) describes the perceived whiteness or blueness of light output. Lower Kelvin values tend toward yellow/orange (halogen territory). Higher values tend toward blue/purple.
For proyectores bi led, 5000K to 6000K is the optimal range. This produces bright, crisp white light with a slight cool tint that maximizes contrast against dark asphalt without excessive blue scatter. 6000K offers near-daylight color rendering, reducing eye strain during prolonged night driving and improving recognition of road hazards, animals, and pedestrians.
Color temperatures above 6500K appear distinctly blue or purple. Although some buyers find this “flashy” or “modern,” the blue-shifted light produces less useful contrast against dark backgrounds and scatters more in fog, rain, and haze, reducing effective visibility. Additionally, high color temperature light tends to cause more perceived glare for oncoming drivers even if the beam pattern is technically correct.
Our recommendation: 5500K to 6000K for general-purpose driving. If you frequently drive in snowy or foggy conditions, consider 5000K, which penetrates moisture slightly better than cooler white light.
6. Wiring and Installation: The Relay Harness Decision
A proyector bi led requires two power inputs: low beam (constant power to the LED chips) and high beam (power to the solenoid actuator that moves the cutoff shield). Most quality projectors include bare wires (typically red for low beam positive, black for low beam negative, plus two thinner wires for the solenoid).
Factory headlight wiring was designed for 55W–65W halogen bulbs drawing 4–5 amps per side. LED projectors draw significantly less power for low beam (typically 1.5–2.5 amps), but the solenoid adds a momentary current spike during high beam activation. In most single-projector-per-side setups, factory wiring handles the load without issues.
However, in proyector bi led quad builds (two projectors per side), relay harnesses become essential. The combined current draw of four projectors (often exceeding 12 amps total low beam) overwhelms factory wiring, leading to voltage drop, flickering, and eventual fuse failure or wiring harness damage. A relay harness draws power directly from the battery with adequate 12 or 14 gauge wire, triggered by the factory headlight signal. The vehicle's original wiring only carries a small trigger current, not the full load, protecting the factory switch and providing stable voltage to the projectors.
Many bi-led projector wiring diagram resources show this relay configuration: battery positive to relay input, relay output to projector low beam positives, factory headlight positive serving as the trigger signal, and all negatives connected to common ground. This setup is industry standard for any multi-projector build or high-power single-projector installation.
6.1. Installation Validation Checklist
After installing any proyector bi led system, complete the following verification steps before considering the job finished:
- Check all ground connections—each ground wire must be bolted directly to bare, unpainted metal. Grounding to painted surfaces or chassis points with makeshift connections introduces resistance and causes flickering, intermittent operation, or total failure.
- Test low beam cutoff alignment—park 25 feet from a flat wall. The cutoff line should be approximately 2–4 inches below the headlight center height. The driver-side cutoff should be slightly lower than the passenger-side to avoid glare for oncoming traffic. Adjust the aim using the factory leveling mechanisms or the projector mounting brackets.
- Verify high beam operation—with the vehicle running and low beams on, activate the high beams. You should hear an audible “click” when the solenoid engages and see the beam pattern shift upward and widen significantly. If the high beam does not activate, check the solenoid wiring polarity or supply voltage.
- Test CAN bus compatibility—drive the vehicle for 10–15 minutes, activating the high beams several times. No warning lights should appear on the dashboard. If flickering or blown bulb warnings occur, install suitable CAN bus decoders or anti-flicker modules in line with the projector inputs.
- Monitor operating temperature—after 30 minutes of continuous low beam operation in moderate ambient temperatures, the projector housing should feel warm but not painfully hot to the touch. Excessive heat indicates insufficient thermal dissipation, which is grounds for immediate replacement.
7. Why GTR Lighting Bi-LED Projectors Outperform Aftermarket Alternatives
GTR Lighting has spent years refining proyector bi led optics, thermal management, and control electronics. We don't simply assemble generic components: we design complete systems with optimizations that budget brands ignore.
First, our optical precision delivers a beam pattern that truly matches or exceeds OEM quality. The cutoff line is sharp with a controlled step for traffic signals. The beam width is expansive, edge to edge, with no dark spots. The central hot spot is well-defined and correctly positioned, providing long-range reach exactly where drivers need it. These features are not happy accidents; they are the result of precise reflector cup geometry, high-borosilicate glass lenses, and sub-millimeter emitter placement tolerances.
Second, our thermal separation technology keeps LED chips cool even under intense sustained use. We physically separate the LED die from the driver circuitry on distinct thermal planes, reducing heat transfer between components. Combined with high-efficiency cooling fans and generously sized passive heat sinks, GTR projectors maintain consistent brightness over thousands of hours of operation, not the dramatic drop common in cheaper units.
Third, our built-in drivers operate across a wide 9V to 32V range with built-in CAN bus tolerance. No external decoder boxes. No resistor kits heating up the engine bay. Just plug-and-play compatibility with most modern vehicles, backed by comprehensive fit validation on Honda, Toyota, Ford, BMW, Mercedes-Benz, and other major platforms.
Fourth, we back every projector with comprehensive technical support and an 18-month warranty against defects. When you buy from GTR Lighting, you are not buying a box of unbranded components from an online marketplace. You are buying engineering accountability from a brand with a documented track record.
8. Frequently Asked Questions: Your Bi-LED Purchase Decision, Simplified
8.1. Is Bi-LED brighter than standard LED headlights?
In terms of raw lumens, a high-quality LED bulb can match or exceed the total output of a proyector bi led’. However, the controlled beam pattern of a projector delivers significantly higher lux (focused intensity) at distance, meaning you see farther down the road even if the total lumen output is theoretically lower. For real-world night driving, the bi led projector vs led comparison consistently favors the projector for usable distance illumination.
8.2. Can I put Bi-LED projectors in my factory halogen housing?
Yes, but only if you perform a full retrofit, not just a bulb swap. A true proyector bi led adaptación requiere abrir la carcasa del faro, retirar el reflector de fábrica o el proyector de haz único, montar el nuevo proyector Bi-LED, sellar la carcasa de forma hermética y alinear correctamente el patrón de haz. Esto no es un trabajo de 15 minutos; planifica de 4 a 6 horas para una adaptación por primera vez en un solo vehículo.
8.3. ¿Cuánto debería gastar en un juego de proyectores Bi-LED de calidad?
Las opciones económicas en el rango de $50–$150 suelen usar LED genéricos, disipadores de calor de tamaño insuficiente y ópticas cuestionables. Las opciones de gama media de $150–$300 por par representan el punto óptimo: componentes de calidad con diseño térmico confiable y patrones de haz decentes. Las opciones premium por encima de $300 por par (nivel de GTR) ofrecen la mejor óptica, LED de la más alta calidad, gestión térmica avanzada y soporte integral de garantía. Como con la mayoría de los componentes automotrices, obtienes lo que pagas, especialmente en precisión térmica y óptica.
8.4. ¿Funcionan los proyectores Bi-LED con sistemas de faros adaptativos?
La mayoría de los proyectores bi led aftermarket están diseñados para aplicaciones estáticas y no se interfazan con los sistemas de iluminación frontal adaptativa (AFS) de fábrica que dirigen los haces en las curvas. Si tu vehículo tiene funcionalidad AFS de fábrica, consulta el soporte de GTR para obtener orientación de compatibilidad antes de comprar: algunas plataformas pueden conservar la funcionalidad de giro con cableado personalizado, mientras que otras no pueden.
8.5. ¿Los proyectores Bi-LED se adaptarán a mi Honda Click / Civic / Accord?
Sí: la línea de proyectores de GTR admite la mayoría de las aplicaciones Honda, incluidas bi led honda click aplicaciones de motocicleta/scooter (a través de proyectores compactos de 1.8 pulgadas) y vehículos de pasajeros Civic/Accord (a través de proyectores de 2.5 o 3.0 pulgadas según la generación de la carcasa). Las marcas NHK y otras marcas de proyectores aftermarket tienen bi led honda click adaptaciones documentadas en foros de entusiastas, lo que confirma la viabilidad con soportes de montaje adecuados. Contacta al soporte de GTR con tu año de modelo exacto y tipo de carcasa para verificar el ajuste.
9. Tu próximo paso: deja de leer y comienza a conducir más seguro esta noche
Has leído los datos, comparado los patrones de haz y entendido por qué las bombillas LED dispersas fallan donde los proyectores Bi-LED controlados tienen éxito. Ahora, solo queda una pregunta: ¿pasarás otro mes conduciendo con faros comprometidos o actualizarás a una iluminación que realmente funcione?
El equipo de ingeniería de GTR Lighting ya ha resuelto todos los problemas discutidos en esta guía: deslumbramiento, calor, errores de bus CAN, ancho de haz deficiente, punto caliente débil y vida útil corta. Nuestros proyector bi led sistemas ofrecen iluminación controlada, segura y potente sin los compromisos que afectan a las alternativas baratas.
Visita https://www.rhgtr.com ahora para seleccionar la plataforma de su vehículo, elija el tamaño de proyector y la temperatura de color preferidos, y ordene la mejora que convierte la conducción nocturna insegura en viajes seguros y sin estrés. Garantía de 18 meses. Soporte técnico con sede en EE. UU. Ingeniería en la que puede confiar.