
Jika Anda masih memasang bohlam LED di rumah reflektor untuk pelanggan, Anda memberikan setengah performa dan menciptakan silau yang berbahaya. Solusi sejati Lensa proyektor 3,0 inci yang dipimpin bi memecahkan apa yang tidak pernah bisa dilakukan bohlam plug-and-play: kontrol pancaran sinar yang presisi tanpa membutakan lalu lintas yang melaju.
Here's what every installer and shop owner needs to know before recommending another LED bulb ‘upgrade.“
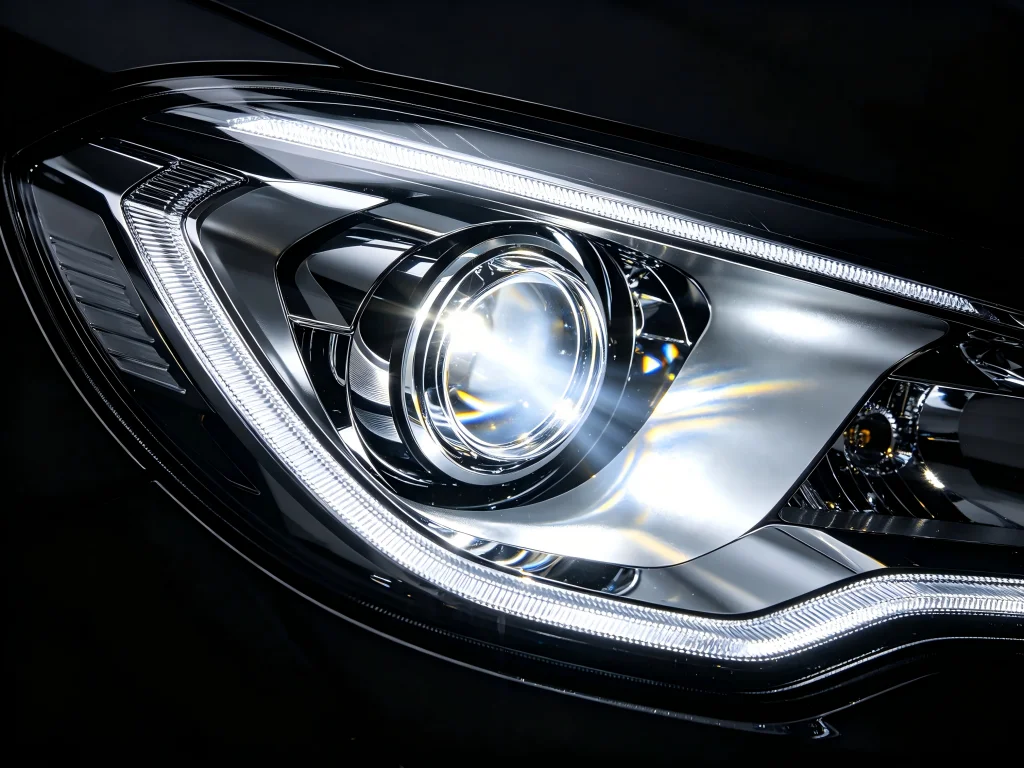
1. The Problem: The LED Bulb Glare Epidemic
LED bulbs in reflector housings create dangerous glare 80% of the time. The reason is simple physics. The reflector bowl is designed for a halogen filament that emits light nearly 360 degrees from a small, precise focal point. The bowl captures and redirects that omnidirectional light.
LED bulbs use flat chips mounted on a circuit board. No matter how well designed, they cannot perfectly mimic the spherical light source of a filament. The reflector cannot reshape LED output like a projector lens. The result: light scatters out above the intended beam cutoff—into trees, road signs, and the eyes of oncoming drivers.
Your customers may see a bright foreground and think the upgrade worked. But long-range visibility suffers, and the glare they create endangers everyone.
2. Agitation: What Glare Means for Your Business
That glare isn't just annoying. It's a growing regulatory and liability issue. Authorities worldwide are tightening enforcement on aftermarket lighting. In the United States, FMVSS 108 sets specific limits on candela output. European ECE regulations are even stricter.
For your shop, recommending an LED bulb ‘upgrade“ that creates glare carries real risks:
- Customer complaints about being flashed by other drivers
- Failed vehicle inspections that come back to you
- Potential liability if a customer's lights cause an accident
- Wasted labor when customers return demanding a real fix
Stop selling compromises. Start installing solutions.
3. Solution: Why 3.0-Inch Bi LED Projector Lenses Fix Everything
Bi-LED projector lenses are an integrated optical system—not a bulb replacement. The LED emitters, reflector cups, physical shields, and projection lenses are aligned at the factory with microscopic accuracy. The entire unit is designed as a single optical system, eliminating the geometric mismatches that cause glare in bulb replacements.
3.1. The Internal Shield That Changes Everything
Inside every quality Bi-LED projector is a precision-cut metal shield positioned between the LED light source and the projection lens. This shield physically blocks the top portion of the light beam before it exits the lamp housing. Only the bottom portion of the beam passes through the lens and reaches the road surface.
The result is a razor-sharp cutoff line—a clear boundary between light and dark. This cutoff line prevents light from entering the eyes of oncoming drivers while focusing illumination exactly where the driver needs it: on the road ahead.
3.2. How the Dual-Beam Mechanism Works
“The ”Bi" in Bi-LED means bifunctional—both high beam and low beam from the same unit. Here's how it works:
- Low beam mode: A solenoid valve controls an internal shield to block part of the light, forming a clear cutoff line that avoids glaring oncoming vehicles.
- High beam mode: An electromagnetic solenoid pulls the shield down, exposing the full output of the LED emitter for maximum forward projection.
- The transition happens instantly within the same optical system—without compromising low beam alignment, without requiring a secondary bulb.
This design maintains low beam glare protection while providing powerful long-distance illumination on high beam.
4. What to Look for in a Quality Bi-LED Projector
4.1. Kejelasan Garis Potong
Garis potong sinar dekat harus tajam dan horizontal sempurna dengan sedikit lengkung ke atas di sisi penumpang. Pola ini diwajibkan secara hukum untuk kendaraan setir kiri (LHD). Proyektor berkualitas buruk menghasilkan garis potong yang kabur atau pola yang tidak konsisten—uji setiap unit sebelum pengiriman.
4.2. Konfigurasi Chip dan Manajemen Daya
Produsen berkualitas menggunakan konfigurasi multi-chip. Unit kelas menengah biasanya menggunakan lampu rendah 40-50W / lampu tinggi 60-70W dengan 6 chip lampu rendah dan chip lampu tinggi tambahan. Desain hiperboloid premium menggabungkan optik lensa ganda untuk efisiensi superior dan jangkauan jarak jauh.
Selalu verifikasi pembagian watt antara lampu rendah dan tinggi. Beberapa unit murah menggunakan daya yang sama terlepas dari mode, yang mengalahkan tujuan pencahayaan lampu rendah yang terkontrol.
4.3. Kualitas Sistem Pendingin
Kinerja LED menurun dengan panas. Proyektor berkualitas menggunakan bodi paduan aluminium penuh dengan area permukaan besar (pendinginan pasif) atau kipas terintegrasi dengan peringkat 10.000+ RPM (pendinginan aktif). Untuk pasangan 100W+, pendinginan aktif sangat penting.
Spesifikasi utama yang perlu diverifikasi:
- Rentang suhu pengoperasian (unit berkualitas: -40°C hingga +110°C)
- RPM kipas dan peringkat kebisingan
- Bahan dan luas permukaan heatsink
4.4. Bahan Konstruksi
Periksa kualitas bahan secara menyeluruh. Proyektor berkualitas menggunakan:
- Braket pemasangan logam—bukan plastik
- Glass projection lens—not polycarbonate that yellows over time
- UV-resistant housing material
- Precision threaded shaft for universal mounting
4.5. Real-World Performance Testing
From forum feedback on similar 3-inch units, experienced users consistently highlight beam pattern quality as a deciding factor. One owner noted “light output is very superior as advertised” with sharp cutoff lines that “work perfectly without blind zones and dark spots.” Another confirmed the 500-meter high beam illumination capability—far exceeding what any LED bulb can achieve in a reflector.
These real-world results align with our own engineering tests. A properly engineered projector with moderate lumens always outperforms poorly designed units with high raw lumen claims by delivering higher lux values exactly where needed.
5. Installation Reality Check
Installing Bi-LED projectors requires professional work. The process involves opening the headlight housing, removing the original reflector or projector assembly, installing the Bi-LED unit, and resealing the housing.
This is not a job for weekend DIY enthusiasts. As one user noted, professional installation is “highly recommended to ensure optimal lighting performance and safety.” For your workshop, this means higher-value service tickets and customers who trust your expertise.
6. Regulatory Compliance
Before stocking or installing any Bi-LED projector for road use, verify compliance with your local regulations. Different markets impose different standards:
- United States: FMVSS 108 governs beam pattern and intensity. Products must be properly aimed after installation.
- European Union: ECE regulations are stricter—many high-intensity lighting systems require automatic leveling or lens cleaning systems to be road-legal.
- Australia and other markets: Local ADR standards apply.
Work with suppliers who understand these requirements and can provide documentation for the markets you serve.
7. Frequently Asked Questions
Q: Can I just install an LED bulb in the projector housing instead of replacing the entire unit?
No. The projector optics are designed for a specific bulb geometry. The different light source shape of an LED bulb means the projector cannot focus the light correctly. You will get poor beam quality and reduced output. Replace the entire unit with a proper Bi-LED projector.
Q: How bright are Bi-LED projectors compared to halogen?
Quality Bi-LED projectors provide 200-300% more effective road illumination than standard halogen systems, with instant full brightness and wider beam coverage.
Q: Are these projectors compatible with CANbus systems?
Most modern Bi-LED projectors include built-in drivers that prevent error codes on CANbus vehicles. Verify with your supplier before ordering for specific models.
Q: How long does installation take for a typical vehicle?
Professional installation averages 3-5 hours per vehicle, depending on the complexity of the headlight design and whether the housing uses permanent sealant or butyl.
Q: What is the most common installation mistake?
Incorrect beam aiming after installation. Always re-aim the projector against a wall at 25 feet before handing over the vehicle. Even perfect optics perform poorly if aimed incorrectly.
Q: Do Bi-LED projectors work in fog lights?
Yes, the 3.0-inch unit works effectively as a fog light. Some models offer a two-color option—white low beam with lemon yellow high beam for better fog penetration.
Q: What happens if the cooling fan fails?
High-quality units (rated -40°C to +110°C) are equipped with thermal protection that reduces output before failure occurs. Cheap units can overheat and permanently damage the LED chips. This is why the quality of the cooling system matters.
8. Switch to the Right Lighting Solution
Stop selling LED bulbs that cause glare as an “upgrade”. Start installing true Bi-LED projector systems that deliver the performance your customers really need: controlled low beams that don't blind oncoming traffic and powerful high beams that illuminate the road up to 500 meters ahead.
For professional-grade 3.0-inch bi-LED projector lenses designed with precision optics, robust cooling, and regulatory compliance, visit https://www.rhgtr.com to explore the GTR Lighting catalog. Contact the sales team to discuss wholesale pricing, sample orders, and technical specifications for your market.