
1. บทนำ: ส่องสว่างเส้นทางข้างหน้าด้วยหลอดไฟ LED 9005
The journey from a dim, yellowed beam to a crisp, daylight-like illumination is a transformative upgrade for any vehicle. At the heart of this transformation for millions of cars, trucks, and SUVs is the 9005 headlight bulb led conversion. This specific bulb size, once the domain of inefficient halogen technology, has become a focal point for the automotive lighting revolution. Upgrading to LED is not merely about aesthetics; it’s a comprehensive enhancement of safety, performance, and longevity. This guide will navigate the critical aspects of 9005 LED bulbs, from their foundational technology and compelling benefits to the practical steps of selection and installation. By understanding what makes a high-quality LED upgrade, you can confidently light your path with superior visibility and modern reliability.
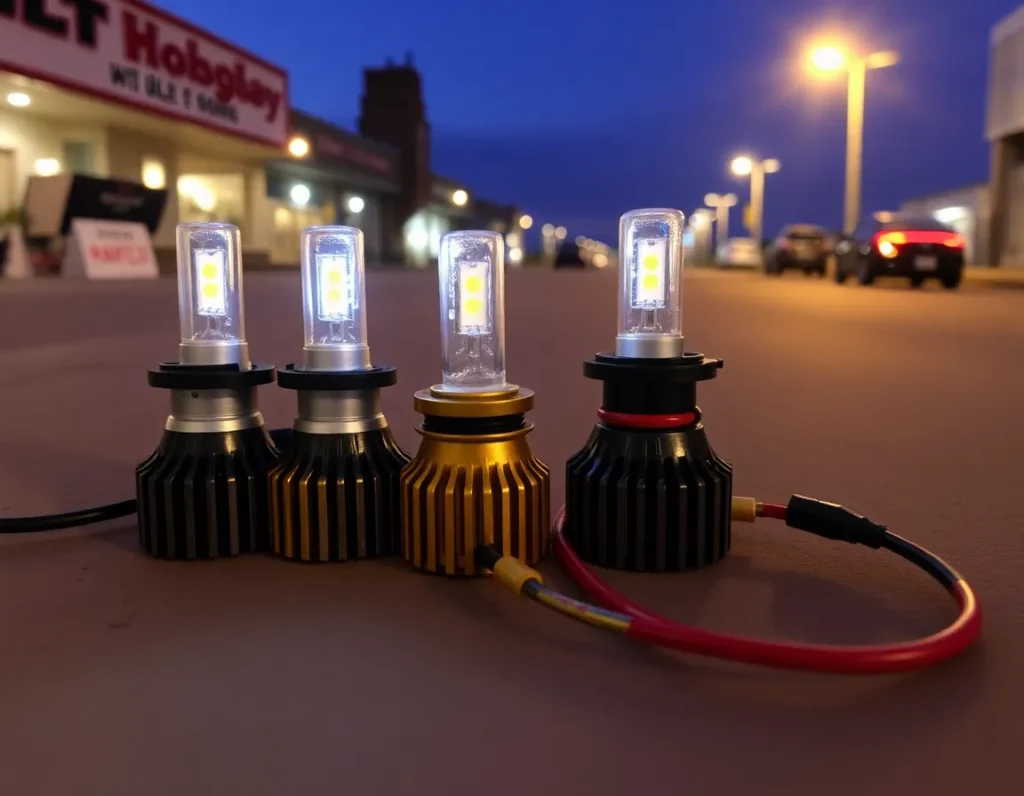
2. หลอดไฟ 9005 คืออะไร? ทำความเข้าใจมาตรฐานฮาโลเจน
To fully appreciate the LED evolution, one must first understand the original standard. The 9005 is a specific bulb size or “fitting,” defined by an international standardized system. It features a single-filament design and uses a P20d base—a plastic connector with three tabs in a specific alignment to ensure it can only be installed in the correct orientation. Historically, the 9005 bulb was almost exclusively manufactured as a halogen bulb. In this design, electricity heats a tungsten filament sealed inside a glass capsule filled with halogen gas, causing it to glow and produce light. The 9005 halogen bulb is typically used for high-beam headlights in many vehicles, though it is also commonly specified for low-beam or fog-light applications in various models.
The halogen 9005 has inherent limitations. Its efficiency is poor, converting only about 10-15% of its energy into visible light, with the vast majority wasted as heat. This inefficiency leads to higher power draw from your vehicle’s electrical system. Furthermore, the filament is fragile and susceptible to vibration failure, and the bulb’s output degrades and yellows over its relatively short lifespan, often rated between 450 to 1,000 hours. The 9005 standard, therefore, represents a specific form factor and electrical interface that newer technologies like LED aim to fit into and dramatically improve upon, creating a direct plug-and-play upgrade path for vehicle owners.
3. การปฏิวัติ LED: ทำไมต้องอัปเกรดจากฮาโลเจนเป็นหลอดไฟ LED 9005?
การเปลี่ยนจากหลอดฮาโลเจนเป็น LED แสดงถึงการเปลี่ยนแปลงพื้นฐานในวิธีการสร้างแสง แทนที่จะใช้ไส้หลอดที่ให้ความร้อน ไดโอดเปล่งแสง (LED) จะสร้างแสงผ่านการเรืองแสงด้วยไฟฟ้า—การเคลื่อนที่ของอิเล็กตรอนในวัสดุกึ่งตัวนำ ความแตกต่างหลักนี้ปลดล็อกข้อได้เปรียบมากมายที่ทำให้การอัปเกรดเป็น 9005 headlight bulb led เป็นการตัดสินใจที่น่าสนใจ.
3.1. กำลังส่องสว่างและทัศนวิสัยที่เหนือกว่า
หลอด LED ให้แสงที่สว่างและขาวกว่าอย่างเห็นได้ชัด เมื่อเทียบกับแสงสีเหลืองของหลอดฮาโลเจน การแปลงเป็น LED 9005 คุณภาพสูงสามารถให้อุณหภูมิสี 5,000 ถึง 6,000 เคลวิน ซึ่งใกล้เคียงกับแสงธรรมชาติในเวลากลางวัน สเปกตรัมนี้ช่วยเพิ่มคอนทราสต์ ลดความเมื่อยล้าของดวงตา และทำให้ป้ายจราจร เครื่องหมาย และอันตรายที่อาจเกิดขึ้นดูคมชัดและมองเห็นได้ชัดเจนในระยะไกลขึ้น.
3.2. ประสิทธิภาพพลังงานและอายุการใช้งานที่เพิ่มขึ้น
LED มีประสิทธิภาพอย่างน่าทึ่ง ใช้พลังงานน้อยกว่าหลอดฮาโลเจนเทียบเท่าถึง 80% เพื่อให้แสงในปริมาณเท่ากันหรือมากกว่า หลอดฮาโลเจน 9005 ทั่วไปกินไฟ 65 วัตต์ ในขณะที่หลอด LED ที่เทียบเท่ากันอาจใช้เพียง 20-30 วัตต์ ซึ่งช่วยลดภาระของไดชาร์จและระบบไฟฟ้าของรถยนต์ ที่สำคัญกว่านั้น LED มีอายุการใช้งานยาวนานเป็นพิเศษ มักได้รับการจัดอันดับระหว่าง 30,000 ถึง 50,000 ชั่วโมง ซึ่งโดยพื้นฐานแล้วคืออายุการใช้งานของรถยนต์สำหรับผู้ขับขี่ส่วนใหญ่.
3.3. เปิดทันทีและการออกแบบที่แข็งแกร่ง
แตกต่างจากระบบ HID บางระบบ LED ให้ความสว่างเต็มที่ทันที โดยไม่ต้องใช้เวลาในการอุ่นเครื่อง ซึ่งเป็นสิ่งสำคัญต่อความปลอดภัยเมื่อกะพริบไฟสูง นอกจากนี้ ชิป LED เป็นส่วนประกอบโซลิดสเตตที่ไม่มีไส้หลอดเปราะบาง ทำให้ทนทานต่อแรงกระแทกและการสั่นสะเทือนจากถนนขรุขระได้ดี ซึ่งเป็นจุดที่มักทำให้หลอดฮาโลเจนเสียหาย.
4. คุณสมบัติหลักและคุณลักษณะของหลอดไฟ LED 9005 คุณภาพสูง
หลอดไฟ LED ไม่ได้ทั้งหมดถูกสร้างมาเท่าเทียมกัน การแยกแยะคุณภาพของการอัปเกรด LED 9005 ต้องมองข้ามคำกล่าวอ้างทางการตลาดและมุ่งเน้นไปที่ข้อกำหนดทางเทคนิคและคุณลักษณะการออกแบบที่สำคัญ.
4.1. ฟลักซ์การส่องสว่าง (ความสว่าง)
วัดเป็นลูเมน (lm) คือปริมาณแสงที่มองเห็นได้ทั้งหมดที่ปล่อยออกมา หลอดฮาโลเจน 9005 ทั่วไปให้แสงประมาณ 1,700 ลูเมน การอัปเกรด LED คุณภาพดีควรให้แสงระหว่าง 3,000 ถึง 6,000 ลูเมนต่อหลอดเพื่อการปรับปรุงที่สำคัญ ควรระวังคำกล่าวอ้างเรื่องลูเมนที่เกินจริงจากผู้ผลิตที่ไม่ได้รับการรับรอง.
4.2. รูปแบบลำแสงและการวางตำแหน่งชิป
คุณลักษณะที่สำคัญที่สุดคือการออกแบบชิป LED และการวางตำแหน่ง หลอดฮาโลเจนปล่อยแสงรอบทิศทางจากไส้หลอดตรงกลาง ซึ่งตัวสะท้อนแสงหรือโปรเจกเตอร์ของโคมไฟหน้าได้รับการออกแบบอย่างแม่นยำเพื่อโฟกัสแสง หลอด LED คุณภาพสูงใช้ชิปที่วางบนสองหรือสี่ด้าน (แบบสองด้านหรือสี่ด้าน) ในรูปแบบที่เลียนแบบตำแหน่งและจุดปล่อยแสงของไส้หลอดฮาโลเจน เพื่อให้แน่ใจว่าแสงถูกฉายอย่างถูกต้อง สร้างเส้นตัดแสงที่คมชัดและถูกกฎหมาย โดยไม่ทำให้เกิดแสงจ้าที่ทำให้ผู้ขับขี่ที่สวนทางมามองไม่เห็น.
4.3. Thermal Management (Heatsink and Fan)
Although LEDs are cooler than halogens in terms of radiated heat, the semiconductor junction itself generates significant heat that must be dissipated for long life. High-quality 9005 LED bulbs feature large finned aluminum heatsinks, often paired with a quiet brushless fan. Passive cooling (heatsink only) may suffice for low-power designs, but active cooling (fan) is generally more effective for high-output bulbs.
4.4. Canbus Compatibility
Modern vehicles use the Canbus (Controller Area Network) system to monitor bulb status. The low power draw of LEDs can trick the system into thinking the bulb is burnt out, causing warning lights on the dashboard. Canbus-compatible 9005 LED bulbs include built-in decoders or resistors that simulate the electrical load of a halogen bulb, preventing error messages.
5. How to Choose the Best 9005 LED Bulb: A Buyer's Guide
With a crowded market, choosing the right bulb requires a systematic evaluation based on your vehicle, needs, and the quality metrics discussed.
- Check Your Bulb Size: Consult your owner's manual or a reliable bulb size guide to confirm you need a 9005 bulb. Some vehicles use 9005 for high beams and a different size (e.g., 9006) for low beams.
- Prioritize Beam Pattern Design: Look for brands that transparently show beam pattern comparisons against halogen bulbs. Look for phrases like “DOT/SAE compliant” and reviews confirming a sharp cutoff. Avoid bulbs where LED chips are stacked directly.
- Evaluate Wattage and Lumens Realistically: Choose bulbs with balanced wattage (e.g., 3,000-4,500 lumens) from reputable brands. Extremely high lumen claims (e.g., 10,000+) are often misleading and may come with poor beam focus and excessive heat.
- Assess the Cooling System: For high-performance bulbs, a fan-cooled system is recommended. Ensure the overall bulb size, especially the cooling assembly and fan, will fit inside your vehicle's headlight housing and allow the dust cap to close.
- Check Canbus Compatibility: If your car is a 2000 model year or newer, consider that you need Canbus-compatible bulbs to avoid errors on the dashboard.
- Consider color temperature: For optimal visibility, a color temperature between 5,000K (pure white) and 6,000K (slightly cool blue tone) is recommended. Higher Kelvin values (e.g., 8,000K) provide deep blue light that reduces usable light output and may attract unwanted attention from police officers.
- Warranty and brand reputation: Reputable manufacturers back their products with long warranties (2 years or more). Read user reviews focusing on longevity, beam pattern quality, and customer service experience.
6. Step-by-step installation guide for 9005 LED headlight bulbs
Installing 9005 LED bulbs is generally a plug-and-play process. However, careful attention to detail ensures a safe, secure, and optimal installation.
6.1. Tools and preparation
You will need: new 9005 LED bulb kit, clean cloth or gloves (to avoid touching the LED lens with bare skin), and possibly a screwdriver or socket wrench set to access the headlight assembly. Always consult your vehicle's manual for specific access instructions. Work on a cool, clean surface and disconnect the negative battery terminal for maximum safety.
6.2. Installation steps
- Access the headlight assembly: Open the hood and locate the back of the headlight housing. You may need to remove a plastic dust cover, which is usually twist-off by hand, or in some vehicles, you may need to access from behind the wheel well.
- Remove the old halogen bulb: Disconnect the wiring connector by pressing the release clip and pulling straight off. For 9005 models, release the bulb by turning the plastic base counterclockwise (usually about 1/8 turn) and pulling the bulb straight out. Handle the old halogen bulb carefully to avoid breakage.
- Prepare the new LED bulb: Use a clean cloth or gloves to unpack the new LED bulb. Avoid touching the yellow LED chip or lens. If your kit includes separate components, install the heatsink/fan onto the bulb base according to the instructions, and make sure it is securely assembled.
- Insert and secure the LED bulb: Align the three tabs on the P20d base of the LED bulb with the slots in the headlight socket. Insert the bulb and turn it clockwise until it locks firmly. The installation position is determined by the tabs, so it can only be inserted one way.
- Manage the wiring and driver: Connect the vehicle's OEM wire connector to the input connector on the LED bulb's driver or the built-in wiring. Store any excess wiring and the driver box (if separate) neatly inside the headlight housing. Ensure no wires are pinched or touching the heatsink.
- Seal the housing again: It is important to reinstall the headlight dust cover. Test-fit the cover before final wire placement. The heatsink and fan of the LED bulb are larger than the original halogen base, but most quality kits are designed so the cover can close. If necessary, some covers have removable rubber grommets to accommodate the wiring.
- Test and align: Reconnect the battery terminals. Turn on the vehicle's headlights to test the new LED bulbs. Ensure both sides work and the cooling fans (if any) operate quietly. Finally, it is highly recommended to check and adjust the headlight level on a flat surface with the light aimed at a wall to ensure your new, brighter lights are properly aligned and do not cause glare.
7. Common Problems and Solutions with 9005 LED Bulb Upgrades
While upgrading to 9005 LED headlight bulbs is generally straightforward, you may encounter some common issues. Understanding these issues and their solutions will help you get the full benefit of the upgrade without hassle.
7.1. Rapid flashing or turn signal error messages (for dual-function bulbs)
If your vehicle uses the 9005 bulb for a dual purpose, such as daytime running lights (DRL) that also serve as turn signals, you may experience rapid flashing (hyper-flashing) or error messages on the dashboard. This is because LED bulbs draw significantly less power than halogen bulbs, causing the vehicle's computer to think the bulb is burnt out. The solution is usually to use a load resistor, also known as a decoder or anti-flicker module, which is wired into the circuit. Many premium LED kits include these devices or have built-in CANbus error cancellation technology.
7.2. Flickering or intermittent operation
Flickering can be caused by several factors. The most common cause is an incompatible or low-quality LED driver that cannot handle the vehicle's pulse-width modulation (PWM) used for dimming DRLs. Ensure your LED bulbs are specifically designed for automotive PWM systems. Loose connections at the connectors or a deteriorating vehicle voltage regulator can also cause flickering. Start by checking that all plugs are firmly seated. If flickering persists, try swapping the bulb to another vehicle to isolate whether the issue is with the bulb or the vehicle's electrical system.
7.3. แสงจ้าเกินไปหรือรูปแบบลำแสงไม่ดี
นี่เป็นปัญหาด้านความปลอดภัยและประสิทธิภาพที่สำคัญ หากไฟ LED ใหม่ของคุณทำให้รถที่สวนทางมามองไม่เห็นหรือไม่ส่องสว่างถนนอย่างเหมาะสม แสดงว่าหลอดไฟอาจไม่ได้จัดตำแหน่งอย่างถูกต้องในตัวครอบไฟ แม้จะติดตั้งอย่างสมบูรณ์แบบ ตัวสะท้อนแสงบางแบบที่ออกแบบมาสำหรับจุดกำเนิดแสงเฉพาะของไส้หลอดฮาโลเจนจะกระจายแสงจากชิป LED อย่างไม่ถูกต้อง ขั้นแรก ตรวจสอบอีกครั้งว่าหลอดไฟ LED เสียบแน่นและล็อกเข้ากับฐานแล้ว และการจัดตำแหน่งแบบหมุน (หากชุดของคุณมี) ตั้งค่าตามคำแนะนำ วิธีแก้ไขขั้นสุดท้ายคือการปรับระดับไฟหน้าอย่างมืออาชีพ หากรูปแบบยังไม่ดี คุณอาจต้องมองหาหลอดไฟ LED ที่ออกแบบมาโดยเฉพาะด้วยการออกแบบ 360 องศาหรือเลียนแบบไส้หลอดอย่างแม่นยำสำหรับตัวสะท้อนแสงของคุณ.
7.4. เสียงพัดลมหรือความล้มเหลวของระบบระบายความร้อน
หลอดไฟ LED 9005 คุณภาพสูงใช้แผ่นระบายความร้อนและพัดลมเพื่อจัดการความร้อน คุณควรได้ยินเสียงหึ่งเบา ๆ เมื่อเริ่มทำงาน แต่ไม่ควรได้ยินจากที่นั่งคนขับเมื่อปิดกระจก เสียงดังเสียดสีหรือพัดลมหยุดหมุนแสดงว่ามีความล้มเหลว ระบบระบายความร้อนที่ล้มเหลวจะทำให้ LED เสื่อมสภาพและไหม้อย่างรวดเร็ว แบรนด์ที่มีชื่อเสียงส่วนใหญ่ให้การรับประกันสำหรับข้อบกพร่องดังกล่าว เพื่อการทำงานที่เงียบขึ้น ให้พิจารณาหลอดไฟที่มีแผ่นระบายความร้อนแบบพาสซีฟขนาดใหญ่ (ไม่มีพัดลม) แต่ตรวจสอบให้แน่ใจว่าช่องไฟหน้ามีพื้นที่เพียงพอสำหรับการไหลเวียนอากาศรอบ ๆ.
7.5. หลอดไฟดวงเดียวไม่ทำงานหรือทำงานเป็นช่วง ๆ
หากหลอดไฟ LED ดวงใดดวงหนึ่งไม่ทำงานหรือทำงานเป็นช่วง ๆ ก่อนอื่นให้สลับหลอดไฟจากด้านหนึ่งไปอีกด้านหนึ่ง หากปัญหาย้ายตามหลอดไฟ แสดงว่าหลอดไฟเสีย หากปัญหายังคงอยู่ที่ด้านเดียวกันของรถ แสดงว่าปัญหาอยู่ที่เต้าเสียบ สายไฟ หรือฟิวส์ของรถ นอกจากนี้ ตรวจสอบขั้วไฟฟ้าถูกต้องหรือไม่ แม้ว่า LED ที่ทันสมัยส่วนใหญ่จะป้องกันขั้วกลับ แต่บางรุ่นที่ถูกกว่าไม่มีการป้องกัน และการติดตั้งกลับด้านจะทำให้ไม่ติดสว่าง.
8. ข้อพิจารณาทางกฎหมายและความปลอดภัยสำหรับไฟหน้า LED หลังการขาย
การอัปเกรดไฟของคุณไม่ใช่แค่เรื่องความสว่าง แต่เป็นการทำอย่างรับผิดชอบและถูกกฎหมาย การปฏิบัติตามข้อกำหนดเป็นสิ่งจำเป็นสำหรับความปลอดภัยของคุณและผู้อื่นบนท้องถนน.
8.1. การรับรอง DOT/SAE และการปฏิบัติตามข้อกำหนด
ในสหรัฐอเมริกา กรมการขนส่ง (DOT) และสมาคมวิศวกรยานยนต์ (SAE) เป็นผู้กำหนดมาตรฐานสำหรับประสิทธิภาพของไฟหน้า เครื่องหมายรับรอง DOT/SAE บนหลอดไฟหรือบรรจุภัณฑ์บ่งบอกว่าผู้ผลิตอ้างว่าผลิตภัณฑ์เป็นไปตามมาตรฐานเหล่านี้สำหรับสิ่งต่างๆ เช่น รูปแบบลำแสง ความเข้ม และสี อย่างไรก็ตาม สิ่งสำคัญคือต้องเข้าใจว่าการรับรองนี้มักเป็นการรับรองตนเองโดยผู้ผลิต สำนักงานความปลอดภัยการจราจรบนทางหลวงแห่งชาติ (NHTSA) ระบุอย่างชัดเจนว่าการแปลงชุดไฟหน้าแบบฮาโลเจนให้ใช้หลอด LED นั้นไม่ถูกกฎหมาย หากชุดไฟหน้าไม่ได้ออกแบบมาสำหรับ LED แต่เดิม เนื่องจากจะไม่คงการปฏิบัติตามมาตรฐานความปลอดภัยยานยนต์ของรัฐบาลกลาง (FMVSS) หมายเลข 108 ซึ่งสร้างพื้นที่สีเทาที่สำคัญสำหรับหลอด LED หลังการขาย.
8.2. การตรวจสอบและการบังคับใช้ในระดับรัฐ
ในขณะที่กฎระเบียบของรัฐบาลกลางเป็นกรอบการทำงาน การบังคับใช้มักเกิดขึ้นในระดับรัฐระหว่างการตรวจสอบยานพาหนะ หลายรัฐมีกฎหมายต่อต้านไฟหน้าที่ “สีน้ำเงินเกินไป” (โดยทั่วไปจำกัดอุณหภูมิสีสูงสุดที่ค่าเคลวินหนึ่งๆ มักประมาณ 6000K) หรือก่อให้เกิดแสงจ้ามากเกินไป การแปลงเป็น LED ที่เล็งไม่ถูกต้องหรือทำให้เกิดแสงจ้าเป็นเหตุผลทั่วไปที่ทำให้ไม่ผ่านการตรวจสอบความปลอดภัยของรัฐหรือได้รับใบสั่งจากเจ้าหน้าที่บังคับใช้กฎหมาย แม้ว่าหลอดไฟจะมีเครื่องหมาย DOT ก็ตาม.
8.3. บทบาทสำคัญของการเล็งที่ถูกต้อง
สิ่งนี้ไม่สามารถกล่าวเกินจริงได้ การดำเนินการด้านความปลอดภัยที่สำคัญที่สุดเพียงอย่างเดียวที่คุณสามารถทำได้หลังจากติดตั้งไฟหน้าใหม่ใดๆ โดยเฉพาะอย่างยิ่ง หลอดไฟ LED หัวเทียน 9005, ...correct aiming. A misaimed halogen bulb is an annoyance. A misaimed LED or HID bulb is dangerous and blinding. Proper aiming ensures your increased light output is projected onto the road where you need it, not into the eyes of oncoming drivers. This simple procedure, done on a level surface with a wall as a backdrop, is your primary defense against creating a hazard.
8.4. Color Temperature and Visibility
While cool white or slightly blue-white light (5000K-6000K) is popular for its modern look, it's important to consider real-world performance. Pure white light around 5000K-5500K closely mimics daylight and generally provides excellent contrast. However, in adverse weather such as fog, snow, or heavy rain, warmer temperature light (4000K-4500K) can sometimes penetrate better with less backscatter. Extremely high color temperatures (8000K+) sacrifice useful lumens to achieve a deep blue tint and can significantly reduce usable light and visibility.
9. Maintenance and Care Tips for Your 9005 LED Headlight System
LED headlights are known for being low-maintenance, but they are not “set and forget” components. A little periodic care will extend their lifespan and peak performance.
9.1. Keeping Lenses and Bulbs Clean
A clear lens is paramount. Over time, polycarbonate headlight lenses oxidize, becoming yellowed and hazy, which diffuses light and significantly reduces the effectiveness of even the brightest LED bulbs. Clean your headlight lenses regularly with automotive soap and water. For oxidized lenses, use a dedicated headlight restoration kit to clarify them. Additionally, when replacing bulbs, avoid touching the LED chip or silicone lens cover with your bare fingers. Oils from your skin can create hot spots on the chip when heated, potentially shortening its lifespan. Use the provided gloves or a clean cloth.
9.2. Ensuring Adequate Cooling and Ventilation
Heat is the enemy of electronics. The heat sinks and built-in fans on your LED bulbs need room to breathe. When installing, do not stuff loose wiring or other items that could obstruct airflow or insulate the heat sink within the headlight housing. Ensure the dust cover is reinstalled to protect against moisture and debris, but confirm it is not directly pressing against the fan's intake or exhaust vents. Periodically, it's a good idea to listen for the faint whir of the fan when you first turn on your headlights.
9.3. Electrical Connection Integrity
Corrosion or loose connections can cause voltage drops, resulting in dimming or flickering. Every year or so, during routine maintenance, consider removing the dust cover and inspecting the connections between the original wiring harness (OEM harness) and the LED driver. Ensure they are clean, dry, and firmly seated. Look for signs of melted plastic or corrosion, which could indicate an incompatible bulb or wiring issue.
9.4. System Diagnostics and Long-Term Checks
Unlike halogen bulbs that burn out instantly, LED bulbs typically degrade slowly and dim over time. Every few months, park facing a wall at night and compare the brightness and color of both headlights. A significant difference in brightness or a shift towards blue (often a sign of phosphor degradation) may indicate one bulb is starting to fail. Proactive replacement in pairs will maintain light balance.
10. Key Takeaways Summary
Upgrading to 9005 LED headlight bulbs is a significant leap in automotive lighting technology, offering superior brightness, efficiency, and lifespan over halogen standards. The process involves understanding the bulb's role, selecting a high-quality product with appropriate lumens, color temperature, and thermal management design, and installing it carefully with attention to proper positioning and alignment. It's crucial to be aware of the legal landscape, which often frowns upon halogen-to-LED conversions in reflector housings from a strict compliance standpoint, making correct aiming a non-negotiable safety and ethical practice. While common issues like hyper-flashing or glare can occur, they are typically resolvable with quality parts and correct setup. Finally, simple maintenance like keeping lenses clean and ensuring connections are secure will protect your investment and keep your roads brightly lit for years to come. An informed decision and careful installation will transform this upgrade from a simple part replacement into a genuine enhancement of nighttime driving safety.
11. คำถามที่พบบ่อย (FAQ)
11.1. หลอดไฟ LED 9005 เป็นแบบเสียบแล้วใช้ได้จริงหรือไม่?
ส่วนใหญ่ถูกออกแบบมาให้เสียบแล้วใช้ได้จริงทางกายภาพ หมายความว่าพอดีกับซ็อกเก็ต 9005 และเชื่อมต่อกับชุดสายไฟจากโรงงาน อย่างไรก็ตาม “การใช้งานได้จริง” อาจขึ้นอยู่กับรถของคุณ คุณอาจต้องเพิ่มตัวต้านทานโหลดสำหรับฟังก์ชันไฟเลี้ยวหรือโมดูลป้องกันการกะพริบสำหรับระบบไฟวิ่งกลางวันบางระบบ ตรวจสอบรายละเอียดผลิตภัณฑ์สำหรับหมายเหตุความเข้ากันได้ที่เกี่ยวข้องกับยี่ห้อและรุ่นรถของคุณเสมอ.
11.2. ฉันสามารถใช้หลอดไฟ LED 9005 ในตัวเรือนโปรเจกเตอร์ฮาโลเจนของฉันได้หรือไม่?
ตัวเรือนโปรเจกเตอร์โดยทั่วไปจะให้อภัยมากกว่าและเหมาะสำหรับการอัปเกรด LED มากกว่าตัวเรือนสะท้อนแสง เลนส์โปรเจกเตอร์ถูกออกแบบมาเพื่อโฟกัสแสงจากจุดโฟกัสเฉพาะ และหลอดไฟ LED จำนวนมากถูกวิศวกรรมให้วางชิปที่จุดเดียวกัน ผลลัพธ์มักเป็นเส้นตัดที่คมชัดและสะอาดโดยมีการกระจายแสงน้อยที่สุด การอัปเกรดมักประสบความสำเร็จอย่างมากในโปรเจกเตอร์ แต่การเล็งยังคงจำเป็น.
11.3. ทำไมหลอดไฟ LED ใหม่ของฉันไม่สว่างเท่าที่คาดหวัง?
มีหลายปัจจัยที่อาจเกี่ยวข้อง ประการแรก ตรวจสอบลูเมนที่ระบุ คำทางการตลาดเช่น “XX,000K” หมายถึงสี ไม่ใช่ความสว่าง ประการที่สอง เลนส์ไฟหน้าที่สกปรกหรือออกซิไดซ์สามารถดูดซับแสงได้มากกว่า 50% ประการที่สาม หากหลอดไฟไม่ได้นั่งอย่างสมบูรณ์แบบหรือหมุนไม่ถูกต้อง รูปแบบลำแสงจะผิดเพี้ยน กระจายแสงแทนที่จะฉายลงบนถนน สุดท้าย ตรวจสอบให้แน่ใจว่าคุณซื้อจากแบรนด์ที่มีชื่อเสียง เนื่องจาก LED ราคาถูกบางตัวกล่าวอ้างเอาต์พุตเกินจริงอย่างมาก.
11.4. หลอดไฟหน้า LED 9005 ใช้งานได้จริงนานแค่ไหน?
ในขณะที่หลายรุ่นได้รับการจัดอันดับที่ 30,000 ถึง 50,000 ชั่วโมง นี่คืออายุการใช้งานตามทฤษฎีภายใต้สภาพห้องปฏิบัติการในอุดมคติ ปัจจัยในโลกแห่งความเป็นจริงเช่นอุณหภูมิห้องเครื่องยนต์ที่สูงเกินไป แรงดันไฟฟ้ากระชาก และความล้มเหลวของระบบระบายความร้อนสามารถทำให้อายุสั้นลง อย่างไรก็ตาม หลอดไฟ LED คุณภาพสูงควรใช้งานได้หลายปี เกินกว่าอายุการใช้งานทั่วไปของหลอดฮาโลเจนที่ 500-1,000 ชั่วโมง.
11.5. การติดตั้งหลอดไฟ LED ในไฟหน้าฮาโลเจนเดิมของฉันถูกกฎหมายหรือไม่?
นี่เป็นคำถามที่ซับซ้อนที่สุด ในระดับรัฐบาลกลางของสหรัฐอเมริกา หากชุดไฟหน้าไม่ได้ถูกออกแบบและรับรองสำหรับ LED ตั้งแต่แรก การติดตั้งหลอดไฟ LED จะทำให้ชุดไฟไม่เป็นไปตามมาตรฐาน FMVSS 108 อย่างไรก็ตาม การบังคับใช้กฎหมายส่วนใหญ่เป็นความรับผิดชอบของรัฐ ความเสี่ยงทางกฎหมายของคุณต่ำที่สุดหากคุณเลือกหลอดไฟคุณภาพสูงที่เล็งอย่างถูกต้องซึ่งสร้างรูปแบบลำแสงที่สะอาดโดยไม่มีแสงจ้ามากเกินไปหรือสีน้ำเงินที่ผิดกฎหมาย เส้นทางที่ปลอดภัยที่สุดตามกฎหมายคือการเปลี่ยนชุดไฟหน้าทั้งหมดด้วยชุด LED หรือ HID ที่ได้รับการรับรอง DOT/SAE ซึ่งออกแบบมาเป็นหน่วยที่สมบูรณ์.
11.6. ฉันต้องใช้ชุดแปลงหรือแค่ซื้อหลอดไฟก็พอ?
สำหรับการใช้งานไฟสูงหรือไฟต่ำมาตรฐาน 9005 โดยทั่วไปคุณเพียงแค่ต้องใช้หลอดไฟคู่หนึ่ง คำว่า “ชุดอุปกรณ์” มักหมายถึงหลอดไฟที่บรรจุพร้อมกับอุปกรณ์เสริมที่จำเป็น เช่น โมดูลป้องกันการกะพริบ ซิปล็อค และถุงมือ สำหรับการใช้งานแบบสองฟังก์ชัน (เช่น ไฟ daytime/ไฟเลี้ยว) คุณต้องตรวจสอบให้แน่ใจว่าชุดอุปกรณ์มีตัวต้านทานโหลดที่ถูกต้องรวมอยู่ด้วย หรือคุณต้องซื้อแยกต่างหาก.