
1. 簡介:使用 H4 LED 燈照亮前方道路
在夜間或惡劣天候條件下駕駛,需要清晰可靠的照明。數十年來,鹵素燈泡的黃光一直是標準,但在亮度、效率和壽命方面卻有很大的限制。如今,對於數百萬車主來說,改變性的升級已經唾手可得:鹵素燈泡。 H4 LED 燈. .此技術可直接強力取代無所不在的 H4 鹵素燈泡,提供性能上的飛躍。升級到 LED 並不僅僅是更換一個燈泡,而是從根本上提升安全性、能見度和車輛美感。這篇文章將引導您了解有關 H4 LED 車燈的一切,從其技術基礎和無可否認的優勢,到選擇完美的套件和放心地安裝,確保您能真正照亮前方的道路。.
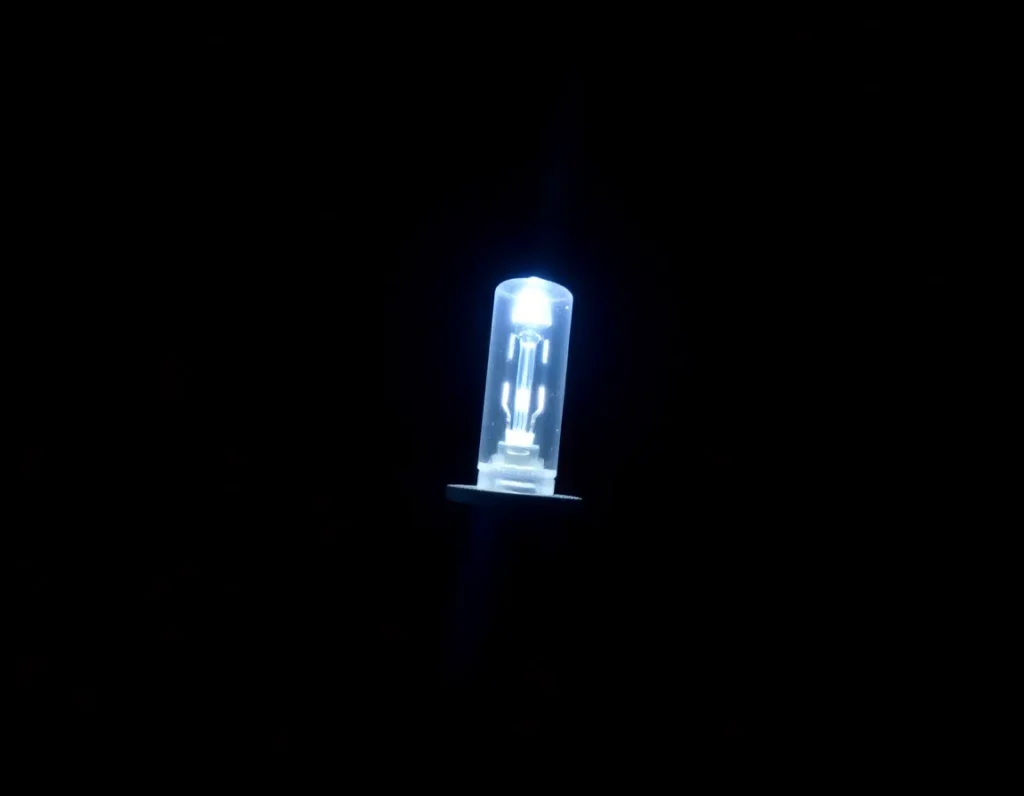
2. 什麼是 H4 LED 燈?技術與歷史概述
要瞭解 H4 LED,首先必須瞭解 H4 標準本身。H4 “指的是特定的燈泡配件或基座類型,是作為國際標準建立的。從歷史上來看,H4 燈泡是一種雙燈絲鹵素裝置,最常用於汽車的頭燈組合功能:一個燈絲用於近光,另一個通常功率較高的燈絲用於遠光。這種單一燈泡透過巧妙的設計和反射器/透鏡系統,從一個外殼提供兩種照明模式。.
傳統的鹵素燈 H4 是將電流通過鎢絲,鎢絲封裝在充滿鹵素氣體的玻璃囊中。燈絲加熱至鎢絲,產生光線。此過程本質上是低效的,因為約有 90% 的能量以熱能的形式浪費掉了。發光二極體 (LED) 技術的出現提供了一個新的範例。LED 透過電致發光(電流通過材料時材料發光的現象)產生光。這個過程更有效率、更冷卻、更耐用。.
顏色 H4 LED 燈 因此,它是一種直接改裝的燈泡,可在物理和電氣上取代標準的 H4 鹵素燈泡。然而,它使用的不是易碎的燈絲,而是安裝在電路板上的高功率 LED 晶片陣列,並搭配精密的驅動器(或鎮流器)來調節電壓和電流。最重要的是,為了複製雙光束功能,H4 LED 燈泡採用了巧妙的機械解決方案,或更常見的電子解決方案。許多設計都有一個可移動的內部遮罩或第二組 LED,當驅動器從近光切換到遠光時,這些 LED 會被電壓變化所啟動。這可讓單一 LED 裝置投射出安全道路照明所需的獨特光束模式,與原來鹵素燈泡的光學焦點相匹配,以便與車輛的頭燈外殼配合得宜。.
3. 核心優勢:為什麼要從鹵素燈升級到 H4 LED 燈泡?
升級的決定是由一系列令人信服的優點所驅使,這些優點直接影響駕駛安全和擁有體驗。.
3.1. 優異的亮度與可視性
這是最明顯的好處。H4 LED 燈泡產生的光輸出(以流明計)遠高於同類鹵素燈泡。它們能發出更接近自然日光的清晰白光。這種色溫(通常在 5000K 和 6000K 之間)可以減少眼睛疲勞,並顯著提高對比度,從而更容易分辨更遠距離的物體、道路標記和潛在危險。前方的道路不只是被照亮,而是被照得更清晰。.
3.2. 強化能源效率
LED 是效率的冠軍。典型的 H4 鹵素燈泡每個燈絲的耗電量為 55-60 瓦。高性能的 H4 LED 套件可提供更多的光線,其總消耗功率通常只有 20-40 瓦。這可以降低車輛電氣系統和交流發電機的負載,從而輕微節省燃料,並減少電池的負荷,尤其是在較舊的車輛或運行多種配件時。.
3.3. 超長壽命
鹵素燈泡的壽命以數百小時為單位(通常約為 500-1,000 小時),而優質 H4 LED 燈泡的壽命可達數萬小時,通常為 30,000 至 50,000 小時或更長。對大多數駕駛者而言,這基本上等同於在車輛的使用壽命內進行「即裝即忘」的升級,省去了與鹵素相關的頻繁更換週期。.
3.4. 增加耐用性與可靠性
LED 燈泡沒有易碎的玻璃外殼或脆弱的燈絲,因此具有更強的抗震性。這使它們成為崎嶇路面、越野和摩托車的理想選擇。其固態結構不易因物理衝擊而失效,而物理衝擊會立即破壞鹵素燈泡。.
3.5. 即開即用且效能穩定
LED 可立即達到全亮度,無需預熱時間。因此,當您開啟燈具時,可立即提供完整的照明。此外,無論外部溫度或工作範圍內的電壓如何波動,LED 的性能都能保持一致,不像鹵素燈會隨著電池電壓下降而變暗。.
4. 購買前需瞭解的主要規格和功能
並非所有的 H4 LED 套件都是一樣的。瞭解這些關鍵規格將有助於您分辨優質產品和次等產品。.
- 流明 vs. 瓦特: 專注於流明 (lm),即可見光輸出總量的量度,而非瓦特 (W),瓦特量度的是耗電量。尋找具有高流明、實際流明等級的套件(例如,每個燈泡達到 4000lm 或更高,才能達到真正的升級)。警惕誇大的聲稱。.
- 色溫: 測量單位為開氏溫度 (K)。4300K-5000K 提供暖白光,5500K-6000K 是純淨明亮的白光(最受歡迎),而 6500K+ 則趨向較冷的藍色調。為了達到最佳能見度及符合法律規定,建議使用 5000K-6000K。.
- 晶片類型和數量: LED 晶片本身非常重要。請選擇 CREE、OSRAM 或 Philips Lumileds 等知名品牌。如果芯片質量低,則芯片越多並不總是意味著光線越好;使用較少優質芯片的精心設計的陣列通常會優於使用大量廉價芯片的陣列。.
- 散熱器設計: LED 雖然高效,但仍會在晶片層產生熱量。有效的冷卻是延長壽命的關鍵。尋找大型、鰭片狀的鋁製散熱器,以及越來越多的風扇冷卻 (主動式) 系統。好的散熱器在操作時會有溫暖的感覺,而不是灼熱。.
- Driver/Canbus Compatibility: 驅動器是 LED 燈泡的大腦。高品質、防水的驅動器可確保穩定的電流,防止閃爍。對於配備電腦控制電氣系統 (CANBUS) 的現代汽車,您可能需要「CANBUS-ready」或內建電阻或解碼器的「無錯誤」燈泡,以防止儀表板警示燈亮起。.
- Beam Pattern Certification: 這一點對合法性和安全性至關重要。最好的套件是模仿鹵素燈泡的準確燈絲位置而設計(通常稱為「1:1 燈絲位置」),並經過測試以產生符合標準的光束模式(如 ECE 或 SAE),不會散射光線而使迎面駛來的車輛失明。.
5.如何選擇最佳的 H4 LED 套件:購買指南
After understanding the key features, follow this practical guide to choose the kit that suits your vehicle and needs.
5.1.確認您的燈泡類型
首先,確認您的車輛使用 H4 燈泡。請參閱您的車主手冊、檢查現有的燈泡,或使用線上車輛燈泡查詢工具。請勿假設;不正確的配備將無法使用。.
5.2.優先處理光束模式和法律合規性
這是最重要的安全和法律因素。尋找明確說明它們是為適當的光束模式而設計的套件。尋找像 “ECE R10 approved”、“SAE/DOT compliant 「或 」projector-ready ”這樣的詞彙。閱讀包含牆上光束截距照片的評論。光束模式完美的套件比流明稍高但模式控制不佳的套件更有價值。.
5.3.評估您車輛的頭燈外殼
您的頭燈外殼是反射器(碗狀)還是投射器(有透鏡)?反射燈外殼對燈泡設計更為敏感。許多現代的 H4 LED 套件都針對投射燈進行了優化,但也有適合反射燈的套件。有些套件可能過大,無法安裝在頭燈的防塵罩內 - 請檢查產品尺寸和車輛特定的安裝說明。.
5.4. Consider Heat Dissipation Methods
Passive (heatsink-only) systems are quiet and generally reliable. Active (fan-cooled) systems are excellent for compact spaces and intense heat dissipation, but introduce a moving part that could fail over a long period. Both have their advantages; choose based on your space constraints and preferences.
5.5. Check plug-and-play compatibility
Ensure the kit is truly plug-and-play. It should connect directly to your original H4 wiring harness without splicing wires. Confirm whether you need a CANBUS decoder (modern vehicles often include or have it built-in).
5.6. Brand reputation and warranty
Invest in reputable brands known for quality and customer support. A robust warranty of at least two years or more is a good indicator of the manufacturer's confidence in their product. Avoid no-name brands with amazing specs but low prices.
6. Installation Guide: Steps and Common Issues
Installing H4 LED bulbs is generally straightforward but requires care and attention to detail.
6.1. Tools and Preparation
You will need: your new H4 LED kit, gloves (to avoid skin oils contacting the bulb heatsink), and possibly basic tools like a screwdriver or socket wrench. Park the vehicle on level ground, turn off the engine, and for absolute safety, disconnect the negative terminal of the car battery.
6.2. Installation Steps
- Accessing the Headlight Assembly: Open the hood and locate the back of the headlight you want to replace. You may need to remove the dust cover, which usually twists off or unclips.
- Remove the old bulb: Unplug the wiring connector from the back of the halogen bulb. Loosen the spring clip or metal retaining wire that holds the bulb in place. Carefully remove the old halogen bulb without shaking it (if the bulb breaks, carefully remove all glass fragments).
- Prepare the new LED bulb: Unpack the new bulb without touching the LED chip or heat sink with your fingers. If there is a separate driver, connect the bulb to the driver first. Do not fully assemble all parts until you have installed the bulb on the housing for testing.
- Test fit and positioning: This is a critical step. Insert the LED bulb into the headlight socket, mimicking the position of the old halogen bulb base. The LED array has a specific orientation (usually the chips face left and right, not up and down) to produce the correct beam pattern. Many bulbs have notches or tabs to ensure correct alignment. Secure with the original spring clip.
- Manage the driver and wiring: After the bulb is in place and secured, you must find a safe, dry location to mount the driver box. Use cable ties (usually included) to secure it away from moving parts, heat sources, and moisture. Route the wiring neatly to avoid pinching. Plug the driver into the vehicle's original H4 connector.
- Reassemble and test: If everything looks good, reinstall the dust cover. You may need to cut a small notch for the wires to pass through – some kits include rubber grommets. Reconnect the car battery. Turn on the headlights and test both low beam and high beam. Check the beam pattern against a wall or garage door on level ground to ensure a sharp cutoff line.
6.3. Common Challenges and Solutions
- Bulb doesn't fit / dust cover won't close: This is the most common issue. The driver or heat sink may be too large. Solutions include using extension rings (sometimes included), carefully modifying the dust cover, or in some cases choosing a more compact bulb model.
- Flickering or hyperflash: This usually indicates a CANBUS error or driver incompatibility. Ensure you are using a CANBUS-ready bulb for your vehicle. Some kits include additional decoders or allow you to switch the driver to a specific mode.
- 單側不亮: Double-check all connections are fully seated. Ensure polarity is correct—although H4 is usually polarity-insensitive, some LED drivers are sensitive. Try swapping the left and right bulbs to isolate whether the issue is with the bulb or the vehicle's wiring.
- Poor beam pattern/glare: This is almost always due to incorrect bulb orientation. Remove the bulb and rotate it 90 or 180 degrees, then re-secure it. The LED chips must be horizontally aligned within the housing.
7. Legal and Safety Considerations: Beam Patterns, MOT, and Roadworthiness
Upgrading to H4 LED 燈 is not just a performance issue; it is a modification that carries significant legal and safety responsibilities. The primary consideration for road use is ensuring that your headlights produce a correct and safe beam pattern that does not dazzle other drivers. Halogen housings are designed to reflect and focus light from a small cylindrical filament at a specific position. LED bulbs have a different light-emitting shape and position, and if they do not perfectly match the housing, they can scatter light incorrectly, causing dangerous glare and dark zones. This is why proper installation and bulb orientation, as described, are non-negotiable for road safety.
Legally, standards vary by region but are generally strict. In the UK and many European countries, vehicles must pass an MOT test, which includes checks on headlight aim and pattern. The official stance is that any headlight unit not type-approved for LED bulbs is technically illegal if such bulbs are installed, even if the beam quality is good. While a correctly aligned, properly installed LED kit in a halogen housing may pass the beam pattern test on MOT equipment, an examiner may still fail the vehicle for non-compliance with type approval (ECE R37 for halogen, ECE R128 for LED). The risk of failure is real, and insurance companies may view non-compliant lighting as a modification, potentially voiding your policy in the event of an accident.
In the US, regulations are based on Federal Motor Vehicle Safety Standard (FMVSS) 108, which effectively requires that any replacement bulb be of the same type as originally installed. This makes most LED retrofits in halogen housings non-compliant at the federal level, although enforcement is typically a state matter. The key takeaway is universal: to ensure worry-free legal road use, the only sure solution is to replace the entire headlight assembly with a unit that is type-approved and designed from the ground up for LED technology. For off-road or show purposes, these restrictions do not apply, but responsible users should always deactivate non-compliant lighting on public roads.
8. Troubleshooting Common H4 LED Issues
Even with careful selection and installation, you may still encounter issues when retrofitting H4 LEDs. Here is a systematic guide to diagnosing and resolving the most common problems.
8.1. Bulb Doesn't Fit or Dust Cap Won't Close
This is the most common physical challenge. The integrated driver or large heatsink at the back of the bulb may protrude too far into the engine bay, preventing the rubber dust cap from sealing. First, check if your kit includes plastic extension rings. These can widen the cap's opening. If not, sometimes you can carefully trim the inside of the dust cap (avoiding cutting the sealing lip). As a last resort, look for a small, breathable but waterproof cap to replace the original. Choosing bulb models known for compact, low-profile drivers is the best preventive measure.
8.2. Flickering, Hyper-Flashing, or Error Messages
Modern vehicles use CANBUS systems that monitor bulb health by detecting small electrical loads. LEDs consume far less power than halogen bulbs, and the vehicle's computer may interpret this as a 'burnt-out bulb,' causing flickering or dashboard warnings. The solution is to use 'CANBUS-ready' bulbs that have built-in load resistors or smart drivers to simulate the electrical characteristics of halogen bulbs. If flickering persists, you may need to add external decoder or capacitor kits. For hyper-flashing turn signals, ensure the bulbs are specifically CANBUS-compatible for turn signal use.
8.3. 單側不亮或燈光間歇性
如果一顆 H4 LED 燈故障,首先將燈泡從左側換到右側。如果問題跟著燈泡移動,則燈泡或其驅動器故障。如果問題仍留在同一側,則問題出在車輛的線路、插座或接地連接。確保插頭完全插入——有些原廠連接器可能較緊。此外,雖然 H4 底座本身沒有極性,但有些 LED 驅動器有。嘗試將插頭在燈泡連接器上旋轉 180 度。檢查車輛頭燈插座是否有腐蝕或彎曲的針腳。.
8.4. 光束模式不佳、過度眩光或暗點
如前所述,這幾乎完全是安裝錯誤。安裝在燈具內時,LED 晶片必須水平對齊(左右方向)。如果光束圖案被不正確地切斷或向上投射光線,燈泡可能旋轉了 90 度。取下固定夾或環,旋轉燈泡並重新安裝。在夜間對著牆壁檢查圖案以確認。如果方向正確但圖案仍然不佳,則該特定燈泡型號可能與您車輛的反射器或透鏡設計在光學上不相容。.
8.5. 過熱或使用壽命縮短
雖然 LED 在發光體處比鹵素燈運行溫度更低,但驅動器和散熱器可能非常熱。如果熱量未散發,會造成永久性損壞。確保散熱器周圍有足夠的自由空氣空間,且未接觸線路或塑膠。切勿將 LED 安裝在非為其設計的封閉燈具中,因為停滯的熱量會大幅縮短其使用壽命。如果燈泡過早失效,過熱是可能的原因。.
9. 頂級應用:從日常駕駛到越野和摩托車
H4 插座的多功能性使 LED 升級適用於各種車輛,每種車輛的優先順序都略有不同。.
9.1. 日常駕駛通勤車
對於一般通勤族而言,最主要的動機是提高安全性和減少疲勞。更白、更明亮的燈光 H4 LED 燈 提高對比度,讓道路邊緣、碎石和行人在弱光和雨天環境下更清晰可見。瞬間開啟的功能和更長的使用壽命也意味著更高的可靠性,以及更少頻繁、惱人的燈泡更換。在此應用中,請優先使用光束型式經過驗證、乾淨的燈泡,以避免對向來車造成眩光,並確保近光燈的光線散佈平順、寬廣。.
9.2. 長途公路和夜間駕駛
經常在夜間無照明的高速公路上駕駛的人,會因高品質 LED 遠光的投射距離增加而獲益良多。好的套件能提供強大、聚焦的熱點,照亮前方數百尺遠的道路標誌和潛在危險,減少駕駛疲勞。尋找具有合法高流明輸出的燈泡,並針對距離進行最佳化設計。寬廣的近光束與穿透力強的遠光束結合,創造出理想的旅行安全組合。.
9.3. 越野和探險車輛
在越野應用中,合法的光束圖案通常次於原始輸出,H4 LED 改裝是一項改變遊戲規則的技術。它們提供大量光線來導航小徑、營地和工作區域。優質 LED 燈泡的堅固結構(沒有脆弱的燈絲)更能承受崎嶇地形的振動和衝擊。對於這些使用者來說,最大流明、耐用的結構,有時甚至是具有專用「僅限越野」模式(同時啟動遠光和近光元件)的燈泡,是主要的吸引力。.
9.4. Motorcycles
For motorcycle riders, being seen is just as important as seeing. Upgrading the typically weaker halogen H4 to LED significantly increases the vehicle's frontal visibility to other drivers. Lower power consumption also reduces the load on the motorcycle's usually smaller charging system, freeing up wattage for other accessories. The compact size of many LED bulbs is a major advantage in tight motorcycle headlight housings. Crucially, riders must ensure that any upgrade does not produce harsh glare, as they are often at the same eye level as car drivers.
9.5. Classic and Vintage Cars
Classic car owners choose LED upgrades for reliability and safety, hoping to gain modern performance while preserving the original appearance. The key here is finding bulbs that maintain a classic color temperature (closer to warm white rather than cool blue) if needed, and that can be installed without modification into the usually compact original housings. This allows these vehicles to be safer at night without altering their iconic look.
10. Maintenance and Care for Long-Lasting H4 LED Performance
While H4 LED bulbs are known for low maintenance compared to halogen, a few simple practices will ensure they deliver optimal performance over their long lifespan.
First, handle the bulbs carefully during installation and subsequent handling. Avoid touching the silicone lens on the LED chip with bare fingers, as skin oils can cause hot spots and degrade the material over time. If touched accidentally, clean gently with isopropyl alcohol. Ensure all electrical connections are secure and moisture-proof. Plugs should click firmly into the bulb's connector, and any aftermarket wiring (e.g., for decoders) should be secured with cable ties away from moving parts or extreme heat sources.
Periodically inspect the bulb and its surroundings. Check the heatsink fins for dirt, dust, or debris buildup, as this insulating layer can cause overheating. A quick blast of compressed air can help. Check the rubber dust covers to ensure they still seal properly, preventing water and contaminants from entering the headlight assembly and potentially corroding the bulb's contacts.
Unlike halogen bulbs that dim gradually, LEDs typically maintain consistent output until failure. However, it's a good idea to visually check both headlights against a wall at night every six months or so to confirm they are both functioning and the beam pattern remains level and correct. If you notice one light significantly dimmer or a color change (a sign of emitter failure), it needs replacement. Finally, always store spare bulbs or the original halogens in a clean, dry place. By following these simple steps, your H4 LED upgrade will provide years of reliable, bright illumination.
11. Key Takeaways
Upgrading to H4 LED headlights represents a significant technological leap from traditional halogen bulbs. At its core, this modification replaces the dual-filament H4 bulb with a unit using light-emitting diodes, offering significantly improved light output, whiter color temperature, and longer lifespan. The core advantages are compelling: you gain enhanced nighttime visibility and safety, reduced energy consumption on your vehicle's electrical system, and the convenience of not having to replace bulbs every year or two.
However, this upgrade is not a simple plug-and-play guarantee of success. Critical technical factors must be considered, such as lumens (actual brightness), Kelvin (light color), and crucially, the thermal management system—passive heatsinks are often more reliable than noisy fans. The biggest challenge is optical compatibility; the bulb must be installed with the LED chips perfectly horizontal to produce a legal, safe beam pattern in a halogen housing, and even then, legal roadworthiness may be a gray area depending on local type approval regulations.
Choosing the right kit involves matching the bulb's physical dimensions to your vehicle's headlight cavity, ensuring it has CANBUS compatibility to prevent flickering, and selecting a reputable brand known for quality components. Installation requires patience to ensure correct orientation and seating, often involving minor modifications like extension rings. Applications are broad, benefiting daily drivers, long-distance travelers, off-road enthusiasts, motorcyclists, and classic car owners. With minimal maintenance—mainly keeping components clean and connections secure—a well-chosen H4 LED kit can transform your nighttime driving experience for many years.
12. FAQ (Frequently Asked Questions)
12.1. Are H4 LED bulbs legal for road use?
This is the most complex issue. Technically, in most regions (including the UK/EU and the US), replacing halogen bulbs with LED bulbs in fixtures not specifically type-approved for LED does not comply with vehicle lighting regulations. Legality often depends on passing a beam pattern test. While a high-quality LED aimed correctly may pass the pattern inspection, inspectors may still deem it non-compliant. To guarantee legality, you must replace the entire headlight unit with an ECE R128 or SAE/DOT certified LED assembly.
12.2. Why do my new H4 LED bulbs flicker?
Flickering is almost always a CANBUS or PWM (pulse-width modulation) issue. Your vehicle's computer checks the bulb by sending small current pulses. The low consumption of LEDs makes them appear damaged. You need 'CANBUS-compatible' bulbs with built-in error cancellation, or you may need to install an external decoder or capacitor to simulate the electrical load of a halogen bulb.
12.3. Can I directly plug H4 LED bulbs into an old halogen socket?
Physically, yes—the base is the same. However, for reliable operation, you must consider three things: 1) physical installation (the driver may be too large), 2) correct rotation direction of the bulb for the beam pattern, and 3) whether your vehicle requires CANBUS-compatible bulbs to avoid error messages. It is rarely just a simple plug-and-play operation.
12.4. Do H4 LED bulbs get hot?
The LED chips themselves produce very little radiant heat compared to a halogen filament. However, the driver and heatsink at the back of the bulb can become quite hot as they dissipate the heat generated at the semiconductor junction. This is why proper heat dissipation and airflow are crucial for longevity.
12.5. What is the actual lifespan of H4 LED headlight bulbs?
While many bulbs are rated for 30,000 to 50,000 hours, actual lifespan in a vehicle depends heavily on thermal management, electrical stability, and manufacturing quality. In a suitable application, a well-designed bulb can easily last 5-10 years, far exceeding the typical 500-1,000 hour lifespan of halogen bulbs.
12.6. Why is there now a dark spot or strange pattern in my headlight beam?
This is a clear sign of incorrect bulb orientation. Your reflector or projector bowl is designed for light emitted from a specific position of the halogen filament. If the LED chips are not precisely aligned with the filament position, the light will be scattered incorrectly. Remove the bulb and rotate it 90 degrees, then retest the pattern on a wall until it is correct.
12.7. Are fan-cooled or heatsink bulbs better?
Passive heatsink designs are generally considered more reliable in the long term because they have no moving parts to fail. Fans can become clogged with dirt or fail, leading to overheating. However, very high-power LEDs sometimes require active cooling. For most applications, a well-designed passive heatsink is preferred.