
1. Introduction: Lighting the Way Forward with H4 LED Lights
Driving at night or in adverse weather conditions requires clear and reliable illumination. For decades, the yellowish glow of halogen bulbs was the standard, but it had significant limitations in brightness, efficiency, and lifespan. Today, a transformative upgrade is within reach for millions of vehicle owners: the H4 LED light. This technology represents a direct and powerful replacement for the ubiquitous H4 halogen bulb, offering a quantum leap in performance. Upgrading to LED is not just changing a bulb; it is fundamentally improving safety, visibility, and the vehicle's aesthetics. This article will guide you through everything you need to know about H4 LED lights, from their technical fundamentals and undeniable advantages to selecting the perfect kit and installing it with confidence, ensuring you can truly light the way forward.
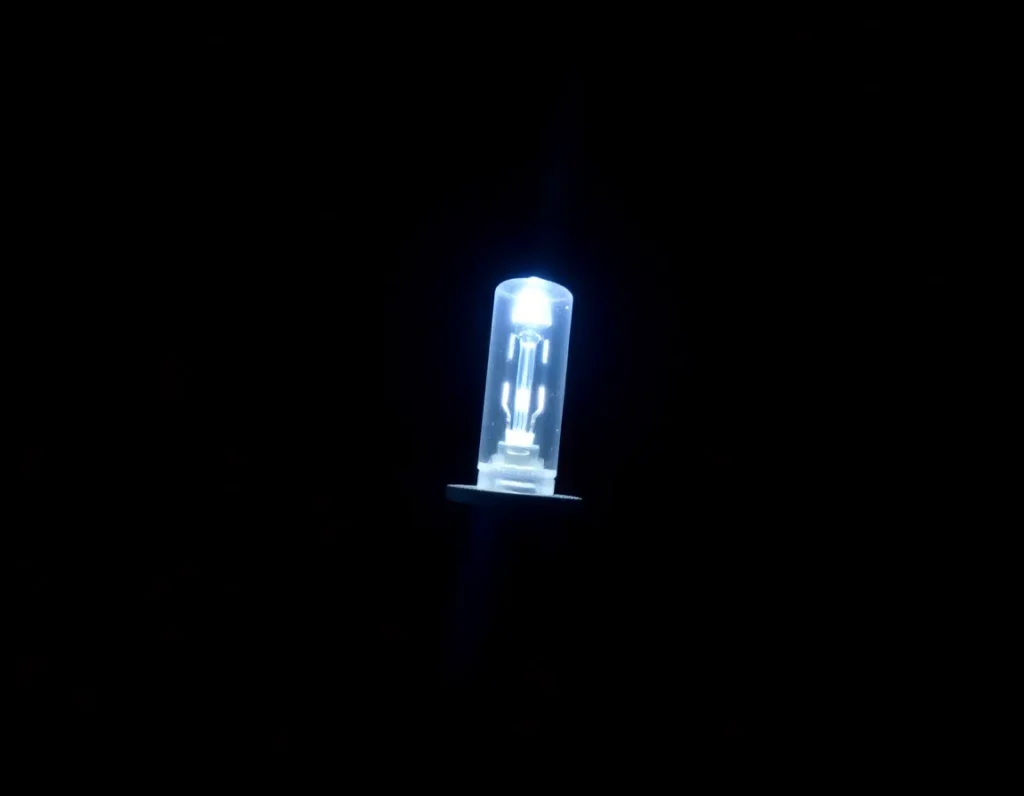
2. What is an H4 LED Light? A Technical and Historical Overview
To understand the H4 LED, one must first understand the H4 standard itself. The designation “H4” refers to a specific type of lamp socket or base, established as an international standard. Historically, an H4 lamp is a dual-filament halogen unit, most commonly used in vehicles for a combined headlight function: one filament for the low beam and a separate, usually higher-wattage, filament for the high beam. This single lamp, through clever design and the reflector/lens system, provides both lighting modes from a single housing.
The traditional halogen H4 operates by passing an electric current through a tungsten filament enclosed in a glass capsule filled with halogen gas. The filament heats to incandescence, producing light. This process is inherently inefficient, as about 90% of the energy is wasted as heat. The advent of Light Emitting Diode (LED) technology presented a new paradigm. LEDs produce light through electroluminescence — the phenomenon of a material emitting light when an electric current passes through it. This process is much more efficient, cooler, and more durable.
An H4 LED light is, therefore, a direct retrofit lamp designed to physically and electrically replace a standard H4 halogen lamp. However, instead of a fragile filament, it uses an array of high-power LED chips mounted on a circuit board, paired with a sophisticated driver (or ballast) that regulates voltage and current. Crucially, to replicate the dual-beam function, H4 LED lamps employ a clever mechanical solution or, more commonly, an electronic one. Many designs feature an internal movable shield or a second set of LEDs that are activated by the change in voltage when the driver switches from low to high beam. This allows the single LED unit to project the distinct beam patterns necessary for safe road illumination, matching the optical focal point of the original halogen lamp to function correctly with the vehicle's headlight housing.
3. The Key Advantages: Why Upgrade from Halogen to H4 LED Lamps
The decision to upgrade is driven by a compelling set of advantages that directly impact driving safety and ownership experience.
3.1. Superior Brightness and Visibility
This is the most noticeable benefit. H4 LED lamps produce significantly higher luminous output (measured in lumens) than their halogen counterparts. They emit a crisp, white light that is closer to natural daylight. This color temperature, typically between 5000K and 6000K, reduces eye strain and dramatically improves contrast, making it easier to distinguish objects, road markings, and potential hazards at a greater distance. The road ahead is not just illuminated; it is illuminated with clarity.
3.2. Enhanced Energy Efficiency
LEDs are champions of efficiency. A typical H4 halogen lamp may consume 55-60 watts per filament. A high-performance H4 LED kit that delivers much more light typically consumes only 20-40 watts in total. This reduces the load on the vehicle's electrical system and alternator, which can contribute to slight fuel savings and less stress on the battery, especially in older vehicles or when using multiple accessories.
3.3. Exceptional Longevity
While the lifespan of a halogen lamp is measured in hundreds of hours (usually around 500-1,000), a quality H4 LED lamp is rated for tens of thousands of hours — typically 30,000 to 50,000 hours or more. This essentially translates to a “fit and forget” upgrade for the life of the vehicle for most drivers, eliminating the frequent replacement cycle associated with halogens.
3.4. Greater Durability and Reliability
Without a fragile glass envelope or delicate filament, LED lamps are much more resistant to vibration and shock. This makes them ideal for rough roads, off-roading, and motorcycles. Their solid-state construction is less susceptible to failure from physical impacts that would instantly destroy a halogen lamp.
3.5. Instant Illumination and Stable Performance
LEDs reach maximum brightness instantly, with no warm-up time. This provides immediate full illumination when lights are turned on. Additionally, their performance is consistent regardless of external temperature or voltage fluctuations within their operating range, unlike halogens that dim when battery voltage drops.
4. Key Specifications and Features to Understand Before Buying
Not all H4 LED kits are the same. Understanding these key specifications will help you discern quality products from inferior ones.
- Lumens vs. Watts: Focus on lumens (lm), the measure of total visible light output, not watts (W), which measure power consumption. Look for kits with high, realistic lumen ratings (e.g., 4000lm per bulb or more for a true upgrade). Beware of exaggerated claims.
- Color Temperature: Measured in Kelvins (K). 4300K-5000K offers a warm white light, 5500K-6000K is a pure, bright white (the most popular), and 6500K+ tends toward a cooler, bluish tint. For optimal visibility and legal compliance, 5000K-6000K is recommended.
- Chip Type and Count: The LED chips themselves are critical. Look for reputable brands like CREE, OSRAM, or Philips Lumileds. More chips don't always mean better light if they are low quality; a well-designed array with a few high-quality chips often outperforms a crowded array of cheap chips.
- Heatsink Design: LEDs are efficient but still generate heat at the chip level. Effective cooling is key to longevity. Look for large, finned aluminum heatsinks and, increasingly, fan-assisted (active) systems. A good heatsink should be warm, not scalding, during operation.
- Driver/Canbus Compatibility: The driver is the brain of the LED bulb. A high-quality, waterproof driver ensures stable current and prevents flickering. For modern vehicles with computer-controlled electrical systems (CANBUS), you may need “CANBUS-ready” or “error-free” bulbs with built-in resistors or decoders to avoid dashboard warning lights.
- Beam Pattern Certification: This is crucial for legality and safety. The best kits are designed to mimic the exact filament position of a halogen bulb (often called “1:1 filament positioning”) and are tested to produce a compliant beam pattern (such as ECE or SAE) that doesn't scatter light or dazzle oncoming traffic.
5. How to Choose the Best H4 LED Kit: Buyer's Guide
Armed with knowledge of the key features, follow this practical guide to select the right kit for your vehicle and needs.
5.1. Check Your Bulb Type
First, confirm that your vehicle uses H4 bulbs. Consult the owner's manual, check the existing bulb, or use an online vehicle bulb lookup tool. Don't assume; an incorrect fit won't work.
5.2. Prioritize Beam Pattern and Legal Compliance
This is the most important safety and legal factor. Look for kits that explicitly state they are designed for a proper beam pattern. Look for phrases like “ECE R10 approved”, “SAE/DOT compliant”, or “projector-ready”. Read reviews that include photos of the beam cutoff on a wall. A kit with a perfect beam pattern is worth more than one with slightly higher lumens but poor pattern control.
5.3. Evaluate Your Vehicle's Headlight Housing
Is your headlight housing a reflector (bowl-shaped) or a projector (has a lens)? Reflector housings are more sensitive to bulb design. Many modern H4 LED kits are optimized for projectors, but there are also good ones for reflectors. Some kits may be too large to fit behind your headlight's dust cover—check product dimensions and vehicle-specific fitment notes.
5.4. Consider the Cooling Method
Passive systems (heat sink only) are silent and generally reliable. Active systems (with fan) are excellent for compact spaces and intense heat dissipation, but introduce a moving part that can fail over a very long period. Both are valid; choose based on your space constraints and preference.
5.5. Check Plug-and-Play Compatibility
Ensure the kit is truly plug-and-play. It should connect directly to the factory H4 wiring harness without splicing wires. Check if you need a CANBUS decoder (often included or built-in for modern cars).
5.6. Brand Reputation and Warranty
Invest in a reputable brand known for quality and customer support. A solid warranty (2 years or more) is a good indicator of the manufacturer's confidence in their product. Avoid unknown brands with unbelievable specifications and very low prices.
6. Installation Guide: Step-by-Step Process and Common Challenges
Installing H4 LED bulbs is generally straightforward, but it requires care and attention to detail.
6.1. Tools and Preparation
You will need: your new H4 LED kit, gloves (to avoid touching the bulb's heat sink with skin oils), and possibly basic tools like a screwdriver or socket set. Park on a level surface, turn off the engine, and disconnect the negative terminal of the car battery for absolute safety.
6.2. Step-by-Step Installation
- Access the Headlight Assembly: Open the hood and locate the back of the headlight you are replacing. You may need to remove a dust cover, which is typically unscrewed or released with clips.
- Remove the Old Bulb: Disconnect the wiring connector from the back of the halogen bulb. Release the spring clip or metal retaining wire that holds the bulb in place. Carefully remove the old halogen bulb without shaking it (if it breaks, carefully extract all glass fragments).
- Prepare the New LED Bulb: Without touching the LED chips or heat sink with your fingers, unpack the new bulb. If it has a separate driver, connect the bulb to the driver first. Do not fully assemble everything until you test the fit of the bulb in the housing.
- Test Fit and Orientation: This is a critical step. Insert the LED bulb into the headlight socket, mimicking the position of the old halogen bulb base. The LED array has a specific orientation (usually with the chips facing left and right, not up and down) to create the correct beam pattern. Many bulbs have a notch or tab to ensure proper alignment. Secure it with the original spring clip.
- Manage the Driver and Wiring: Once the bulb is seated and secured, you need to find a safe, dry place to mount the driver box. Use cable ties (usually provided) to secure it away from moving parts, heat sources, and moisture. Route the wires neatly to avoid pinching. Connect the driver to the vehicle's factory H4 connector.
- Reassemble and Test: If everything fits without forcing, replace the dust cover. You may need to cut a small notch for the wires to pass through—some kits include a rubber grommet for this. Reconnect the car battery. Turn on the headlights and test the low and high beams. Check the beam pattern against a wall or garage door on level ground to ensure a sharp cutoff line.
6.3. Common Challenges and Solutions
- The Bulb Doesn't Fit / The Dust Cover Won't Close: This is the most common issue. The driver or heat sink may be too large. Solutions include using an extension ring (sometimes included), carefully modifying the dust cover, or in some cases, selecting a more compact bulb model.
- Flickering or Hyperflash: This usually indicates a CANBUS error or incompatible driver. Make sure you are using CANBUS-compatible bulbs for your vehicle. Some kits include additional decoders or allow you to switch the driver to a specific mode.
- One Side Not Working: Double-check that all connections are fully seated. Ensure the polarity is correct—although H4 is generally not polarity-sensitive, some LED drivers are. Try swapping the left and right bulbs to isolate whether the issue is with the bulb or the vehicle's wiring.
- Poor Beam Pattern / Glare: This is almost always due to incorrect bulb orientation. Remove the bulb and rotate it 90 or 180 degrees, then secure it again. The LED chips should align horizontally in the housing.
7. Legal and Safety Considerations: Beam Standards, MOT, and Road-Use Compliance
Upgrading to a H4 LED light is not just about performance; it's a modification that carries significant legal and safety responsibilities. The primary concern for road use is ensuring your headlights produce a correct and safe beam pattern that does not dazzle other drivers. Halogen housings are designed to reflect and focus light from a small cylindrical filament at a specific location. LED bulbs, with their differently shaped and positioned emitters, can scatter light incorrectly if not perfectly matched with the housing, creating dangerous glare and dark spots. That's why proper installation and bulb orientation, as discussed, are non-negotiable for road safety.
Legally, standards vary by region, but they are generally strict. In the UK and many European countries, vehicles must pass an MOT test, which includes a check of headlight alignment and pattern. The official position is that any headlight unit not type-approved for use with LED bulbs is technically illegal if such bulbs are installed, regardless of beam quality. While a well-aligned, correctly installed LED kit in a halogen housing might pass the beam pattern test on MOT equipment, the tester can still fail the vehicle based on non-compliance with type approval (ECE R37 for halogen, ECE R128 for LED). The risk of failure is real, and insurers may consider non-compliant lights as a modification that invalidates a policy in the event of an accident.
In the United States, regulations are based on Federal Motor Vehicle Safety Standard (FMVSS) 108, which effectively requires any replacement bulb to be of the same type as originally installed. This makes most LED retrofits in halogen housings non-compliant at the federal level, though enforcement is typically a state matter. The bottom line is universal: for guaranteed road legality and peace of mind, the only definitive solution is to replace the entire headlight assembly with a type-approved unit designed from the ground up for LED technology. For off-road or show use, these restrictions do not apply, but responsible users should always disable non-compliant lights when on public roads.
8. Solução de Problemas Comuns de LED H4
Mesmo com seleção e instalação cuidadosas, você pode encontrar problemas com sua conversão de LED H4. Aqui está um guia sistemático para diagnosticar e resolver os problemas mais comuns.
8.1. A Lâmpada Não Encaixa ou a Tampa de Poeira Não Fecha
Este é o desafio físico mais frequente. O driver integrado ou o dissipador de calor grande na parte traseira da lâmpada pode se projetar muito para dentro do compartimento do motor, impedindo que a tampa de borracha contra poeira vede. Primeiro, verifique se o seu kit inclui anéis extensores de plástico. Eles alargam a abertura da tampa. Se não, às vezes você pode cuidadosamente aparar o interior da tampa de poeira (evite cortar o lábio de vedação). Como último recurso, uma tampa pequena, respirável, mas à prova d’água, pode ser obtida para substituir a original. Selecionar um modelo de lâmpada conhecido por ter um driver compacto e de perfil baixo é a melhor medida preventiva.
8.2. Cintilação, Hiperpiscar ou Mensagens de Erro
Veículos modernos usam um sistema CANBUS para monitorar a saúde das lâmpadas, detectando pequenas cargas elétricas. Os LEDs consomem significativamente menos energia do que os halogênios, o que o computador do carro interpreta como uma “lâmpada queimada”, causando cintilação ou avisos no painel. A solução é usar lâmpadas “prontas para CANBUS”, que têm resistores de carga integrados ou drivers inteligentes que simulam a assinatura elétrica de um halogênio. Se a cintilação persistir, você pode precisar adicionar um decodificador externo ou kit de capacitor. Para hiperpiscar do indicador de direção, certifique-se de que as lâmpadas sejam compatíveis com CANBUS especificamente para indicadores de direção.
8.3. Um Lado Não Funciona ou Luzes Intermitentes
Se uma luz de LED H4 falhar, primeiro troque as lâmpadas da esquerda para a direita. Se o problema se mover, a lâmpada ou seu driver está com defeito. Se o problema permanecer no mesmo lado, o problema está na fiação do veículo, soquete ou conexão de aterramento. Certifique-se de que o plugue esteja totalmente encaixado – alguns conectores OEM podem ser apertados. Além disso, embora a base H4 em si não seja polarizada, alguns drivers de LED são. Tente girar o plugue 180 graus no conector da lâmpada. Verifique se há corrosão ou pinos tortos no soquete do farol do veículo.
8.4. Padrão de Feixe Ruim, Ofuscamento Excessivo ou Pontos Escuros
Como enfatizado, isso é quase exclusivamente um erro de instalação. Os chips de LED devem ser alinhados horizontalmente (lado a lado) quando instalados no alojamento. Se o padrão do feixe for cortado incorretamente ou projetar luz para cima, a lâmpada provavelmente está girada 90 graus. Remova o clipe ou anel de retenção, gire a lâmpada e reassente-a. Veja o padrão em uma parede à noite para confirmar. Se o padrão permanecer ruim com orientação perfeita, o modelo específico da lâmpada pode simplesmente ser opticamente incompatível com o refletor ou design da lente do seu veículo.
8.5. Superaquecimento ou Vida Útil Reduzida
Embora os LEDs funcionem mais frios do que os halogênios no emissor, o driver e o dissipador de calor podem ficar muito quentes. Danos permanentes ocorrem se o calor não for dissipado. Certifique-se de que o dissipador de calor tenha amplo espaço de ar livre ao redor e não esteja encostado em fiação ou plástico. Nunca instale LEDs em alojamentos fechados não projetados para eles, pois o calor estagnado encurtará drasticamente sua vida útil. Se uma lâmpada falhar prematuramente, o superaquecimento é um provável culpado.
9. Principais Aplicações: De Carros de Passeio a Off-Road e Motocicletas
A versatilidade do soquete H4 torna as atualizações de LED benéficas em uma ampla gama de veículos, cada um com prioridades ligeiramente diferentes.
9.1. Carros de Passeio para Uso Diário
For the average driver, the main motivation is greater safety and less effort. The whiter, brighter light of an H4 LED light improves contrast, making road edges, debris, and pedestrians more visible in low-light and rainy conditions. The instant-on capability and longer lifespan also mean greater reliability and fewer frequent, annoying bulb changes. For this application, prioritize bulbs with a clean, proven beam pattern to avoid glare for oncoming traffic and ensure a smooth, wide light spread in the low beam.
9.2. Long-Distance and Night Highway Driving
Those who frequently drive on unlit highways at night benefit immensely from the increased beam reach of a high-quality LED high beam. A good kit will provide a powerful, focused hotspot that illuminates traffic signs and potential hazards hundreds of meters ahead, reducing driver fatigue. Look for bulbs with high, legitimate luminous flux (lumens) and a design optimized for distance. The combination of a wide low beam and a penetrating high beam creates an ideal safety package for travel.
9.3. Off-Road and Adventure Vehicles
In off-road applications, where legal beam patterns are often secondary to raw output, H4 to LED conversions are a game-changer. They provide massive light for navigating trails, campsites, and work areas. The robust construction of good LED bulbs (no fragile filaments) withstands the vibrations and shocks of rough terrain better. For these users, maximum lumens, durable construction, and sometimes even bulbs with a dedicated “off-road only” mode that activates both high and low beam elements simultaneously are the main attractions.
9.4. Motorcycles
For motorcyclists, being seen is as important as seeing. Upgrading a motorcycle's often weak halogen H4 headlight to LED significantly increases the vehicle's frontal presence for other drivers. The lower power consumption also reduces the load on the bike's typically smaller charging system, freeing up watts for other accessories. The compact size of many LED bulbs is a big advantage in tight motorcycle headlight housings. Crucially, motorcyclists must ensure that any upgrade does not create glare, as they are often at eye level with car drivers.
9.5. Classic and Vintage Cars
Owners of classic cars are drawn to LED upgrades for reliability and safety, wanting to preserve the original look while gaining modern performance. The secret here is to find bulbs that maintain a classic color temperature (closer to warm white than cool blue), if desired, and that fit into often tight original housings without modification. This allows these vehicles to be driven more safely at night without altering their iconic appearance.
10. Maintenance and Care for Long-Lasting H4 LED Performance
Although H4 LED bulbs are notoriously low-maintenance compared to halogens, a few simple practices will ensure they deliver peak performance throughout their long lifespan.
First, handle the bulbs with care during installation and any subsequent handling. Avoid touching the silicone lens over the LED chips with bare fingers, as skin oils can create hot spots and degrade the material over time. If touched, clean gently with isopropyl alcohol. Ensure all electrical connections are secure and protected from moisture. The connector should fit firmly onto the bulb's connector, and any replacement wiring (such as for decoders) should be secured with cable ties away from moving parts or extreme heat sources.
Periodically inspect the bulbs and their surroundings. Check that the heatsink fins are free of accumulated dirt, dust, or debris, as this insulation can cause overheating. A quick blast of compressed air can help. Look at the rubber dust cover to ensure it is still sealing properly, preventing water and contaminants from entering the headlight assembly and potentially corroding the bulb's contacts.
Unlike halogens that dim gradually, LEDs typically maintain consistent output until they fail. However, it's a good idea every six months or so to visually check both headlights at night against a wall to confirm both are working and that the beam pattern remains level and correct. If you notice one light appearing significantly dimmer or changing color (a sign of emitter failure), it's time to replace. Finally, always store spare bulbs or your original halogens in a clean, dry place. By following these simple steps, your H4 LED upgrade will provide years of reliable, bright illumination.
11. Summary of Key Points
Upgrading to H4 LED headlights represents a significant technological leap over traditional halogen bulbs. This conversion centers on replacing the dual-filament H4 bulb with a unit that uses light-emitting diodes, offering dramatically improved light output, a whiter color temperature, and vastly longer lifespan. The main advantages are compelling: you gain enhanced nighttime visibility and safety, reduced power consumption on the vehicle's electrical system, and the convenience of not having to replace bulbs every year or two.
However, this upgrade is not a simple guarantee of plug-and-play success. Critical technical factors must be considered, such as lumens (actual brightness), Kelvin (light color), and the all-important thermal management system—passive heat sinks are generally more reliable than noisy fans. The biggest challenge is optical compatibility; a bulb must be installed with its LED chips perfectly horizontal to produce a legal and safe beam pattern in a halogen housing, and even then, road legality can be a gray area depending on local type-approval regulations.
Choosing the right kit involves matching the physical size of the bulb to your vehicle's headlight cavity, ensuring it is CANBUS compatible to avoid flickering, and selecting a reputable brand known for quality components. Installation requires patience to ensure proper orientation and fit, often involving minor modifications like extension rings. Applications are broad, benefiting daily drivers, long-distance travelers, off-road enthusiasts, motorcyclists, and classic car owners. With minimal maintenance—mainly keeping the assembly clean and connections secure—a well-chosen H4 LED light kit can transform your nighttime driving experience for many years.
12. Frequently Asked Questions (FAQ)
12.1. Are H4 LED bulbs legal for road use?
This is the most complex question. Technically, in most regions (including UK/EU and USA), replacing a halogen bulb with an LED bulb in a housing not specifically approved for LEDs is not compliant with vehicle lighting regulations. Legality often depends on passing a beam pattern test. While a high-quality, properly oriented LED can pass the pattern check, it may still be considered non-compliant by an inspector. For guaranteed legality, you must replace the entire headlight assembly with an ECE R128 or SAE/DOT approved unit.
12.2. Why are my new H4 LED bulbs flickering?
Flickering is almost always a CANBUS or PWM (Pulse Width Modulation) issue. Your vehicle's computer checks the bulbs by sending a small pulse of current. The low power draw of an LED makes it appear burned out. You need “CANBUS-ready” bulbs with built-in error cancellation, or you may need to install external decoders or capacitors to simulate the electrical load of a halogen.
12.3. Can I simply plug H4 LED bulbs into my old halogen sockets?
Physically, yes – the base is identical. However, for reliable operation, you must consider three things: 1) Physical fit (the driver may be too large), 2) Correct rotational orientation of the bulb for the beam pattern, and 3) Whether your vehicle requires CANBUS-compatible bulbs to avoid error messages. It is rarely just a simple plug-in operation.
12.4. Do H4 LED bulbs get hot?
The LED chips themselves produce very little radiant heat compared to a halogen filament. However, the driver and heat sink on the back of the bulb get quite hot as they work to dissipate heat generated at the semiconductor junction. That is why a proper heat sink and airflow are critical for longevity.
12.5. How long do H4 LED headlight bulbs actually last?
While many are rated for 30,000 to 50,000 hours, real-world lifespan in a vehicle depends heavily on thermal management, electrical stability, and build quality. A well-designed bulb in a suitable application can easily last 5 to 10 years of normal use, far exceeding the typical 500 to 1,000-hour lifespan of a halogen bulb.
12.6. Por que há um ponto escuro ou padrão estranho no meu feixe de farol agora?
Este é um sinal claro de orientação incorreta da lâmpada. O design do seu refletor ou cuba do projetor é projetado para luz emanando da posição específica de um filamento halógeno. Se os chips de LED não estiverem alinhados exatamente onde o filamento estava, a luz será espalhada incorretamente. Remova a lâmpada e gire-a 90 graus, depois teste o padrão em uma parede até que esteja correto.
12.7. Lâmpadas com ventilador ou dissipador de calor são melhores?
Os designs de dissipador de calor passivo são geralmente considerados mais confiáveis a longo prazo porque não têm partes móveis que possam falhar. Os ventiladores podem ficar entupidos com sujeira ou falhar, levando ao superaquecimento. No entanto, LEDs de potência muito alta às vezes requerem resfriamento ativo. Para a maioria das aplicações, um dissipador de calor passivo bem projetado é preferível.