
1. Introducción: Iluminando el camino con luces LED H4
Conducir de noche o en condiciones climáticas adversas exige una iluminación clara y fiable. Durante décadas, el resplandor amarillento de las bombillas halógenas fue el estándar, pero presentaba limitaciones significativas en brillo, eficiencia y vida útil. Hoy en día, una mejora transformadora está al alcance de millones de propietarios de vehículos: la luz LED H4. This technology represents a direct and powerful replacement for the ubiquitous H4 halogen bulb, offering a quantum leap in performance. Upgrading to LED is not just about changing a bulb; it is about fundamentally improving safety, visibility, and vehicle aesthetics. This article will guide you through everything you need to know about H4 LED lights, from their technical fundamentals and undeniable advantages to selecting the perfect kit and installing it with confidence, ensuring you can truly light the way.
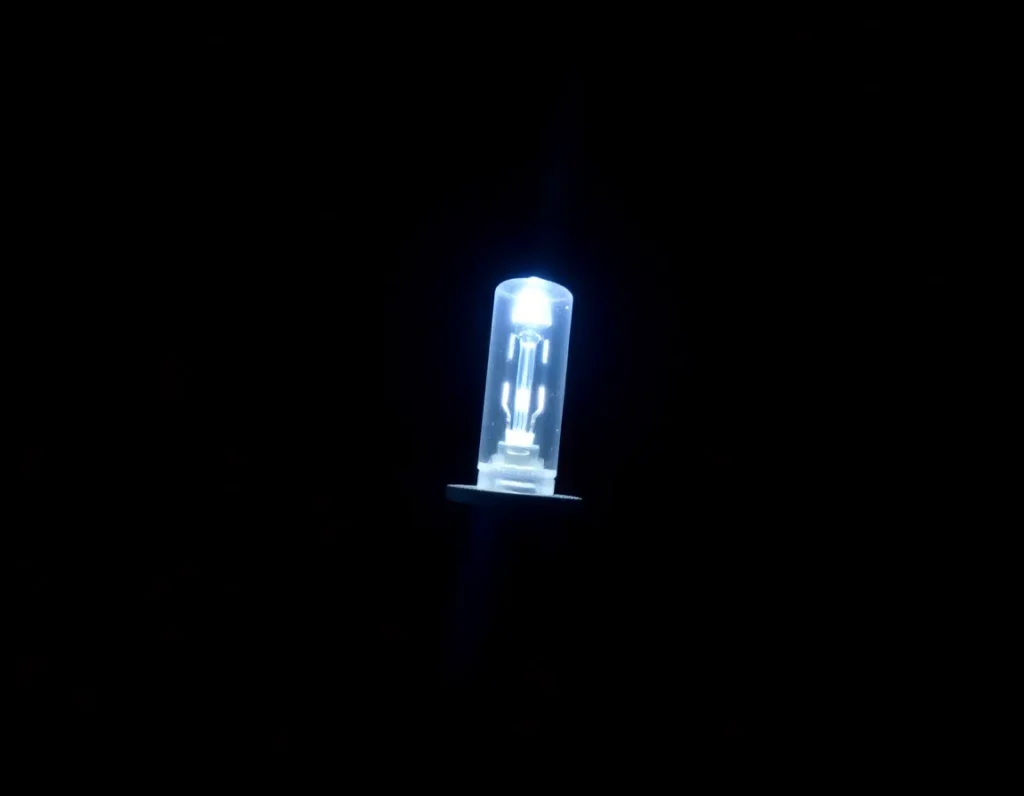
2. What is an H4 LED light? A technical and historical overview
To understand the H4 LED, one must first understand the H4 standard itself. The designation “H4” refers to a specific type of bulb socket or base, established as an international standard. Historically, an H4 bulb is a dual-filament halogen unit, commonly used in vehicles for a combined headlight function: one filament for low beam and another, often higher wattage, for high beam. This single bulb, through clever design and a reflector/lens system, provides both lighting modes from the same housing.
The traditional halogen H4 works by passing an electric current through a tungsten filament enclosed in a glass capsule filled with halogen gas. The filament heats to incandescence, producing light. This process is inherently inefficient, as around 90% of the energy is wasted as heat. The advent of light-emitting diode (LED) technology presented a new paradigm. LEDs produce light through electroluminescence: the phenomenon of a material emitting light when an electric current passes through it. This process is much more efficient, cooler, and more durable.
Un luz LED H4 is, therefore, a direct replacement bulb designed to physically and electrically substitute a standard H4 halogen bulb. However, instead of a fragile filament, it uses an array of high-power LED chips mounted on a circuit board, along with a sophisticated driver (or ballast) that regulates voltage and current. Crucially, to replicate the dual-beam function, H4 LED bulbs employ a clever mechanical solution or, more commonly, an electronic one. Many designs feature an internal movable shield or a second set of LEDs that activate with the voltage change when the driver switches from low beam to high beam. This allows the LED unit to project the distinctive beam patterns required for safe road illumination, matching the optical focal point of the original halogen bulb to function correctly with the vehicle's headlight housing.
3. The main advantages: Why upgrade from halogen to H4 LED bulbs
La decisión de actualizar está impulsada por un conjunto convincente de ventajas que impactan directamente en la seguridad de conducción y la experiencia de propiedad.
3.1. Brillo y visibilidad superiores
This is the most notable benefit. H4 LED bulbs produce significantly higher light output (measured in lumens) than their halogen counterparts. They emit a crisp white light that closely resembles natural daylight. This color temperature, typically between 5000K and 6000K, reduces eye strain and dramatically improves contrast, making it easier to distinguish objects, road markings, and potential hazards at greater distances. The road is not just illuminated; it is illuminated with clarity.
3.2. Eficiencia energética mejorada
LEDs are champions of efficiency. A typical halogen H4 bulb may consume 55-60 watts per filament. A high-performance H4 LED kit providing much more light often consumes only 20-40 watts in total. This reduces the load on your vehicle's electrical system and alternator, which can contribute to small fuel savings and less strain on the battery, especially in older vehicles or when using multiple accessories.
3.3. Longevidad excepcional
While the lifespan of a halogen bulb is measured in hundreds of hours (often around 500-1,000), a quality H4 LED bulb is rated for tens of thousands of hours, typically 30,000 to 50,000 hours or more. This essentially translates to a “fit and forget” improvement for the life of the vehicle for most drivers, eliminating the frequent replacement cycle associated with halogens.
3.4. Mayor durabilidad y fiabilidad
Without a fragile glass envelope or delicate filament, LED bulbs are much more resistant to vibration and shock. This makes them ideal for rough roads, off-road driving, and motorcycles. Their solid-state construction is less susceptible to failure from physical impacts that would instantly destroy a halogen bulb.
3.5. Encendido instantáneo y rendimiento estable
Los LED alcanzan su brillo máximo al instante, sin tiempo de calentamiento. Esto proporciona una iluminación completa inmediata al encender las luces. Además, su rendimiento es constante independientemente de la temperatura externa o las fluctuaciones de voltaje dentro de su rango de funcionamiento, a diferencia de las halógenas que se atenúan cuando baja el voltaje de la batería.
4. Especificaciones y características clave a entender antes de comprar
Not all H4 LED kits are the same. Understanding these key specifications will help you distinguish quality products from inferior ones.
- Lúmenes vs. vatios: Focus on lumens (lm), the measure of total visible light output, not watts (W), which measure power consumption. Look for kits with high, realistic lumen ratings (e.g., 4000 lm per bulb or more for a real upgrade). Beware of exaggerated claims.
- Temperatura de color: Measured in Kelvin (K). 4300K-5000K offers warm white light, 5500K-6000K is pure bright white (the most popular), and 6500K+ tends toward a cooler, bluish tone. For optimal visibility and legal compliance, 5000K-6000K is recommended.
- Tipo y número de chips: Los propios chips LED son críticos. Busque marcas de renombre como CREE, OSRAM o Philips Lumileds. Más chips no siempre significan mejor luz si son de baja calidad; una matriz bien diseñada con menos chips de alta calidad a menudo supera a una matriz abarrotada de chips baratos.
- Diseño del disipador de calor: LEDs are efficient but still generate heat at the chip level. Effective cooling is paramount for longevity. Look for large, finned aluminum heat sinks, and increasingly, fan-assisted (active) systems. A good heat sink should feel warm, not hot, during operation.
- Driver/CANBUS compatibility: The driver is the brain of the LED bulb. A high-quality, waterproof driver ensures stable current and prevents flickering. For modern vehicles with computer-controlled electrical systems (CANBUS), you may need “CANBUS-ready” or “error-free” bulbs with built-in resistors or decoders to avoid dashboard warning lights.
- Certificación del patrón de haz: Esto es crucial para la legalidad y la seguridad. Los mejores kits están diseñados para imitar la posición exacta del filamento de una bombilla halógena (a menudo denominada “colocación de filamento 1:1”) y se prueban para producir un patrón de haz conforme (como ECE o SAE) que no disperse la luz y no deslumbre al tráfico que viene en sentido contrario.
5. How to choose the best H4 LED kit: Buyer's guide
Armed with knowledge of key features, follow this practical guide to select the right kit for your vehicle and needs.
5.1. Check your bulb type
First, confirm that your vehicle uses H4 bulbs. Consult the owner's manual, check the existing bulb, or use an online vehicle bulb lookup tool. Don't assume; an incorrect fit won't work.
5.2. Prioritize beam pattern and legal compliance
This is the most important safety and legal factor. Look for kits that explicitly state they are designed for a proper beam pattern. Look for phrases like “ECE R10 approved”, “SAE/DOT compliant”, or “projector ready”. Read reviews that include photos of the beam cutoff on a wall. A kit with a perfect beam pattern is worth more than one with slightly higher lumens but poor pattern control.
5.3. Evaluate your vehicle's headlight housing
Is your headlight housing a reflector (bowl-shaped) or projector (has a lens)? Reflector housings are more sensitive to bulb design. Many modern H4 LED kits are optimized for projectors, but there are also good ones for reflectors. Some kits may be too large to fit inside your headlight dust cap: check product dimensions and vehicle-specific fit notes.
5.4. Consider the cooling method
Passive systems (heat sink only) are silent and generally reliable. Active systems (with fan) are excellent for compact spaces and intense heat dissipation, but introduce a moving part that could potentially fail over a very long period. Both are valid; choose based on your space constraints and preference.
5.5. Verify plug-and-play compatibility
Ensure the kit is truly plug-and-play. It should connect directly to the factory H4 wiring harness without splicing wires. Check if you need a CANBUS decoder (often included or built-in for modern cars).
5.6. Brand reputation and warranty
Invest in a reputable brand known for quality and customer support. A solid warranty (2 years or more) is a good indicator of the manufacturer's confidence in their product. Avoid unknown brands with incredible specs and very low prices.
6. Installation guide: step-by-step process and common challenges
The installation of H4 LED bulbs is generally straightforward, but it requires care and attention to detail.
6.1. Tools and preparation
You will need: your new H4 LED kit, gloves (to avoid touching the bulb's heat sink with skin oils), and possibly basic tools such as a screwdriver or a socket wrench set. Park on a level surface, turn off the engine, and disconnect the negative terminal of your car's battery for absolute safety.
6.2. Step-by-step installation
- Access the headlight assembly: Open the hood and locate the back of the headlight you are replacing. You may need to remove a dust cap, which usually unscrews or unclips.
- Remove the old bulb: Disconnect the wiring connector from the back of the halogen bulb. Release the spring clip or metal retaining wire that holds the bulb in place. Carefully remove the old halogen bulb without shaking it (if it breaks, carefully extract all glass fragments).
- Prepare the new LED bulb: Without touching the LED chips or the heat sink with your fingers, unpack the new bulb. If it has a separate driver, connect the bulb to the driver first. Do not fully assemble everything until you test the fit of the bulb in the housing.
- Test the fit and orientation: This is a critical step. Insert the LED bulb into the headlight socket, mimicking the position of the old halogen base. The LED array has a specific orientation (usually with the chips facing left and right, not up and down) to create the correct beam pattern. Many bulbs have a notch or tab to ensure proper alignment. Secure it with the original spring clip.
- Manage the driver and wiring: Once the bulb is seated and secured, you need to find a safe, dry place to mount the driver box. Use cable ties (often provided) to secure it away from moving parts, heat sources, and moisture. Route the wires neatly to avoid pinching. Connect the driver to the vehicle's factory H4 connector.
- Reassemble and test: If everything fits without forcing, replace the dust cap. It may be necessary to cut a small notch for the wires to pass through; some kits include a rubber grommet for this. Reconnect the car battery. Turn on the headlights and test both low and high beams. Check the beam pattern against a wall or garage door on level ground to ensure a sharp cutoff line.
6.3. Common challenges and solutions
- The bulb doesn't fit / the dust cap won't close: This is the most common problem. The driver or heat sink may be too large. Solutions include using an extension ring (sometimes included), carefully modifying the dust cap, or in some cases, choosing a more compact bulb model.
- Flickering or hyper-flashing: This usually indicates a CANBUS error or an incompatible driver. Make sure you use CANBUS-compatible bulbs for your vehicle. Some kits include additional decoders or allow you to switch the driver to a specific mode.
- One side doesn't work: Double-check that all connections are fully seated. Ensure the polarity is correct; although H4 is generally not polarity-sensitive, some LED drivers are. Try swapping the left and right bulbs to isolate whether the problem is in the bulb or the vehicle's wiring.
- Poor beam pattern / glare: This is almost always due to incorrect bulb orientation. Remove the bulb and rotate it 90 or 180 degrees, then re-secure it. The LED chips should be aligned horizontally in the housing.
7. Legal and safety considerations: beam patterns, MOT, and roadworthiness
Upgrading to a luz LED H4 is not just about performance; it is a modification that carries significant legal and safety responsibilities. The main concern for road use is ensuring that your headlights produce a correct and safe beam pattern that does not dazzle other drivers. Halogen housings are designed to reflect and focus light from a small cylindrical filament at a specific location. LED bulbs, with their differently shaped and positioned emitters, can scatter light incorrectly if they do not perfectly match the housing, creating dangerous glare and dark spots. That is why proper installation and bulb orientation, as discussed, are non-negotiable for road safety.
Legally, standards vary by region, but they are generally strict. In the UK and many European countries, vehicles must pass an ITV (MOT) test, which includes a check of headlight alignment and pattern. The official stance is that any headlight unit not type-approved for use with LED bulbs is technically illegal if such bulbs are installed, regardless of beam quality. While a well-aligned and correctly installed LED kit in a halogen housing may pass the beam pattern test on ITV equipment, the inspector can still fail the vehicle for non-compliance with type approval (ECE R37 for halogen, ECE R128 for LED). The risk of failure is real, and insurance companies may consider non-compliant lights as a modification that invalidates a policy in the event of an accident.
In the United States, regulations are based on Federal Motor Vehicle Safety Standard (FMVSS) 108, which effectively requires any replacement bulb to be of the same type as originally installed. This makes most LED conversions in halogen housings non-compliant at the federal level, although enforcement is usually a state-level issue. The key takeaway is universal: for guaranteed and worry-free road legality, the only definitive solution is to replace the entire headlight assembly with a type-approved unit designed from the ground up for LED technology. For off-road or show use, these restrictions do not apply, but responsible users should always disable non-compliant lights when on public roads.
8. Common H4 LED Troubleshooting
Even with careful selection and installation, you may encounter issues with your H4 LED conversion. Here is a systematic guide to diagnosing and resolving the most common problems.
8.1. The bulb doesn't fit or the dust cap won't close
This is the most frequent physical challenge. The integrated driver or large heat sink on the back of the bulb may protrude too far into the engine compartment, preventing the rubber dust cap from sealing. First, check if your kit included plastic extension rings. These widen the cap opening. If not, you can sometimes carefully trim the inside of the dust cap (avoid cutting the sealing lip). As a last resort, a small, breathable but waterproof cap can be sourced to replace the original. Selecting a bulb model known for a compact, low-profile driver is the best preventive measure.
8.2. Flickering, hyper-flashing, or error messages
Modern vehicles use a CANBUS system to monitor bulb health by detecting small electrical loads. LEDs consume significantly less power than halogens, which the car's computer interprets as a “blown bulb,” causing flickering or dashboard warnings. The solution is to use “CANBUS-compatible” bulbs, which have built-in load resistors or smart drivers that simulate the electrical signature of a halogen. If flickering persists, you may need to add an external decoder or capacitor kit. For hyper-flashing turn signals, ensure the bulbs are CANBUS-compatible specifically for turn signals.
8.3. One side doesn't work or lights flicker intermittently
If one H4 LED fails, first swap the bulbs from left to right. If the problem moves, the bulb or its driver is defective. If the problem remains on the same side, the issue is in the vehicle's wiring, socket, or ground connection. Ensure the plug is fully seated: some OEM connectors can be tight. Also, although the H4 base itself is not polarized, some LED drivers are. Try rotating the plug 180 degrees in the bulb connector. Check for corrosion or bent pins in the vehicle's headlight socket.
8.4. Poor beam pattern, excessive glare, or dark spots
As emphasized, this is almost exclusively an installation error. The LED chips must be aligned horizontally (side-to-side) when installed in the housing. If the beam pattern is cut off incorrectly or projects light upward, the bulb is likely rotated 90 degrees. Remove the clip or retaining ring, rotate the bulb, and reseat it. Check the pattern on a wall at night to confirm. If the pattern remains poor with perfect orientation, the specific bulb model may simply be optically incompatible with your vehicle's reflector or lens design.
8.5. Overheating or reduced lifespan
Although LEDs run cooler than halogens at the emitter, the driver and heat sink can get quite hot. Permanent damage occurs if heat is not dissipated. Ensure the heat sink has enough free air space around it and is not resting against wires or plastic. Never install LEDs in sealed housings not designed for them, as trapped heat will drastically shorten their life. If a bulb fails prematurely, overheating is a likely culprit.
9. Main Applications: From Daily Drivers to Off-Road and Motorcycles
The versatility of the H4 socket makes LED upgrades beneficial across a wide range of vehicles, each with slightly different priorities.
9.1. Daily Driver Cars
For the average driver, the main motivation is increased safety and reduced stress. The whiter, brighter light of an luz LED H4 improves contrast, making road edges, debris, and pedestrians more visible in low-light and rainy conditions. The instant-on capability and longer lifespan also mean greater reliability and fewer annoying, frequent bulb changes. For this application, prioritize bulbs with a clean, proven beam pattern to avoid glare to oncoming traffic and ensure a smooth, wide light distribution in low beam.
9.2. Conducción de larga distancia por autopista y nocturna
Aquellos que conducen con frecuencia por autopistas sin iluminación por la noche se benefician enormemente del mayor alcance de proyección de un haz de carretera LED de alta calidad. Un buen kit proporcionará un punto caliente potente y enfocado que ilumina las señales de tráfico y los peligros potenciales a cientos de metros de distancia, reduciendo la fatiga del conductor. Busque bombillas con una salida de lúmenes alta y legítima y un diseño optimizado para la distancia. La combinación de una luz de cruce ancha y una luz de carretera penetrante crea un paquete de seguridad ideal para viajes.
9.3. Off-road and adventure vehicles
En aplicaciones todoterreno, donde los patrones de haz legales a menudo son secundarios a la salida bruta, las conversiones H4 LED cambian las reglas del juego. Proporcionan una luz masiva para navegar por senderos, campamentos y áreas de trabajo. La construcción robusta de las buenas bombillas LED (sin filamentos frágiles) resiste mejor las vibraciones y los golpes del terreno accidentado. Para estos usuarios, los lúmenes máximos, una construcción duradera y, a veces, incluso bombillas con un modo dedicado “solo todoterreno” que activa simultáneamente los elementos de luz de cruce y carretera son atracciones clave.
9.4. Motorcycles
Para los motociclistas, ser vistos es tan importante como ver. Actualizar el a menudo débil halógeno H4 de una motocicleta a LED aumenta significativamente la presencia frontal del vehículo para otros conductores. El menor consumo de energía también reduce la carga en el sistema de carga típicamente más pequeño de la moto, liberando vatios para otros accesorios. El tamaño compacto de muchas bombillas LED es una gran ventaja en los estrechos alojamientos de los faros de las motocicletas. Fundamentalmente, los motociclistas deben asegurarse de que cualquier actualización no cree deslumbramiento cegador, ya que a menudo están a la altura de los ojos de los conductores de automóviles.
9.5. Coches clásicos y antiguos
Los propietarios de coches clásicos se sienten atraídos por las actualizaciones LED por su fiabilidad y seguridad, queriendo preservar el aspecto original mientras obtienen un rendimiento moderno. La clave aquí es encontrar bombillas que mantengan una temperatura de color clásica (más cercana al blanco cálido que al azul frío) si se desea, y que encajen dentro de los alojamientos originales a menudo estrechos sin modificación. Esto permite que estos vehículos se conduzcan de manera más segura por la noche sin alterar su apariencia icónica.
10. Mantenimiento y cuidado para un rendimiento duradero de los LED H4
Aunque las bombillas LED H4 son famosas por requerir poco mantenimiento en comparación con las halógenas, algunas prácticas simples asegurarán que ofrezcan un rendimiento máximo durante toda su larga vida útil.
Primero, manipule las bombillas con cuidado durante la instalación y cualquier manejo posterior. Evite tocar la lente de silicona sobre los chips LED con los dedos desnudos, ya que los aceites de la piel pueden crear puntos calientes y degradar el material con el tiempo. Si lo toca, límpielo suavemente con alcohol isopropílico. Asegúrese de que todas las conexiones eléctricas estén apretadas y protegidas de la humedad. El enchufe debe encajar firmemente en el conector de la bombilla, y cualquier cableado adicional (como para decodificadores) debe asegurarse con bridas lejos de piezas móviles o fuentes de calor extremo.
Inspeccione periódicamente las bombillas y su entorno. Compruebe que las aletas del disipador de calor estén libres de suciedad, polvo o residuos acumulados, ya que este aislamiento puede causar sobrecalentamiento. Una ráfaga rápida de aire comprimido puede ayudar. Mire la tapa antipolvo de goma para asegurarse de que todavía esté sellada correctamente, evitando que el agua y los contaminantes entren en el conjunto del faro y potencialmente corroan los contactos de la bombilla.
A diferencia de las halógenas que se atenúan gradualmente, los LED generalmente mantienen una salida constante hasta que fallan. Sin embargo, es una buena idea cada seis meses más o menos verificar visualmente ambos faros por la noche contra una pared para confirmar que ambos funcionan y que el patrón de haz permanece nivelado y correcto. Si nota que una luz parece significativamente más tenue o cambia de color (una señal de falla del emisor), es hora de reemplazarla. Finalmente, siempre guarde las bombillas de repuesto o sus halógenas originales en un lugar limpio y seco. Siguiendo estos simples pasos, su actualización H4 LED proporcionará años de iluminación brillante y confiable.
11. Summary of Key Points
Upgrading to H4 LED headlights represents a significant technological leap over traditional halogen bulbs. This conversion focuses on replacing the dual-filament H4 bulb with a unit that uses light-emitting diodes, offering dramatically improved light output, a whiter color temperature, and a much longer lifespan. The main advantages are compelling: you get enhanced nighttime visibility and safety, reduced power consumption on your vehicle's electrical system, and the convenience of not having to replace bulbs every year or two.
However, this upgrade is not a simple plug-and-play guarantee. Critical technical factors must be considered, such as lumens (actual brightness), Kelvin (light color), and the thermal management system is of utmost importance: passive heat sinks are generally more reliable than noisy fans. The biggest challenge is optical compatibility; a bulb must be installed with its LED chips perfectly horizontal to produce a legal and safe beam pattern in a halogen housing, and even then, road legality can be a gray area depending on local type-approval regulations.
Choosing the right kit involves matching the physical size of the bulb to your vehicle's headlight cavity, ensuring it is CANBUS compatible to avoid flickering, and selecting a reputable brand known for quality components. Installation requires patience to ensure proper orientation and fit, often involving minor modifications like extension rings. Applications are broad, benefiting daily drivers, long-distance travelers, off-road enthusiasts, motorcyclists, and classic car owners alike. With minimal maintenance (mainly keeping the assembly clean and connections secure), a well-chosen H4 LED light kit can transform your nighttime driving experience for many years.
12. Frequently Asked Questions (FAQ)
12.1. Are H4 LED bulbs legal for road use?
This is the most complex question. Technically, in most regions (including UK/EU and USA), replacing a halogen bulb with an LED bulb in a housing not specifically approved for LED does not comply with vehicle lighting regulations. Legality often depends on passing a beam pattern test. While a high-quality, correctly oriented LED bulb can pass the pattern check, it may still be considered non-compliant by an inspector. For guaranteed legality, you must replace the entire headlight assembly with an ECE R128 or SAE/DOT approved LED assembly.
12.2. Why do my new H4 LED bulbs flicker?
Flickering is almost always a CANBUS or PWM (Pulse Width Modulation) issue. Your vehicle's computer checks the bulbs by sending a small pulse of current. The low power draw of an LED makes it appear burned out. You need “CANBUS-ready” bulbs with built-in error cancellation, or you may need to install external decoders or capacitors to simulate the electrical load of a halogen.
12.3. Can I just plug H4 LED bulbs into my old halogen sockets?
Physically, yes: the base is identical. However, for reliable operation, you must consider three things: 1) Physical fit (the driver may be too large), 2) Correct rotational orientation of the bulb for the beam pattern, and 3) Whether your vehicle requires CANBUS-compatible bulbs to avoid error messages. It is rarely a simple plug-and-play operation.
12.4. Do H4 LED bulbs get hot?
The LED chips themselves produce very little radiant heat compared to a halogen filament. However, the driver and heat sink on the back of the bulb get quite hot as they work to dissipate heat generated at the semiconductor junction. That's why good heat dissipation and airflow are critical for longevity.
12.5. How long do H4 LED headlight bulbs actually last?
Although many are rated for 30,000 to 50,000 hours, real-world lifespan in a vehicle depends heavily on thermal management, electrical stability, and build quality. A well-designed bulb in a suitable application can easily last 5 to 10 years of normal use, far exceeding the typical 500 to 1,000-hour lifespan of a halogen bulb.
12.6. ¿Por qué ahora hay un punto oscuro o un patrón extraño en el haz de mi faro?
Esta es una señal clara de orientación incorrecta de la bombilla. El diseño de su reflector o copa de proyector está diseñado para luz que emana de la posición específica de un filamento halógeno. Si los chips LED no están alineados exactamente donde estaba ese filamento, la luz se dispersará incorrectamente. Retire la bombilla y gírela 90 grados, luego vuelva a probar el patrón en una pared hasta que sea correcto.
12.7. ¿Son mejores las bombillas con ventilador o con disipador de calor?
Los diseños de disipador de calor pasivo generalmente se consideran más confiables a largo plazo porque no tienen partes móviles que puedan fallar. Los ventiladores pueden obstruirse con suciedad o fallar, lo que lleva a sobrecalentamiento. Sin embargo, los LED de muy alta potencia a veces requieren enfriamiento activo. Para la mayoría de las aplicaciones, un disipador de calor pasivo bien diseñado es preferible.