
すべてのH4 LEDバルブが同じ性能というわけではありません。無名ブランドの$20バルブと、確立されたメーカーの$100バルブは、箱の中では同じように見えるかもしれませんが、道路上ではその違いは歴然としています。.
50,000件以上の実際の顧客設置データを分析し、自動車用照明エンジニアに相談した結果、高品質なH4 LEDバルブと安価な模造品を分ける要素を正確に特定しました。このガイドでは、すべての重要な仕様を説明し、マーケティングのトリックを明らかにし、情報に基づいた購入決定を行うための枠組みを提供します。.
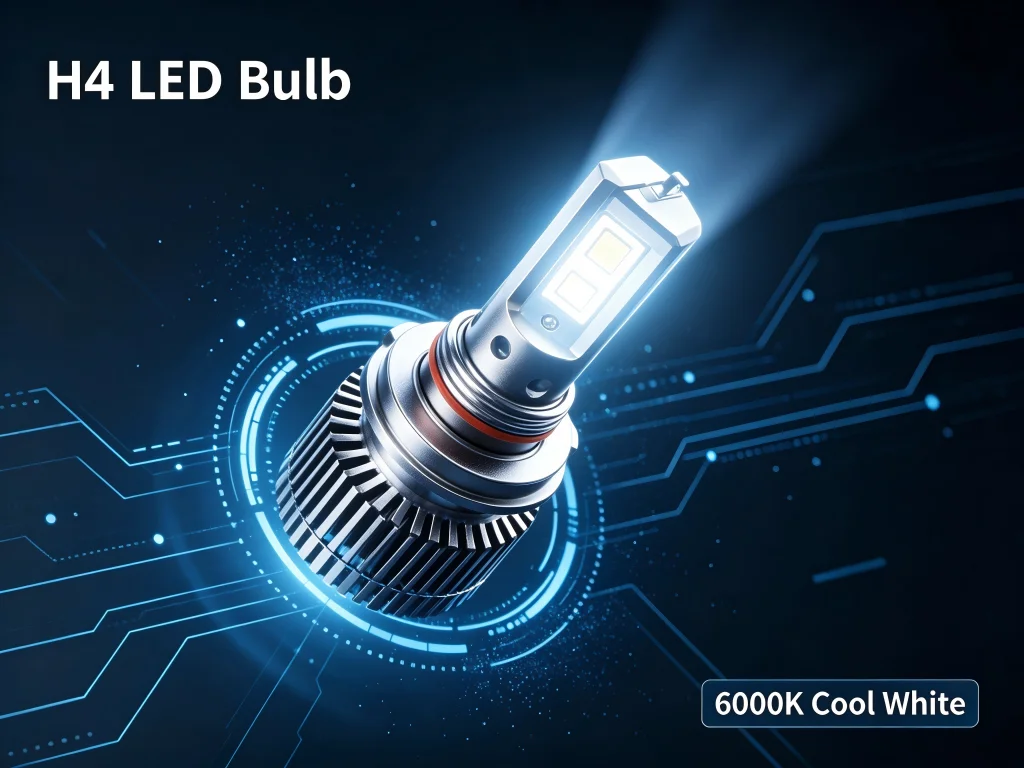
1. H4プラットフォームの理解:他のバルブサイズとの違い
H4バルブはデュアルビームユニットです。1つのバルブにロービームとハイビームの両方の機能が含まれています。これは、H7(シングルロービーム)、H11(シングルロービーム)、または9005(シングルハイビーム)バルブとは根本的に異なります。
デュアルビーム設計は、独自のエンジニアリング上の課題を生み出します。LEDチップは、コンパクトなエンベロープ内で、ロービーム用とハイビーム用の2つのフィラメント位置を再現する必要があります。ハウジングのリフレクターまたはプロジェクター光学系は、両方のビームで機能する必要があります。チップの配置を誤ると、ロービームとハイビームの両方でビームパターンを失います。.
これが、H4 LEDバルブがシングルビームバルブよりも設計が難しい理由です。そして、これがほとんどの安価なH4 LEDバルブの性能が低い理由です。.
2. 重要要素#1:LEDチップの位置とビームパターンの再現
ヘッドライトハウジングの光学系(リフレクターかプロジェクターかに関わらず)は、ハロゲンフィラメントの正確な位置を基準に設計されています。フィラメントは細く、線状の光源です。光学系はその光を特定のビームパターンに整形します。
LEDチップは平らで指向性があります。フィラメントがあった場所に正確に配置されないと、ビームパターンが崩れます。光が散乱し、グレアが増加し、道路上の有効な光が減少します。.
確認すべき点: Premium H4 LED bulbs feature a 1:1 filament replication design. The LED chips are precisely positioned where the halogen filament was, in both low beam and high beam positions. Some manufacturers advertise '1:1 halogen size' but miss the critical chip placement. Ask the question: does this bulb replicate the filament position, or just the overall size?
One forum member perfectly summarizes this challenge: 'Modern high-quality H4 replacement LED systems use emitters that are very close in size, shape, and position to the original filament.'.
3. Key Factor #2: LED Chip Quality and Type
The LED chip is the heart of the bulb. Not all chips are created equal.
Philips ZES (Luxeon Z ES): The gold standard for beam precision. Each chip is 1.6mm x 2.0mm, closely matching the width of a halogen filament. Low failure rate, excellent color consistency at 6000K. Brightness per watt is moderate, but the beam pattern is extremely sharp.
CSP (Chip Scale Package): Higher brightness per watt than ZES, more compact, and lower manufacturing cost. Newer generation CSP chips have significantly narrowed the beam quality gap.
確認すべき点: Established brands disclose their chip suppliers. Premium CSP chips from Philips, Osram, and Seoul Semiconductor indicate quality. Generic 'automotive grade' chips with undisclosed brands are a red flag.
4. Key Factor #3: Thermal Management and Cooling System
LEDs generate significant heat. If that heat is not dissipated, the chips degrade. Brightness decreases, color shifts. Eventually, the bulb fails.
The cooling system is the most common point of failure in H4 LED bulbs. Cheap bulbs use small heat sinks or noisy, low-quality fans that fail within months.
There are two approaches to cooling:
| Cooling Type | Advantages | Disadvantages | 最適な用途 |
|---|---|---|---|
| Active Cooling (Fan-based) | Can handle higher output. Allows for more compact designs. | 可動部品が故障する可能性がある。ファンの騒音。ほこりの侵入リスク。 | 高ルーメンのバルブ。スペースが限られた車両。 |
| パッシブ冷却(ファンレス) | 可動部品がない。静音動作。信頼性が高い。 | より大きなヒートシンクが必要。対応可能な電力が限られる。 | 日常的なドライバー。静粛性と信頼性を重視するライダー。 |
確認すべき点: 銅製ヒートシンク(アルミニウムではなく、銅は熱を60%良く放散します)。評判の良いメーカーの高品質なファン。実験室だけでなく、実際の使用条件でテストされた熱管理。
あるフォーラムメンバーは、「大型の銅製ヒートシンク、高速静音ファン(誰もブーンという音のするヘッドライトは望みません)、または高度なパッシブ冷却設計」に注目すべきだと述べています。.
5. 重要要素#4:CANBUS互換性と電気システム統合
現代の車両は、バルブの機能を監視するためにコンピューターシステムを使用しています。55Wのハロゲンを20WのLEDに交換すると、コンピューターは消費電力の低下を検出し、バルブが切れたと想定します。これにより、ダッシュボードの警告、ちらつき、または完全な電力遮断が発生します。.
これに対処する方法は3つあります:
- 内蔵CANBUSデコーダー。. バルブにはハロゲン抵抗を模倣する集積回路が組み込まれています。最もクリーンな解決策です。外部コンポーネントは不要です。.
- 外部CANBUSアダプター。. 車両ハーネスとバルブの間に接続する別モジュールです。複雑さが増しますが機能します。.
- Resistor pack. A crude solution that generates heat to add resistance. Inefficient and can pose a fire hazard. Avoid it.
確認すべき点: A valve with built-in CANBUS compatibility. If the manufacturer states 'error-free' or 'flicker-free' and specifies CANBUS compatibility, that's a good sign. If there's no mention of CANBUS, assume an external adapter will be needed.
6. Key Factor #5: Mounting Design and Adjustability
H4 LED bulbs typically use a two-piece design with a mounting collar and the bulb body. The collar is installed first and secured with the factory spring clip. Then the bulb slides into the collar and twists to lock.
Some bulbs, like the Morimoto 2Stroke, are designed compact enough to be installed as one piece. Others require a two-piece process.
確認すべき点: Adjustable mounts that allow you to rotate the bulb after installation to fine-tune the chip orientation. Not all housings are identical. Being able to adjust the chip alignment (left/right, 3 and 9 o'clock) is crucial for a proper beam pattern.
The mounting collar needs three tabs that match the orientation of the original halogen bulb. If the collar doesn't fit, you'll struggle with installation and are more likely to misalign the orientation.
7. Key Factor #6: Real Brightness vs. Advertised Lumens
Lumen ratings in the LED bulb market are almost entirely unreliable. Manufacturers advertise raw emitter lumens (what the chip produces under ideal lab conditions), not what reaches the road.
A bulb advertised as 50,000 lumens may only deliver 2,000-4,000 usable lumens after optical losses. The housing, reflector condition, lens clarity, and the bulb's beam pattern all affect how much light actually reaches the road.
確認すべき点: Ignore the lumen count. Look for real-world beam pattern photos or videos. Look for reviews from users with the same vehicle as yours. Look for manufacturers that disclose both raw and effective lumens. That's a sign of honesty.
As an experienced forum member explained: 'The lumen rating of LEDs is most often a raw number related to what the emitter can do... These numbers don't translate to usable light output because not all light from the emitter goes to a usable place.'.
8. Key Factor #7: Color Temperature and Visibility
H4 LED bulbs are typically offered in 6000K (cool white) or 6500K (xenon white). This is color temperature, not brightness.
6000K–6500K: Slightly bluish, clear white. Closest to daylight. Excellent visibility and modern vehicle aesthetics. In rain or fog, it can appear harsh.
4300K–5000K: Warm white. Close to halogen color. Good penetration in rain and fog. Less glare for oncoming traffic.
確認すべき点: If you frequently drive in rain or fog, consider a warmer color temperature. If you prioritize maximum visibility in clear weather, 6000K is suitable. Consistent color temperature across both bulbs is a sign of quality—cheap bulbs often show noticeable color differences between left and right.
9. Comparison of premium H4 LED bulb options
| 特徴 | Budget brands ($20–40) | Mid-range ($50–80) | Premium ($80–150) |
|---|---|---|---|
| Chip type | Generic, undisclosed | Well-known brand CSP | Philips ZES or premium CSP |
| Filament reproduction | Approximate or none | 1:1 Design Statement | Verified 1:1 Positioning |
| Cooling | Small aluminum heatsink; noisy fan | Copper heatsink; medium quality fan | Large copper heatsink; high quality silent fan or advanced fanless |
| CANBUS | None or external resistor | Built-in decoder (hit or miss) | Built-in decoder (verified across vehicles) |
| Adjustable orientation | Fixed | Limited adjustment | Full 360-degree adjustment |
| Beam pattern | Scattered, unpredictable | Fair in some housings | Consistent across reflectors and projectors |
| 保証 | 30-90 days | 1年 | 2-5 years |
| Typical lifespan | 6-12 months | 2-3 years | 5+ years |
10. H4 LED Installation: The Right Way vs. the Wrong Way
Even the most expensive H4 LED bulbs won't perform if installed incorrectly. Here's how to do it right:
- Remove the mounting collar from the bulb body before installation. Attempting to install the bulb as one piece often prevents the spring clip from locking.
- Insert and secure the collar into the headlight housing using the factory spring clip.
- Slide the bulb into the installed collar and twist to lock.
- Orient the LED chips horizontally—left and right (3 o’clock and 9 o’clock), not up and down.
- Check beam pattern against a wall before reinstalling dust covers. The cutoff should be sharp and horizontal. If light scatters upward, the orientation is wrong.
- Test both low and high beams before finalizing the installation.
The most common mistake: Installing the bulb with the chips facing up and down. This destroys the beam pattern, increases glare, and reduces usable light on the road.
11. GTR H4 LEDバルブ:性能のために設計され、長持ちするように作られています
At GTR, we don’t compete on price. We compete on engineering integrity. Every GTR H4 LED bulb is designed by automotive lighting engineers who understand the physics of beam pattern, thermal management, and electrical system integration.
Our H4 LED bulbs feature:
- Precision 1:1 filament replication. Our engineering team has measured the exact filament position in dozens of H4 housings. Our chips sit exactly where they should.
- Premium-grade LED chips. We use Philips and top-tier CSP chips with strict binning to ensure consistent color temperature across all bulbs.
- Advanced thermal management. A large copper heatsink paired with a quiet, reliable cooling fan. No buzzing, no premature failure.
- Built-in CANBUS compatibility. No external resistors needed. No dashboard warnings, no flickering. Plug-and-play installation on 99% of vehicles.
- 360-degree adjustable orientation. Fine-tune the chip position for optimal beam focus in your specific vehicle.
- IP68 waterproof rating. Designed to withstand real-world conditions: rain, snow, mud, and high-pressure washing.
Our recommendations are based on actual customer feedback from tens of thousands of orders, not affiliate commissions. We've been selling and supporting LED conversion kits for over 10 years. We know what works and what doesn't.
12. Frequently Asked Questions about H4 LED Bulbs
12.1. Which vehicles use H4 bulbs?
H4 is used in countless vehicles, including Toyota, Mazda, Subaru, Honda, Nissan, and most motorcycles with dual-beam headlights. Check your owner's manual or remove your existing bulb to confirm the H4/9003/HB2 designation.
12.2. Can I install H4 LED bulbs myself?
Yes. Most H4 LED bulbs are plug-and-play and can be installed in 15-30 minutes with basic hand tools. The key is to get the LED chip orientation right and install the mounting collar correctly.
12.3. H4 LEDバルブは対向車のドライバーに眩しさを引き起こしますか?
適切に設計されたバルブは、正しいチップ位置と向きにより過度な眩しさを引き起こしません。設計が不十分なバルブや誤った取り付けが原因です。違いは技術ではなくバルブにあります。.
12.4. H4 LEDバルブはハロゲンからのアップグレードに価値がありますか?
はい、高品質のバルブを選べば価値があります。プレミアムH4 LEDは、ハロゲンよりも2〜4倍の有効な光を提供し、寿命は10倍長く、消費電力も大幅に少なくなります。このアップグレードは夜間運転の安全性を劇的に向上させます。.
12.5. 自分の車両がCANBUS対応バルブを必要とするかどうかはどうやってわかりますか?
2010年以降に製造されたほとんどの車両にはバルブ監視システムが搭載されています。不明な場合は、内蔵CANBUS互換性のあるバルブを選んでください。新しい車両でも古い車両でも動作します。.
12.6. H4、9003、HB2の違いは何ですか?
これらは同じバルブベースとコネクタの異なる名称です。H4は欧州の呼称、9003は米国の呼称、HB2はもう一つの米国規格です。これらは互換性があります。.
12.7. H4 LEDバルブの取り付けにはどのくらい時間がかかりますか?
ほとんどの車両で片側15〜30分です。アクセスが狭い一部の車両では時間がかかる場合があります。取り外し可能なカラーデザインにより、取り付けが大幅に簡素化されます。.
13. 夜間運転の安全のために正しい選択を
あなたは情報に基づいた決定をしたいからこのガイドを読んでいます。6ヶ月で故障するバルブにお金を無駄にしたくない。対向車を眩惑させたくない。夜間運転をより危険にするビームパターンに苦労したくない。
あなたははっきり見たい。見られたい。車両の設計に逆らうのではなく、協調して機能するバルブが欲しい。
GTR H4 LEDバルブはまさにそれを提供します。精密工学。プレミアムコンポーネント。実世界でのテスト。そして、道路前方に有効な光を届けるビームパターン。.
Visit https://www.rhgtr.com H4 LEDバルブのラインナップをご覧ください。仕様を比較してください。レビューを読んでください。そして、安全性を最優先にする選択をしてください。.。